It's time to get the comfort you deserve. Good soap matters. soapisbest.com
Fermented Vegetables
I visited France many years ago, and fell in love with the salads. Celeriac, beets, carrots. 3 simple vegetables made into delicious salads that I lived on while I was there. The process of fermenting vegetables was unknown to me at the time.
Only recently did I discover that the reason my salad de celeri was not the same as the salad I had in France. All of this time, I thought my roulade sauce was not right. The salads I enjoyed so much, and longed for after I left, started with the simple act of fermenting the vegetables before dressing them.
You can ferment any vegetables using the following recipes/instructions as guides. Softer, more delicate vegetables, like baby greens, and vegetable mixes like tomato salsas are ready after 2-3 days.
Sauerkraut can ferment for 9 weeks or longer.
Fermentated vegetable tools
 |
 Once you have all of your tools, making fermented cauliflower is easy.Wash your jars and fermenting tops. Wash and chop your cauliflower. into florets, so the pieces stay together while fermenting. Follow the fermenting process on this page. Look closely to see the purple cauliflower in the brilliant fuscia colored brine. This cauliflower fermented for 2-3 weeks. Once you have all of your tools, making fermented cauliflower is easy.Wash your jars and fermenting tops. Wash and chop your cauliflower. into florets, so the pieces stay together while fermenting. Follow the fermenting process on this page. Look closely to see the purple cauliflower in the brilliant fuscia colored brine. This cauliflower fermented for 2-3 weeks. |
There are a few tools I use for this process. The most important tool you will need to allow for is time. It can take anywhere for 3 days to 9 weeks depending on what vegetables you are preparing. You can always Carefully open a jar and take out a taste to see if it's fermented to your liking.
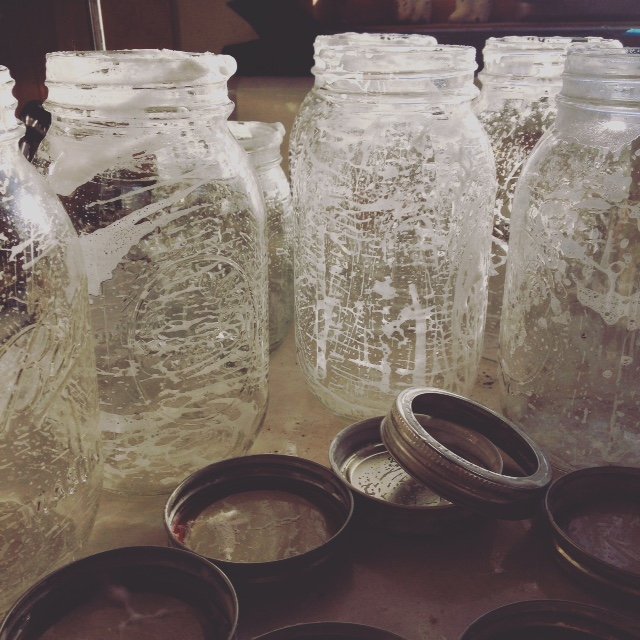 Ithaca Soap suds cleaning canning jars
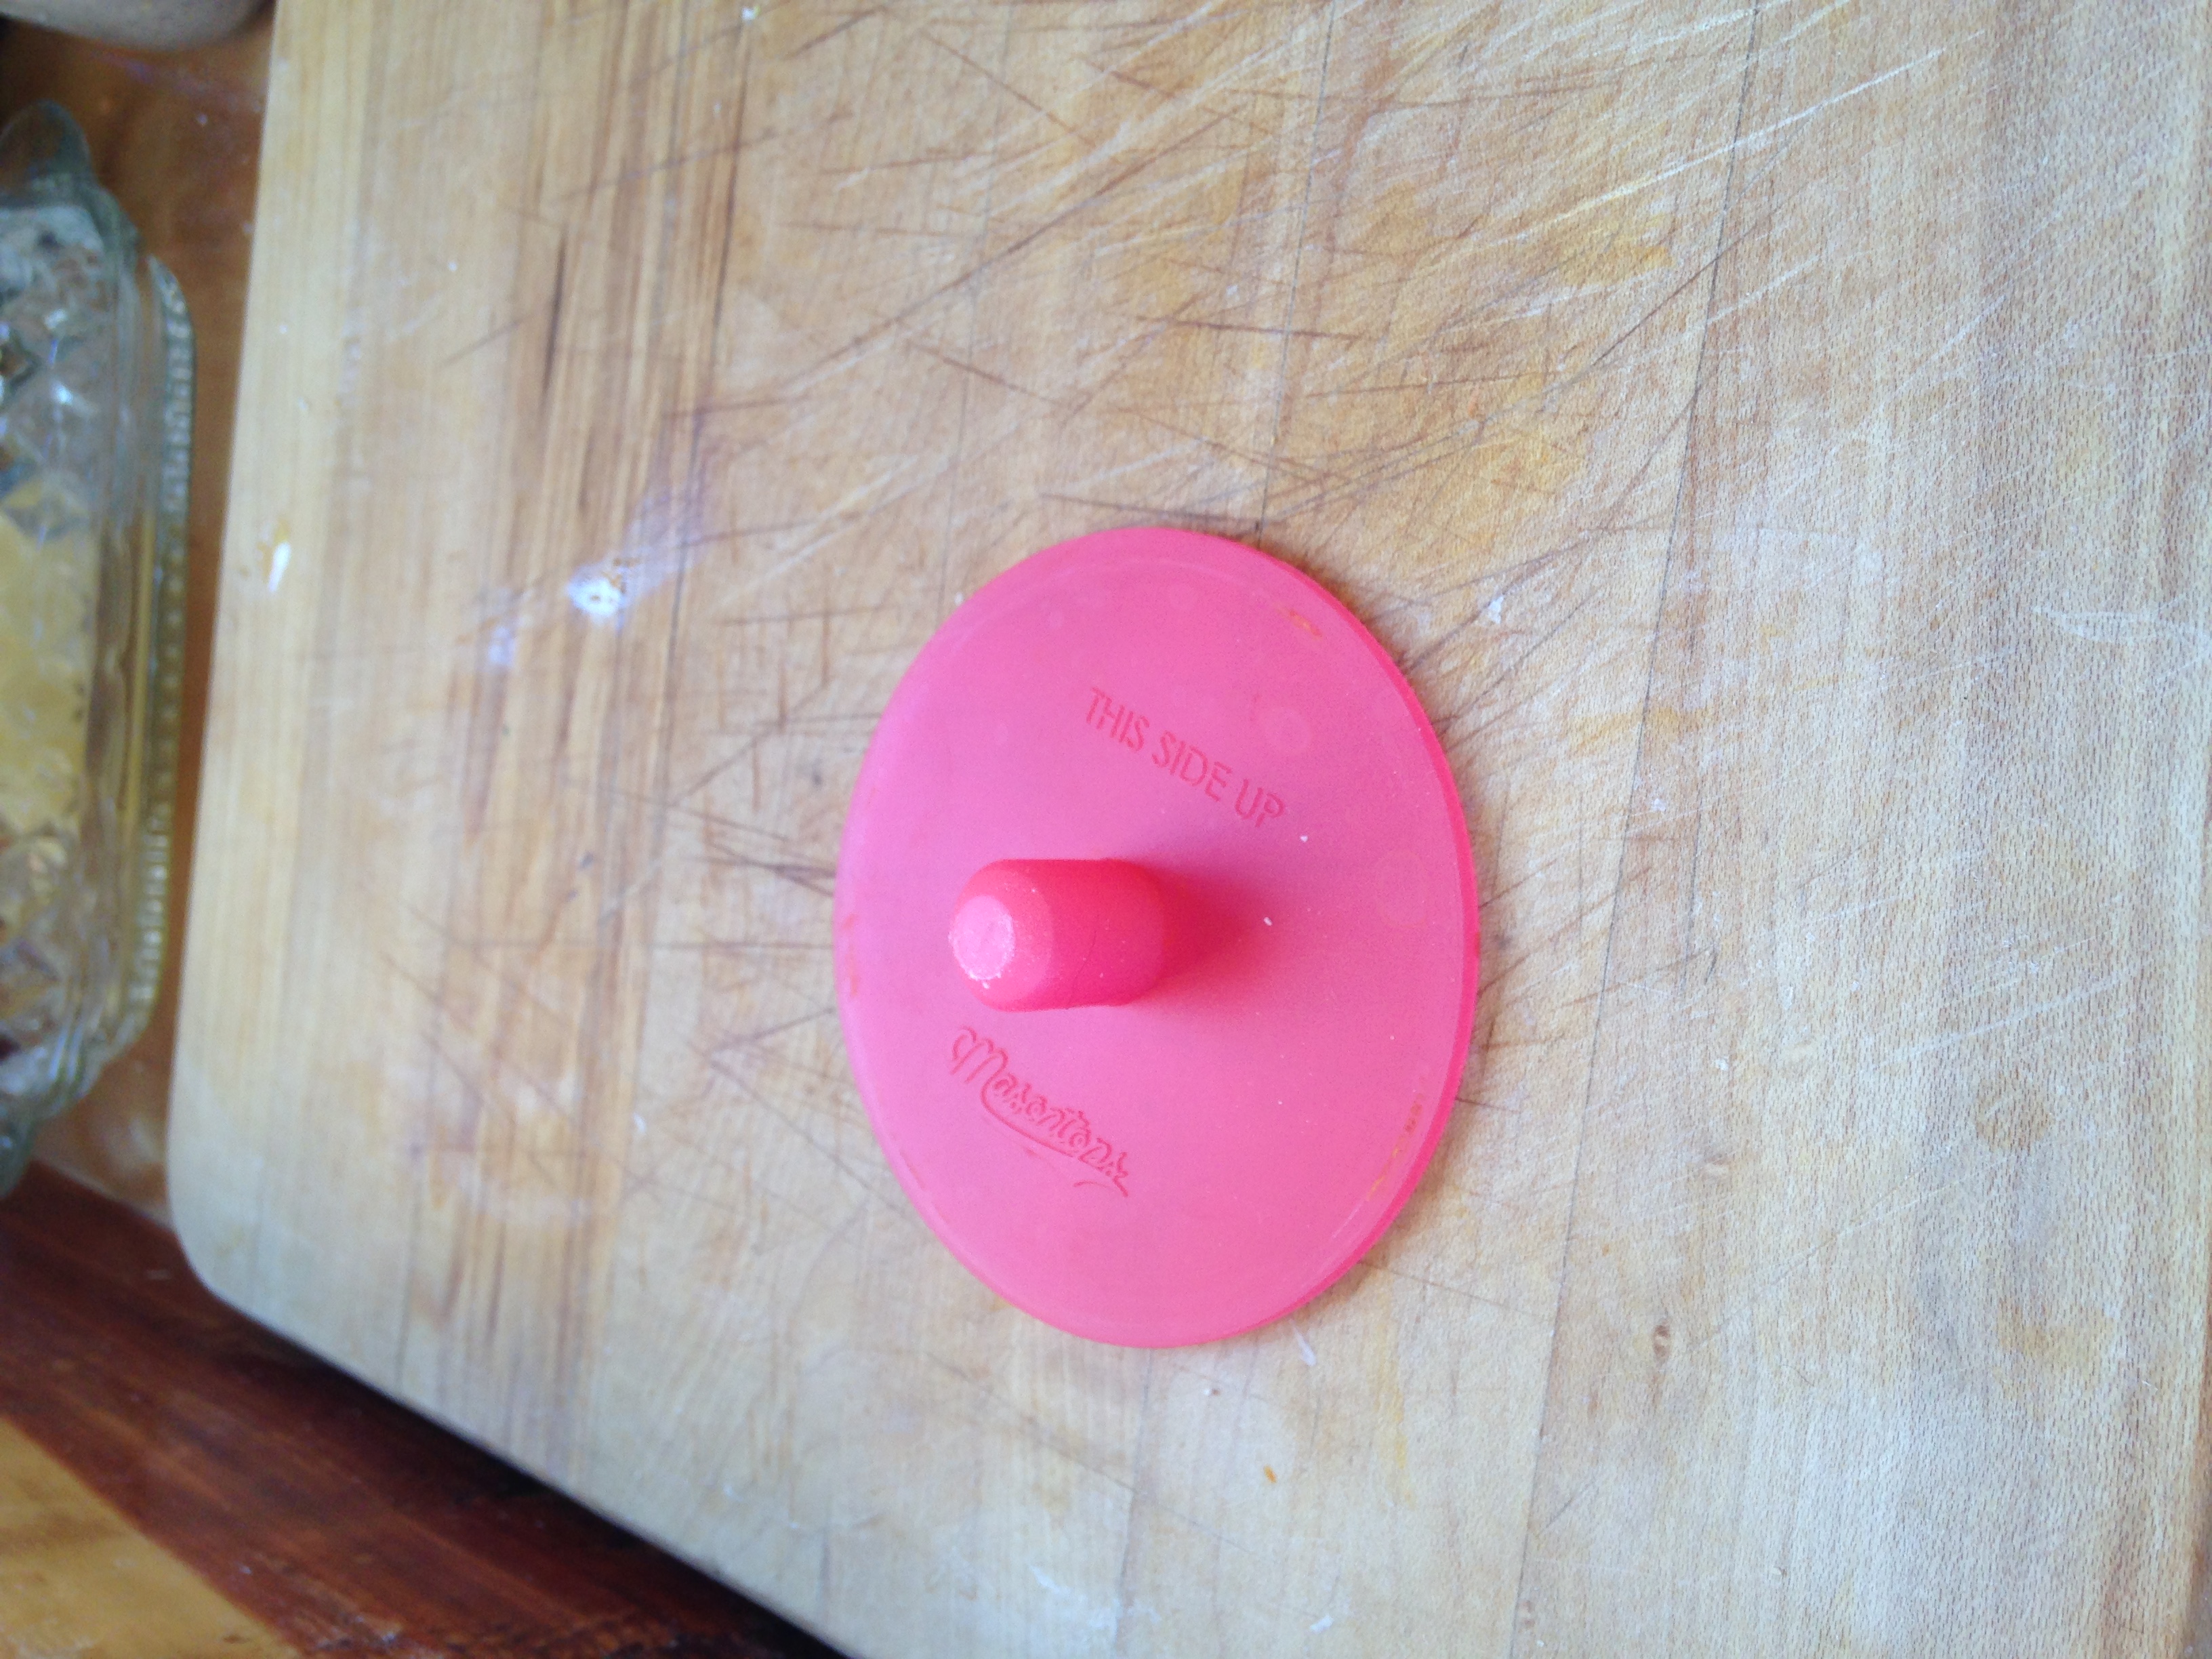 Masontops pickle pipe
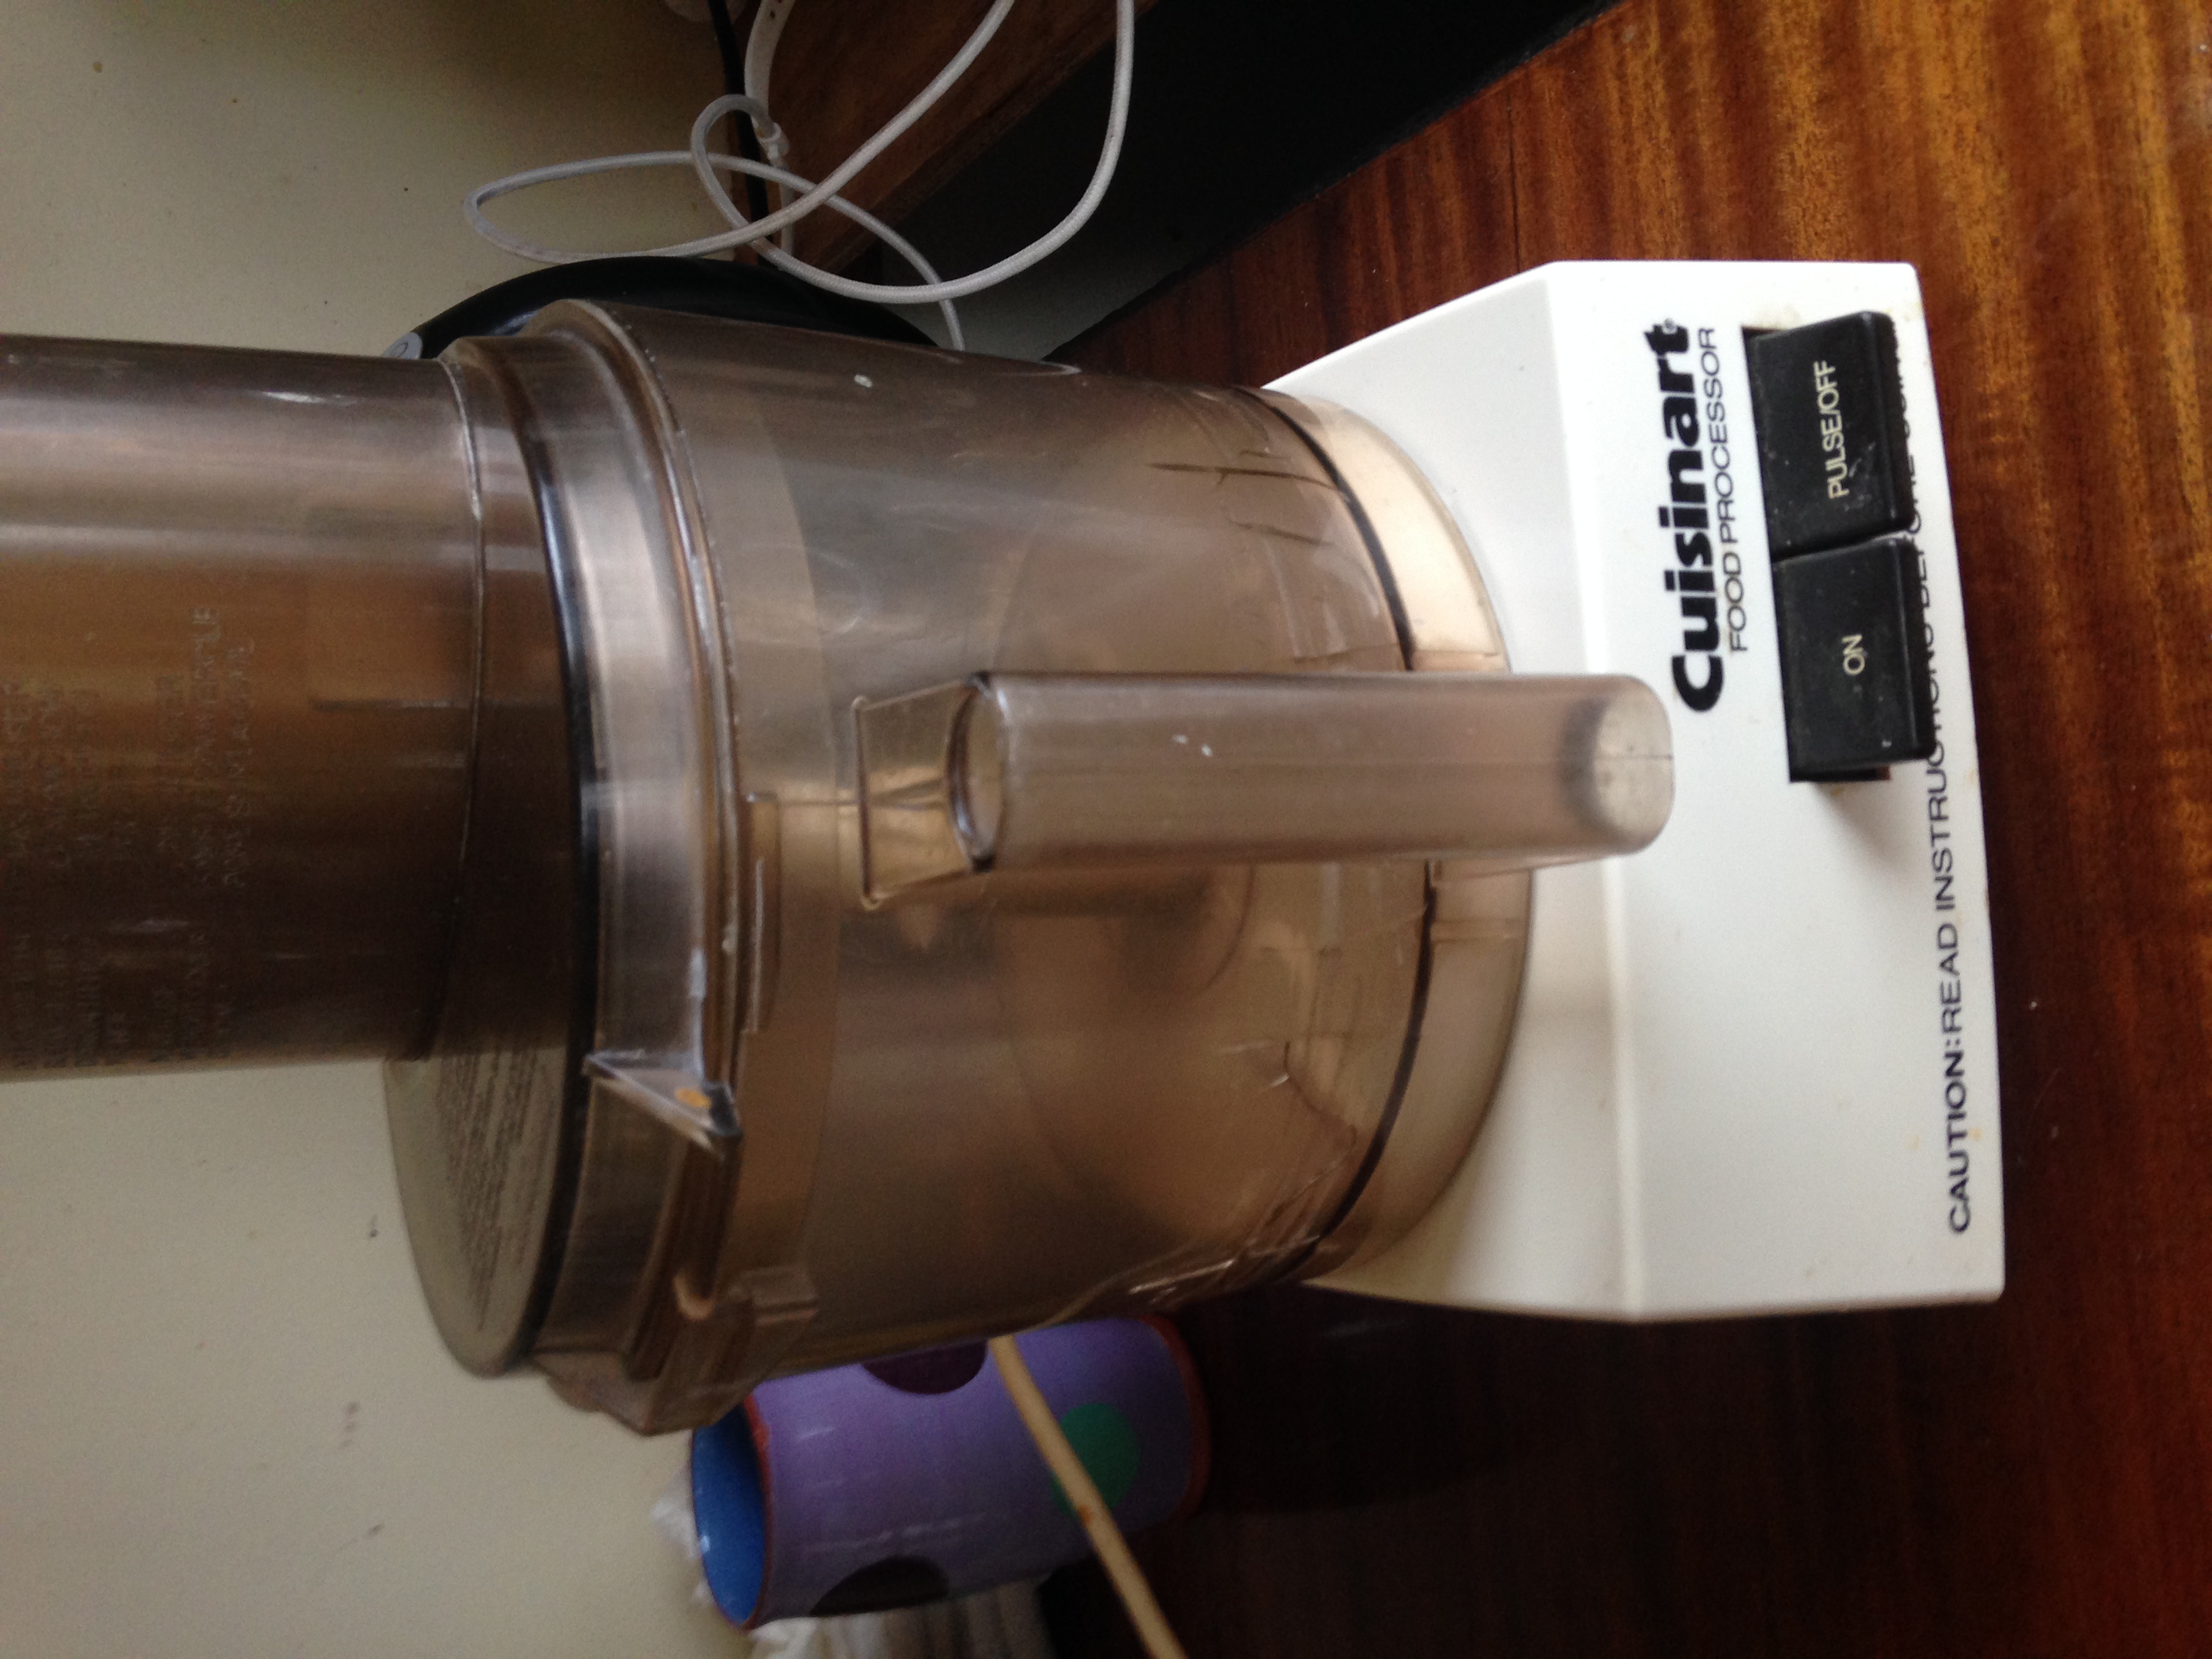 Cuisinart Food Processor
Glass jars or ceramic crocks. I prefer glass canning jars. They are easy to keep clean and you can ferment small batches. I like variety, so small batches are attractive. I also happen to have a fabulous collection of canning jars that I have collected over a lifetime. Plus I like old things, so I have collected some very old canning jars over the years from friends, garage sales, and others people's discarded kitchen items.
Clean lids or pickle pipes. I prefer pickle pipes, so the burping happens all by itself, and I don't have to worry about possible explosions and the nuances of when the optimal burping time is. Pickle pipes operate with the fermenting process all by themselves, burping at the perfect time. Other wise, you can use 2 piece canning lids, which will need to be burped regularly throughout the process. You can also opt to place the band around the lid without tightening it. This will avoid too much pressure building up if you are unable to burp at the perfect time, but it will also increase unwanted bacteria risk.
Grater or food processor. I use both depending on which is better for the project at hand
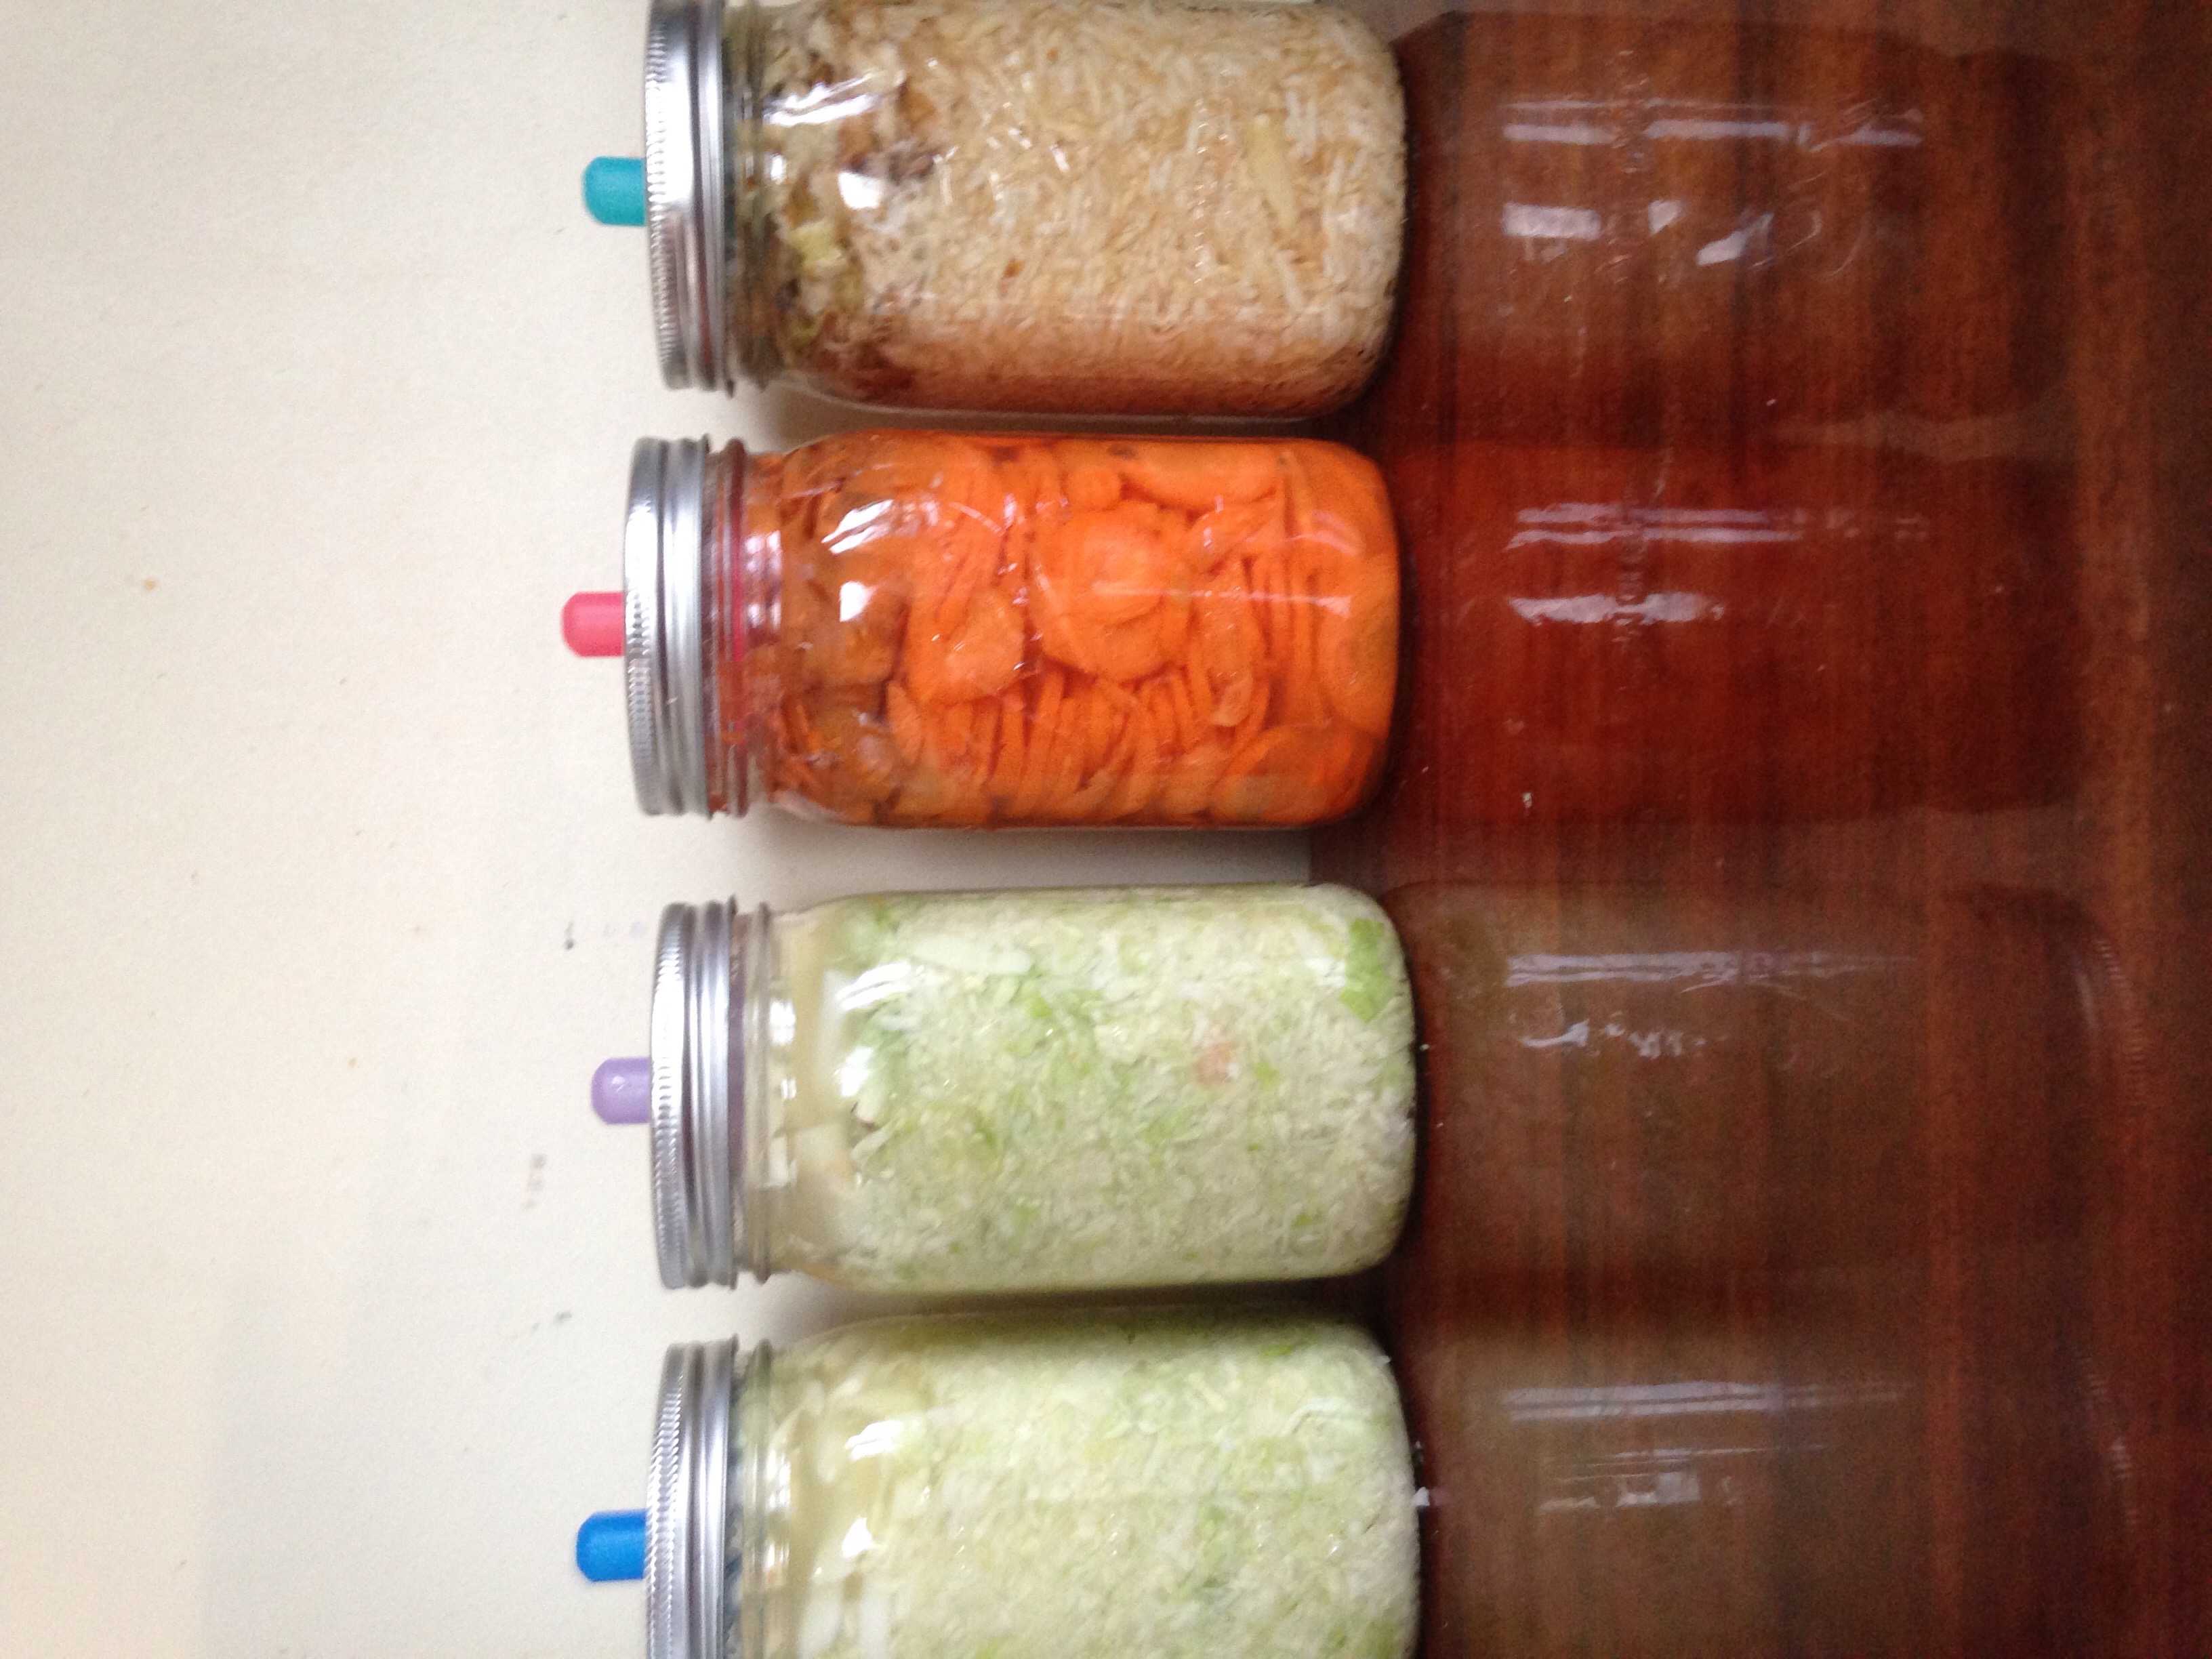 From left to right: cabbage, carrots, celeriac From left to right: cabbage, carrots, celeriac |

Sharp knifes. Hand health is important. Sharp knives reduce hand and wrist stress, thereby reducing the potential for carpal tunnel issues.
Large and small bowls. Glass, ceramic, stainless steel, whatever you have.
Salt. I prefer natural sea salt, Celtic grey salt and pink salt. Large crystal or table salt size.
Soap. Good kitchen soap is very important. Soap kills germs on your hands, jars, vegetables, and tools. Instant Liquid Soap is the best natural Castile soap.
Space. A shelf, away from live plants and your sprout operation. Also away from your sourdough starter. All other bacteria will effect the bacteria you are trying to make inside your jars. Even though the pickle pipes have the advantage of letting air out, but not letting air in, I still keep it on the other side of my kitchen.
Basic Preparation
The basic preparation for fermented vegetables is simple. There are specifics depending on what vegetables are being fermented.
Wash your hands thoroughly with soap and water before beginning any food preservation process. I prefer bar soap for this, preferably the scrubby odor eating Tough Guy that is usually at our kitchen sink.
Wash the vegetables with Instant Liquid Soap refill, a scrubby sponge, and water. I prefer using unscented soap for washing fruits and vegetables. Pay close attention to washing the parts usually discarded, that have nooks and crannies filled with dirt and germs These bits will be used as your weight to keep the vegetables being fermented submerged in their brine.
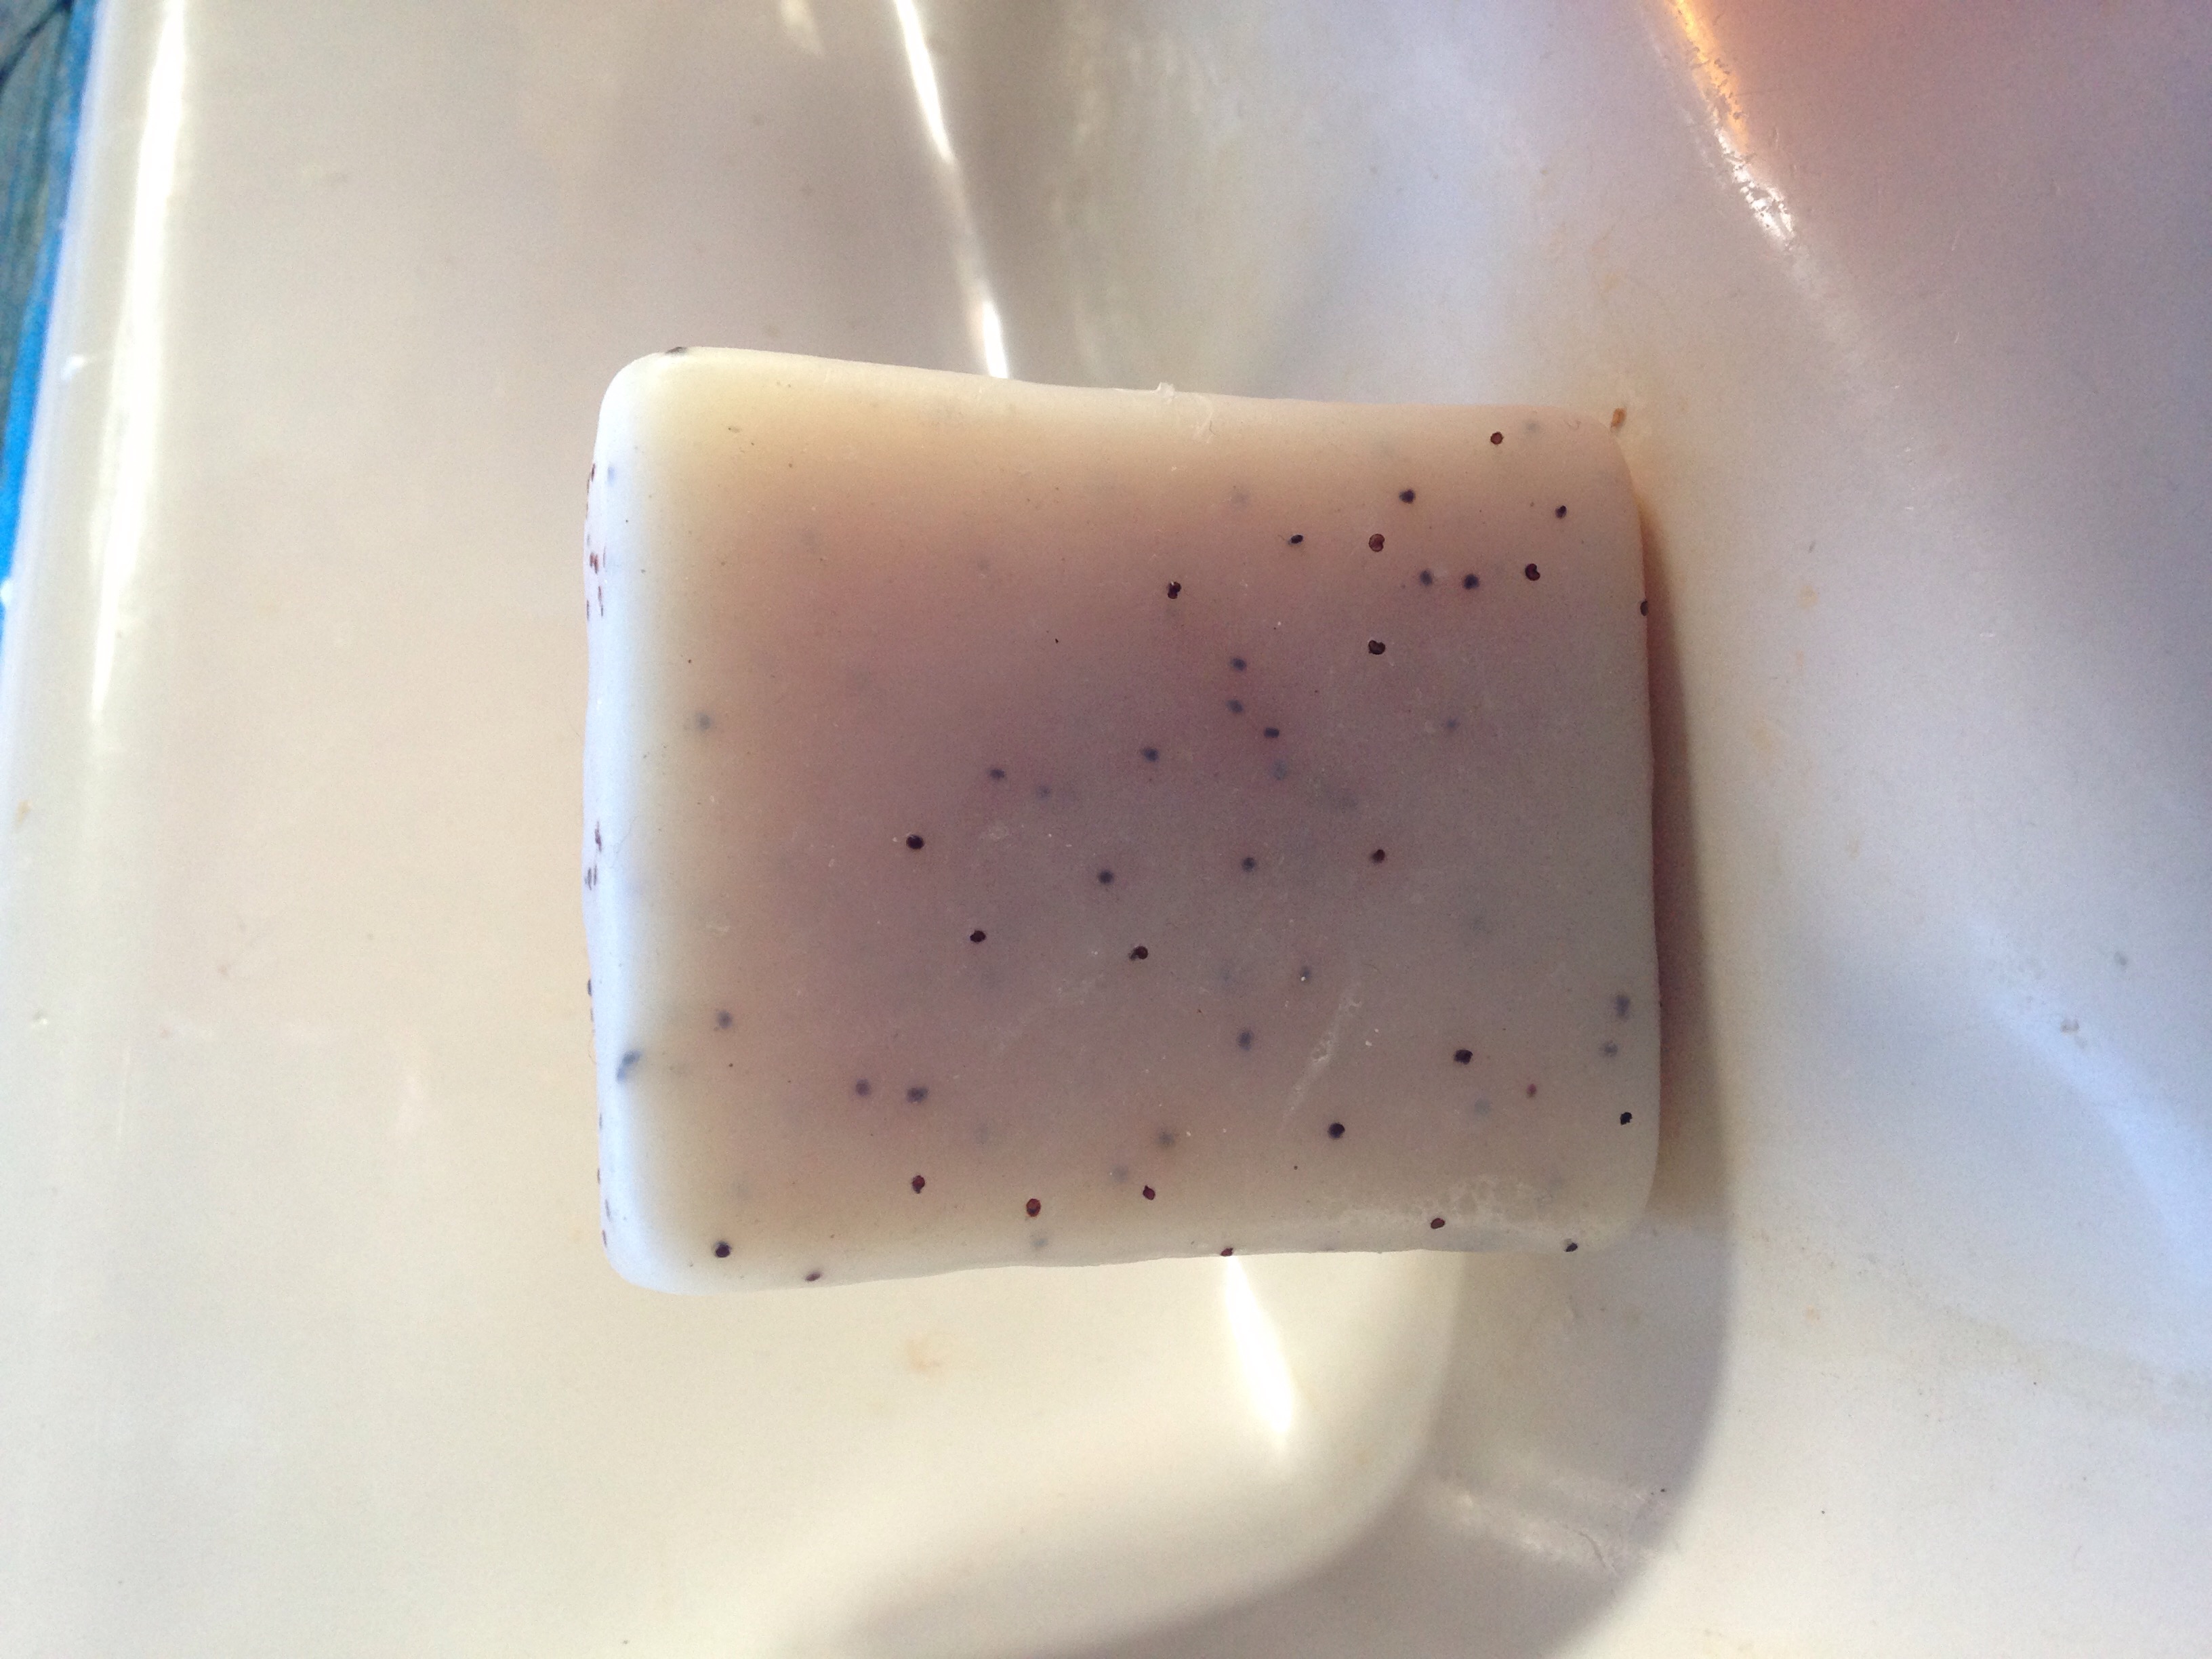 Ithaca Soap's Tough Guy Soap is a scrubby oder eater soap. The exfoliating texture is from steam cleaned pumice and poppy seeds
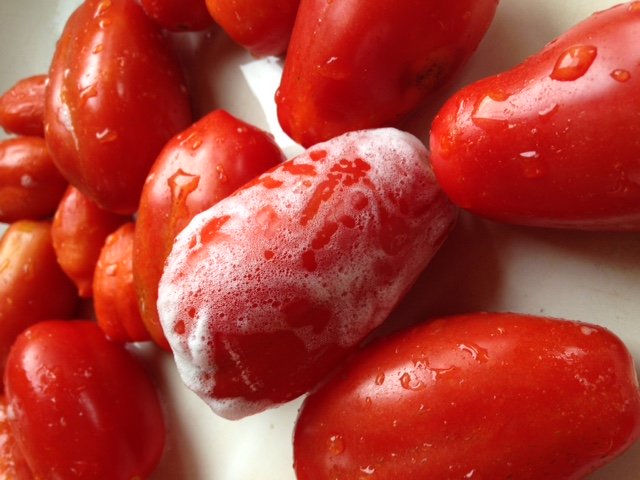 Wash your vegetables thoroughly to remove all bacteria that will disrupt your fermenting process
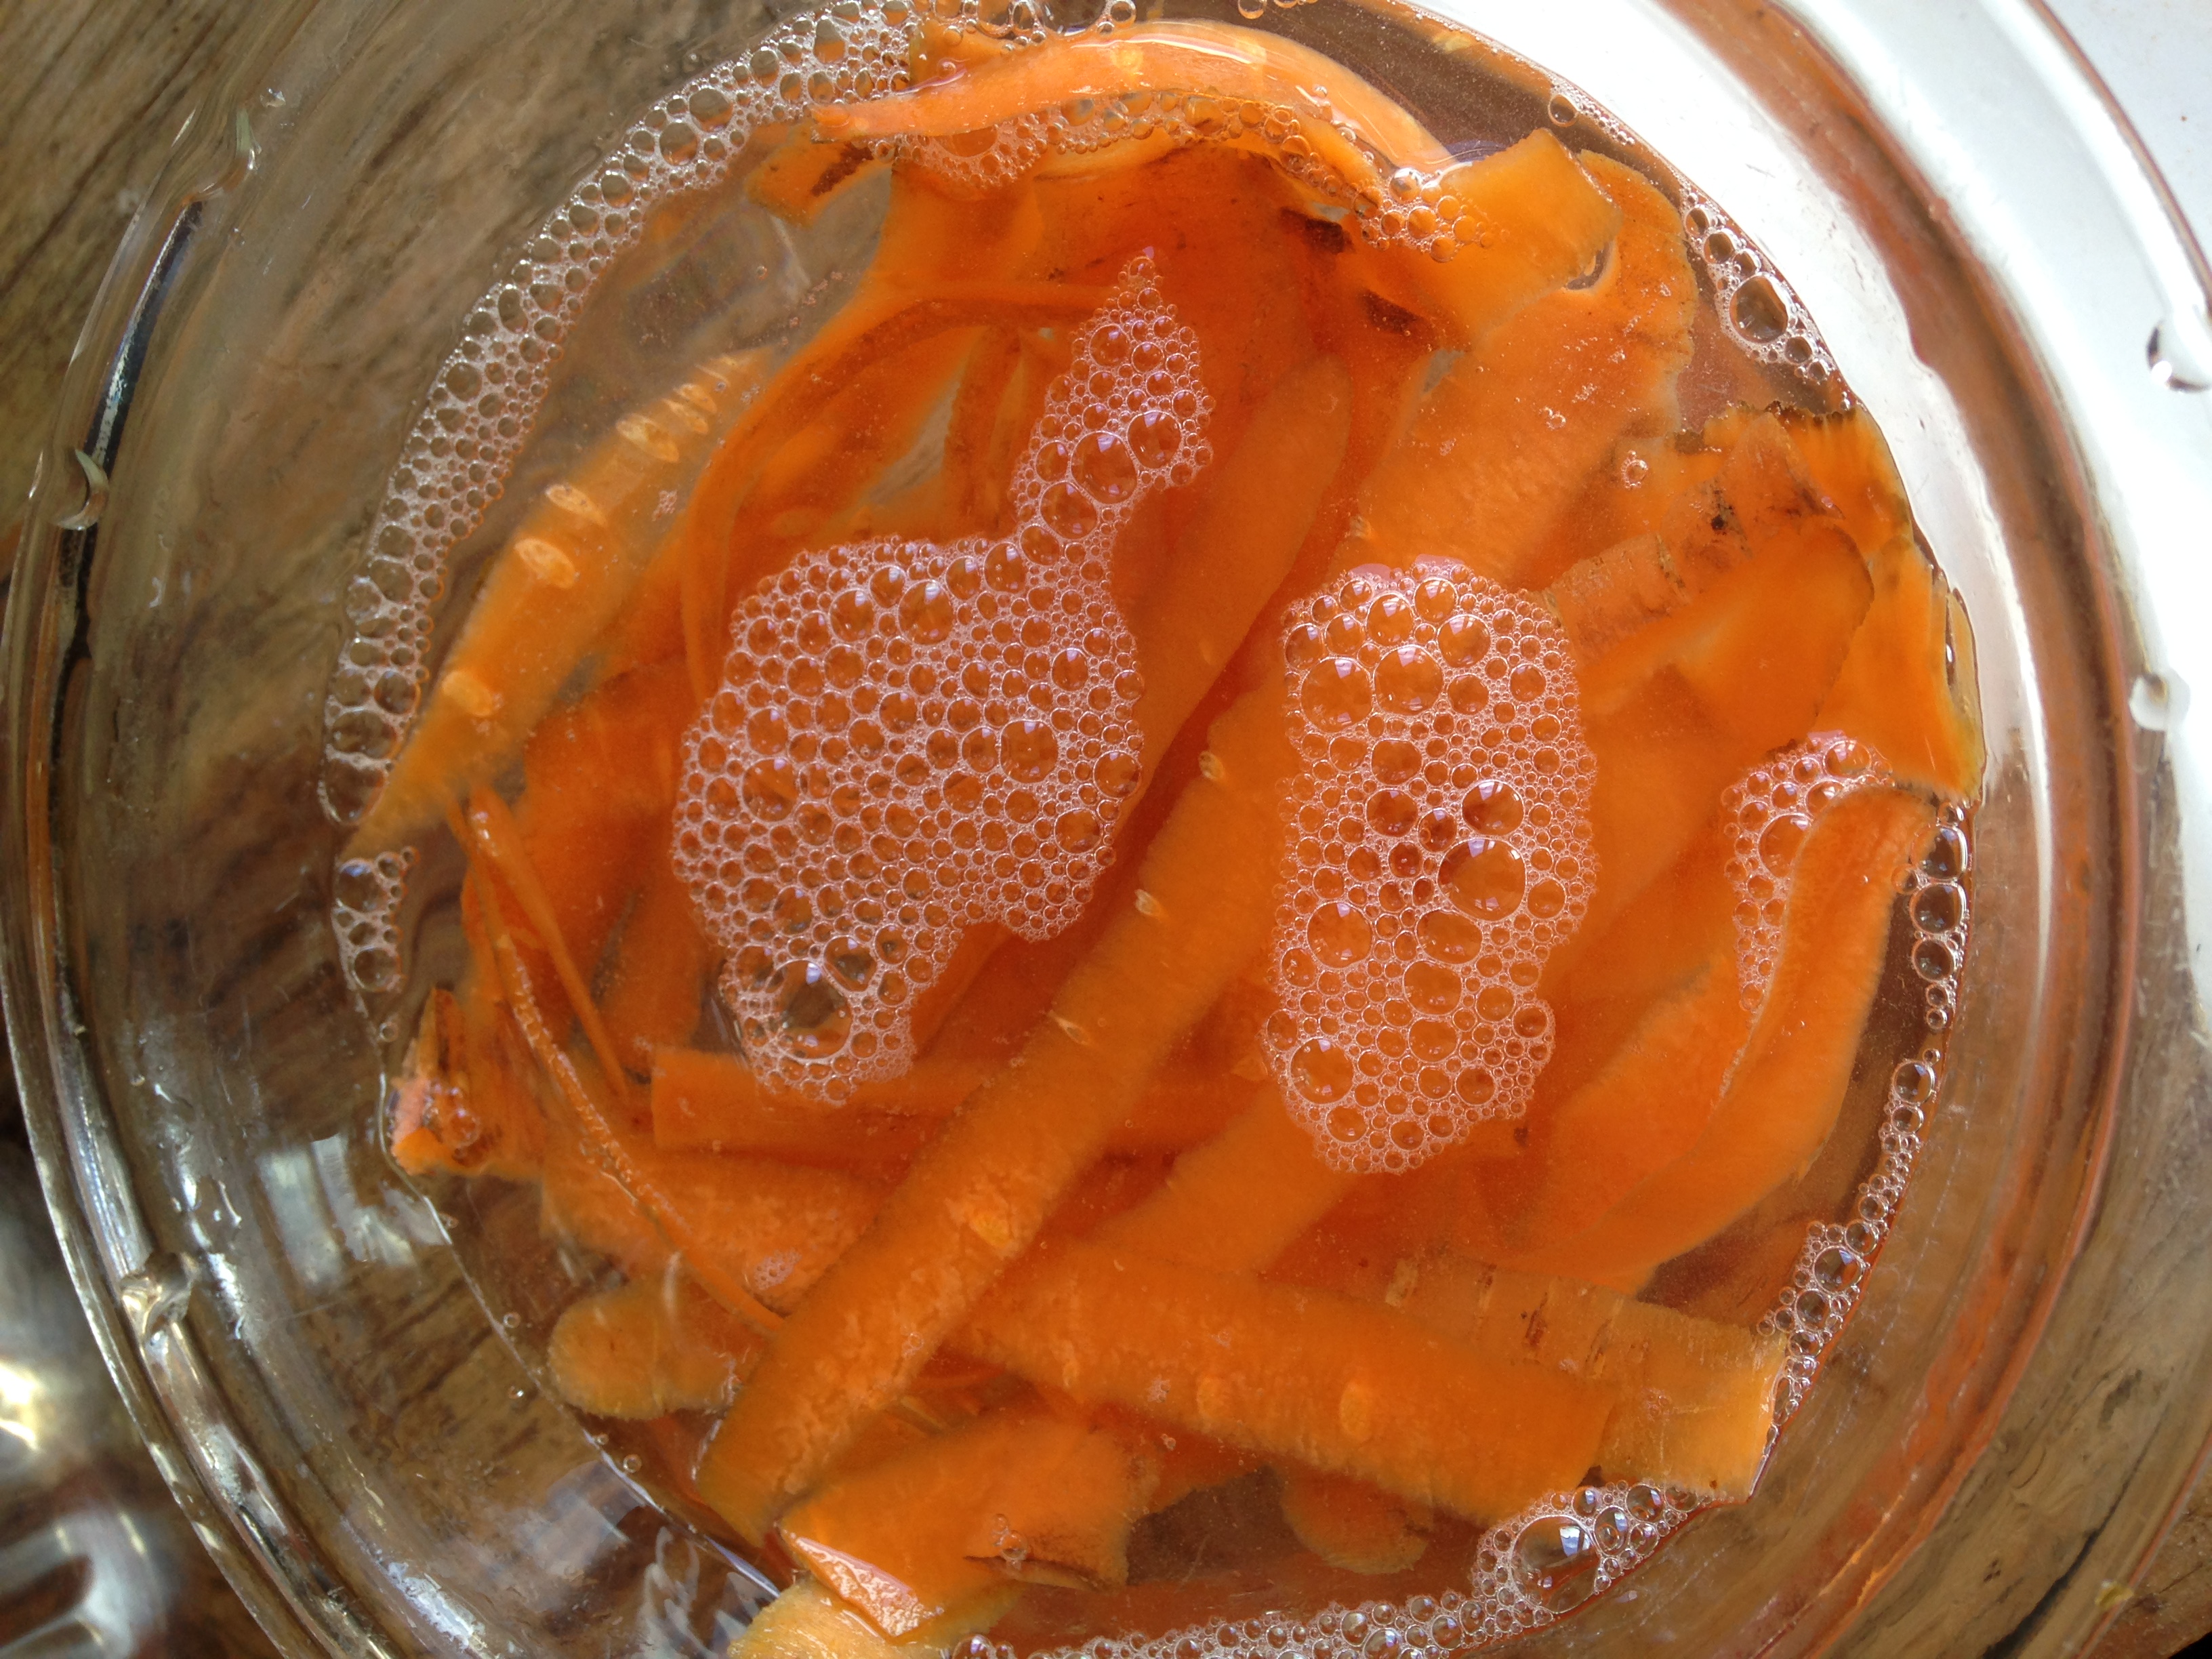 Carrot peels soaking in mild soapy water to make sure they are fit to be sealed in the fermenting jar as weights
Some fermenting teachers sell glass weights. Others recommend using a plastic bag filled with water or your salt brine. I have fermenting glass weights for the small mouth canning jars and prefer to use the vegetable ends that are not going to be eaten for the wide mouth jars.
If you use old fashioned crocks, be very selective about what your weights are and pay attention to avoid unwanted bacteria formation. I will also caution against using repaired crock lids.
Contamination issues can be avoided by proper cleaning and avoiding using plastic bags, which are never as clean as they were when you took them out of the box.
Since I use discarded vegetable bits, I scrub the vegetables well with soap and water before I prep them. After the the ends and peels are removed from the vegetables to be fermented, I wash them a second time by placing them in a small bowl of clean water, with a drop of Instant Liquid Soap to clean off any tiny dirt particles. Let them soak while doing the rest of the prep. These cleaned discarded bits are my weights.
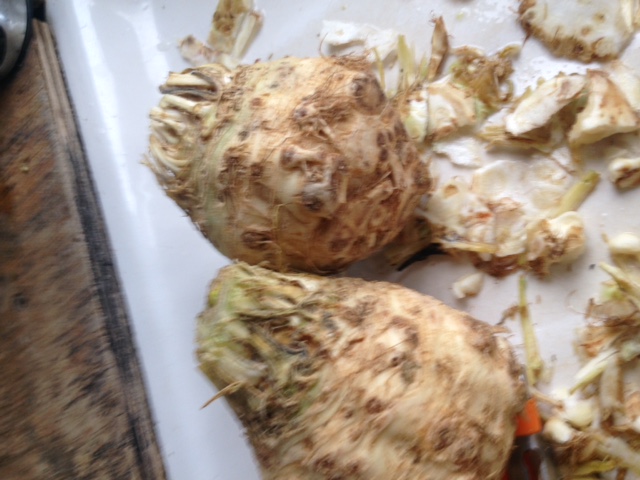 Washed celeriac and peels
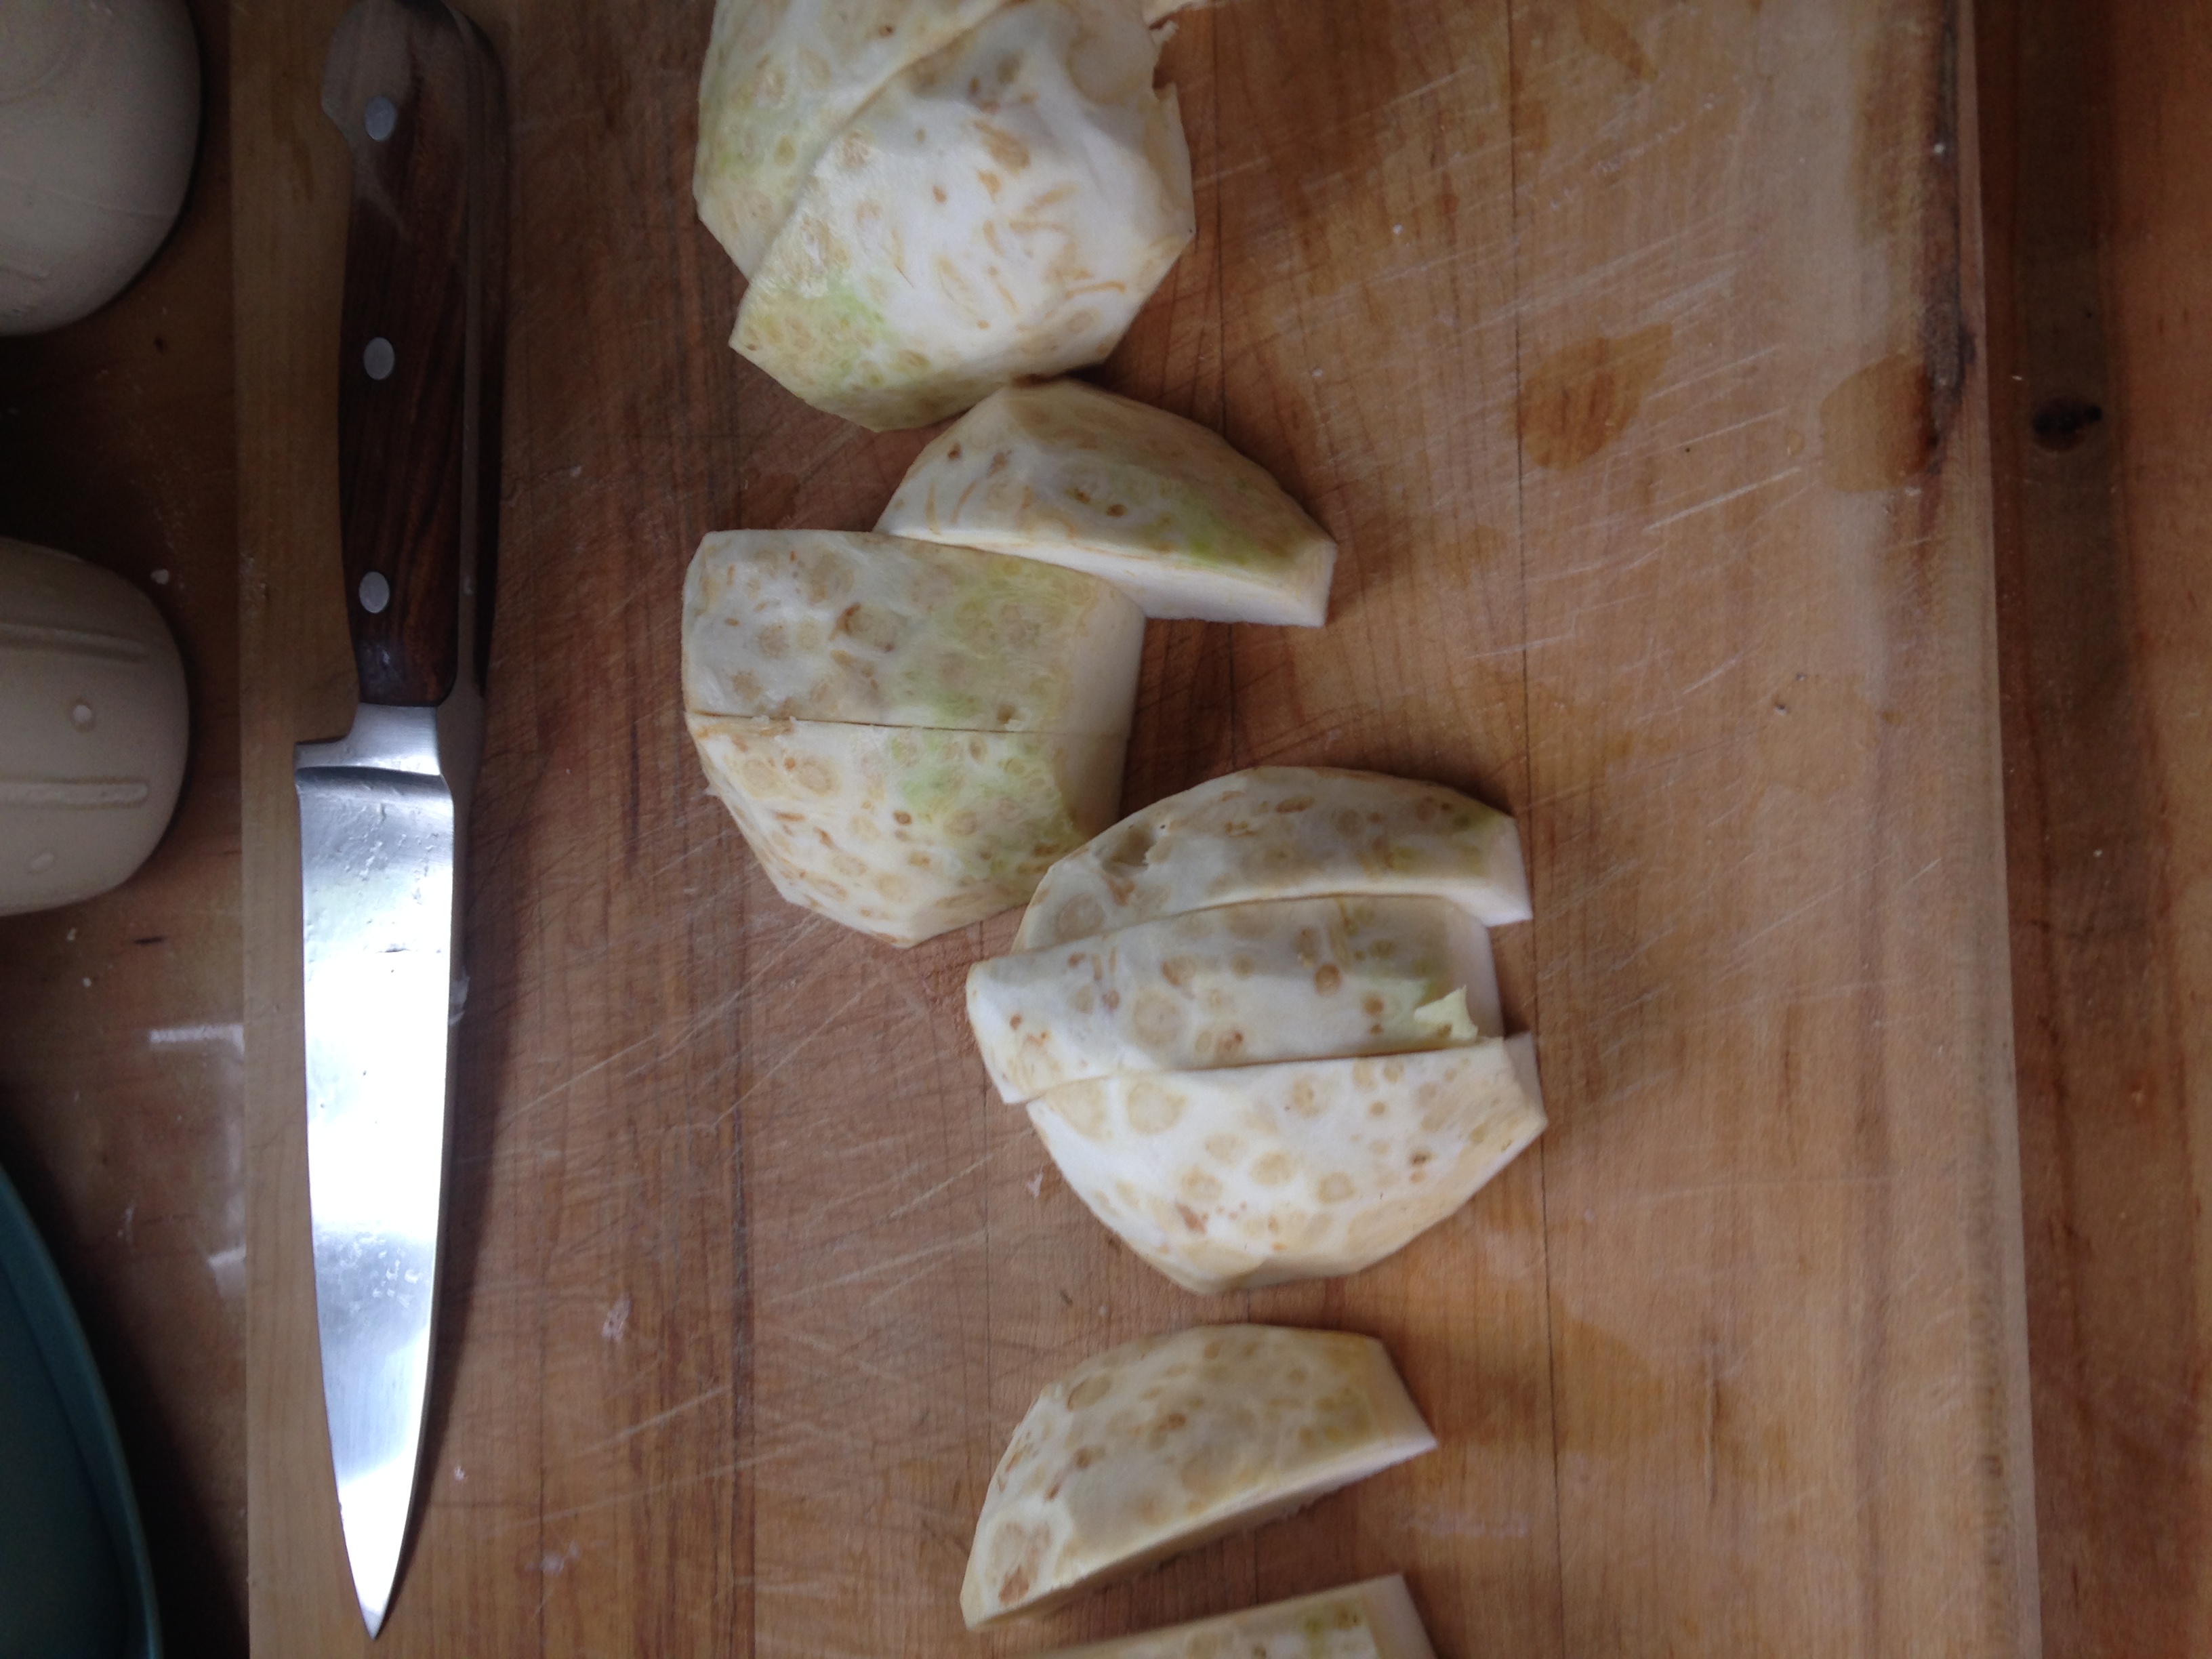 Peeled and chopped celeriac. This size fits in my food processor
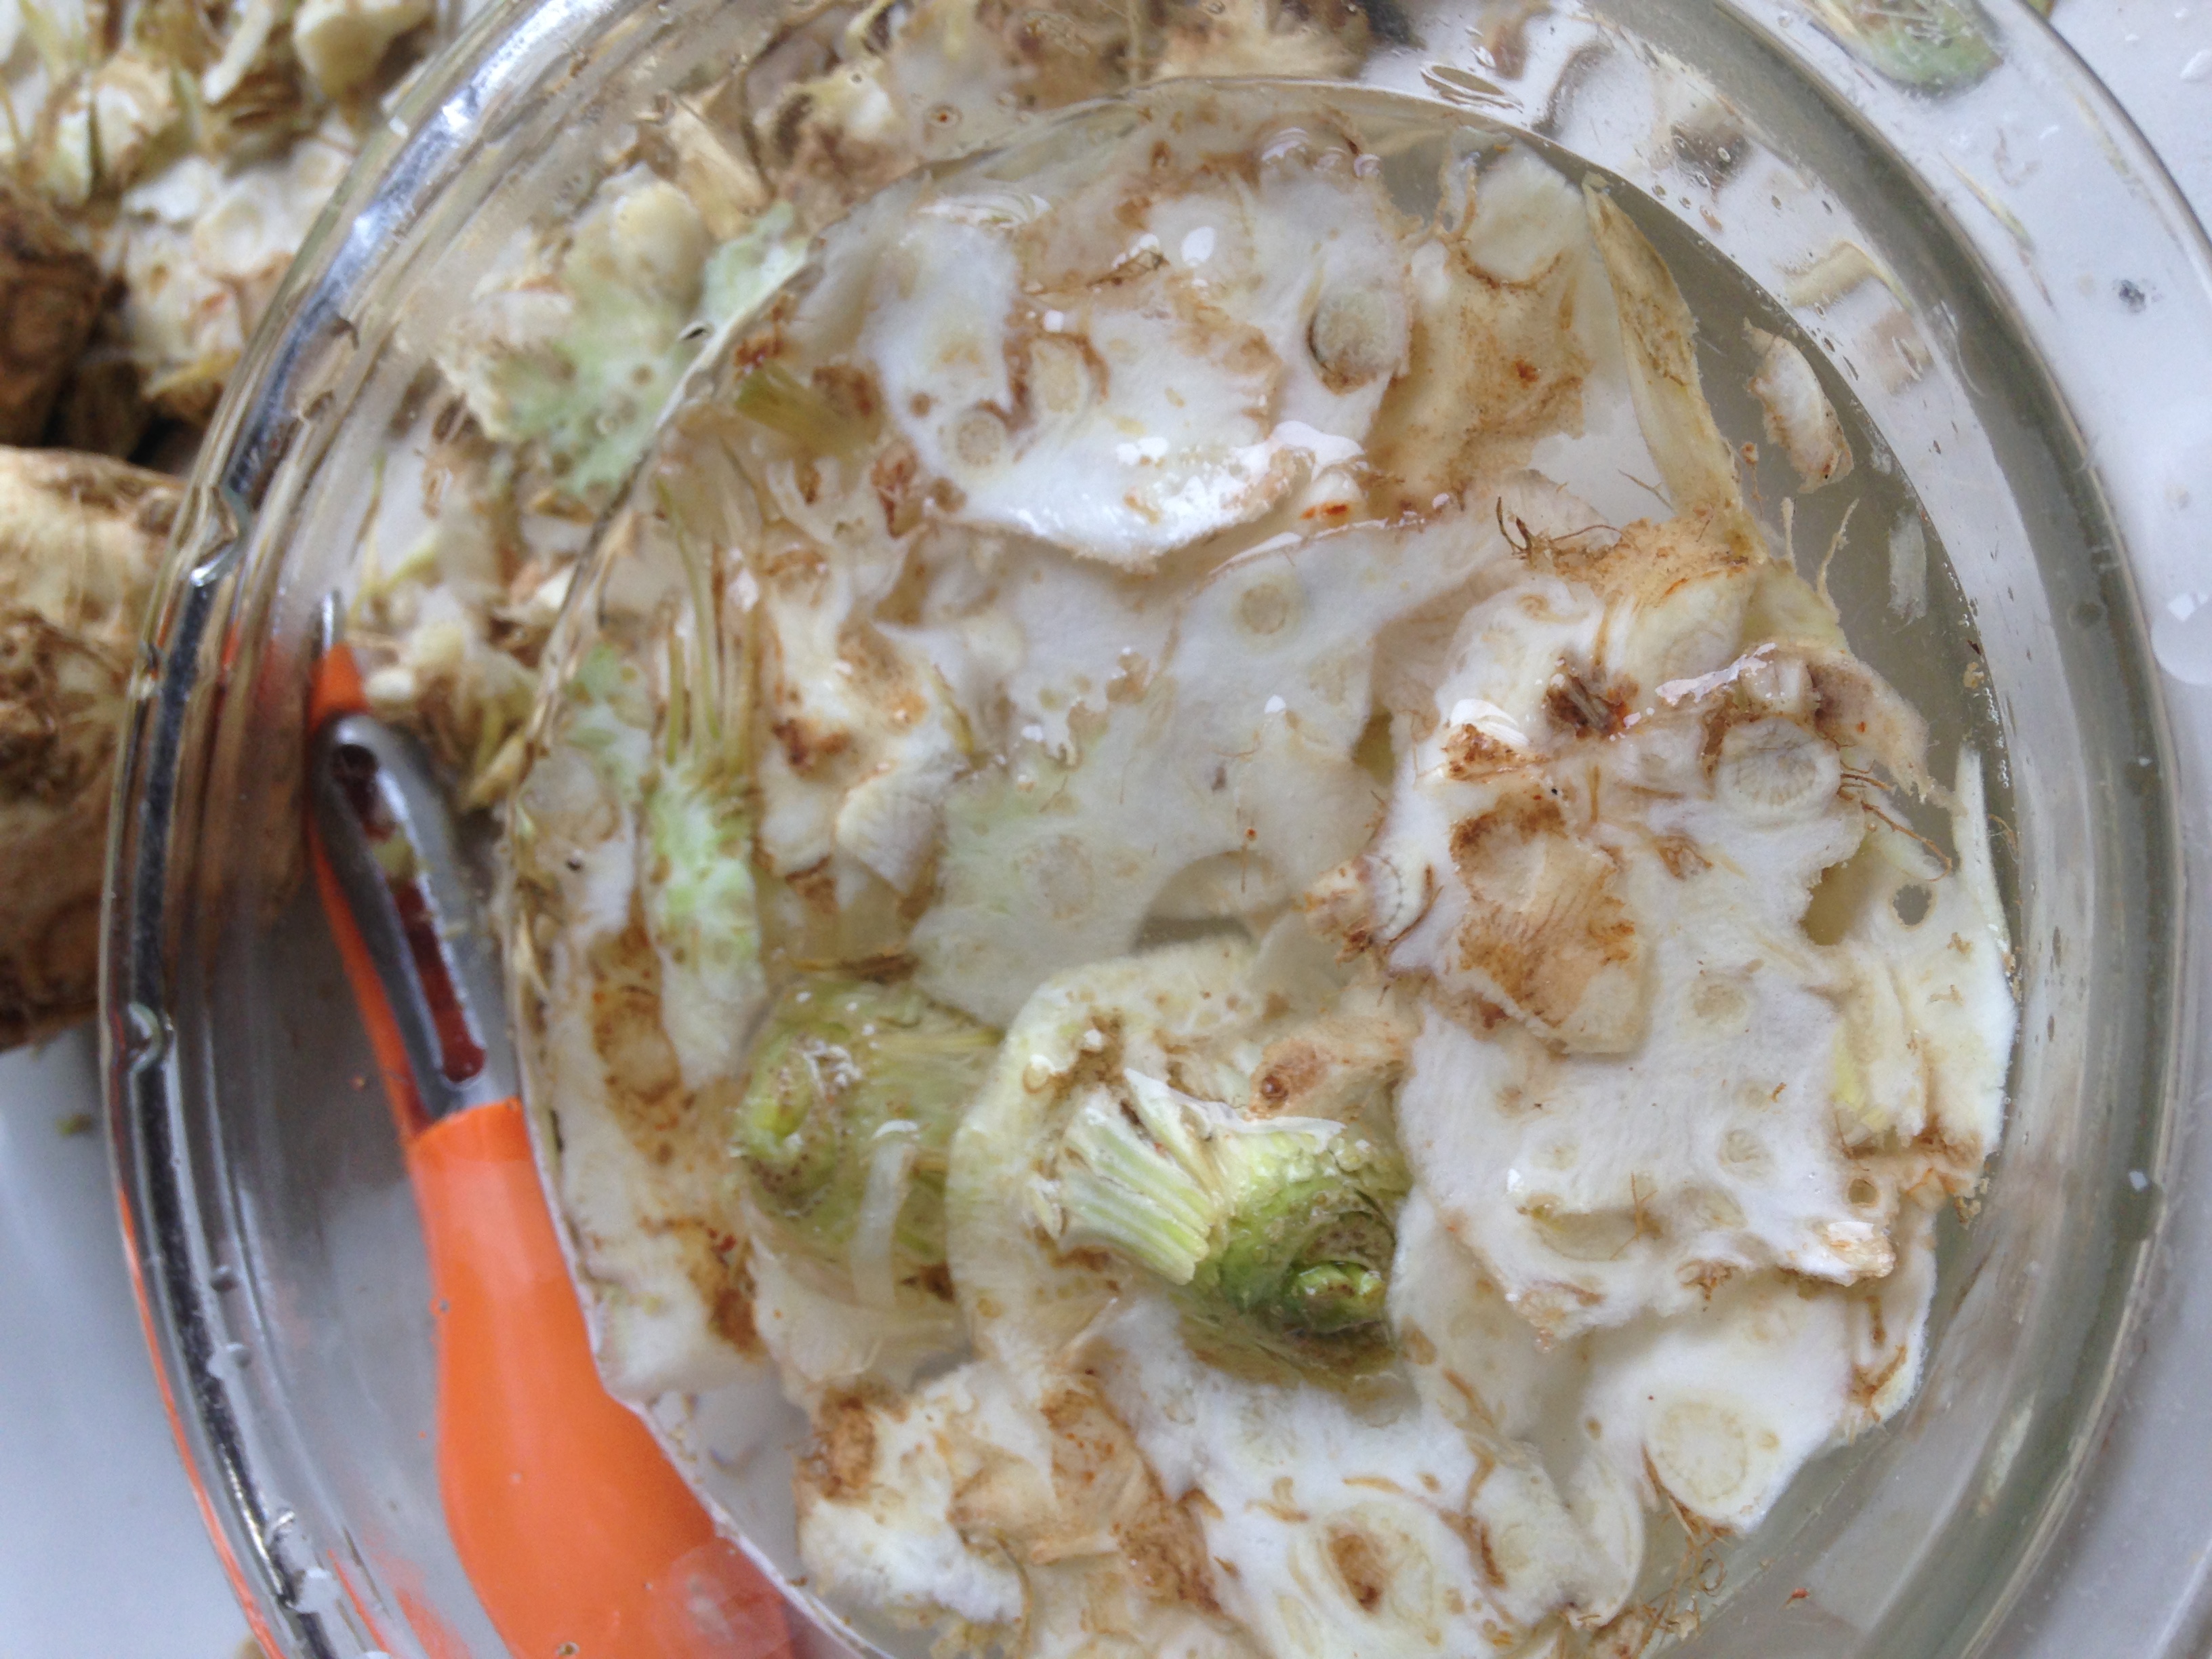 Celeric discarded bits soaking to be used as my weights
Fermented Celeriac
I find that 3 medium celeriac roots will pack in and fill a wide mouth quart canning jar.
As you can see in the photos above, I scrubbed the celeriac with soap and water. The bits in the photo to the left are peels. I select the best and cleanest bits for my weights and soak them in a bowl of clean soapy drinking water for 10 minutes. Rinse them and soak them again in plain drinking water.
I make sure to use filtered drinking water that has no chlorine or fluoride in it.
The peeled sliced celeriac in the middle photo above, is ready for my food processor. If you are using a hand grater, there's no need to make the extra cuts. You can just grate the whole root.
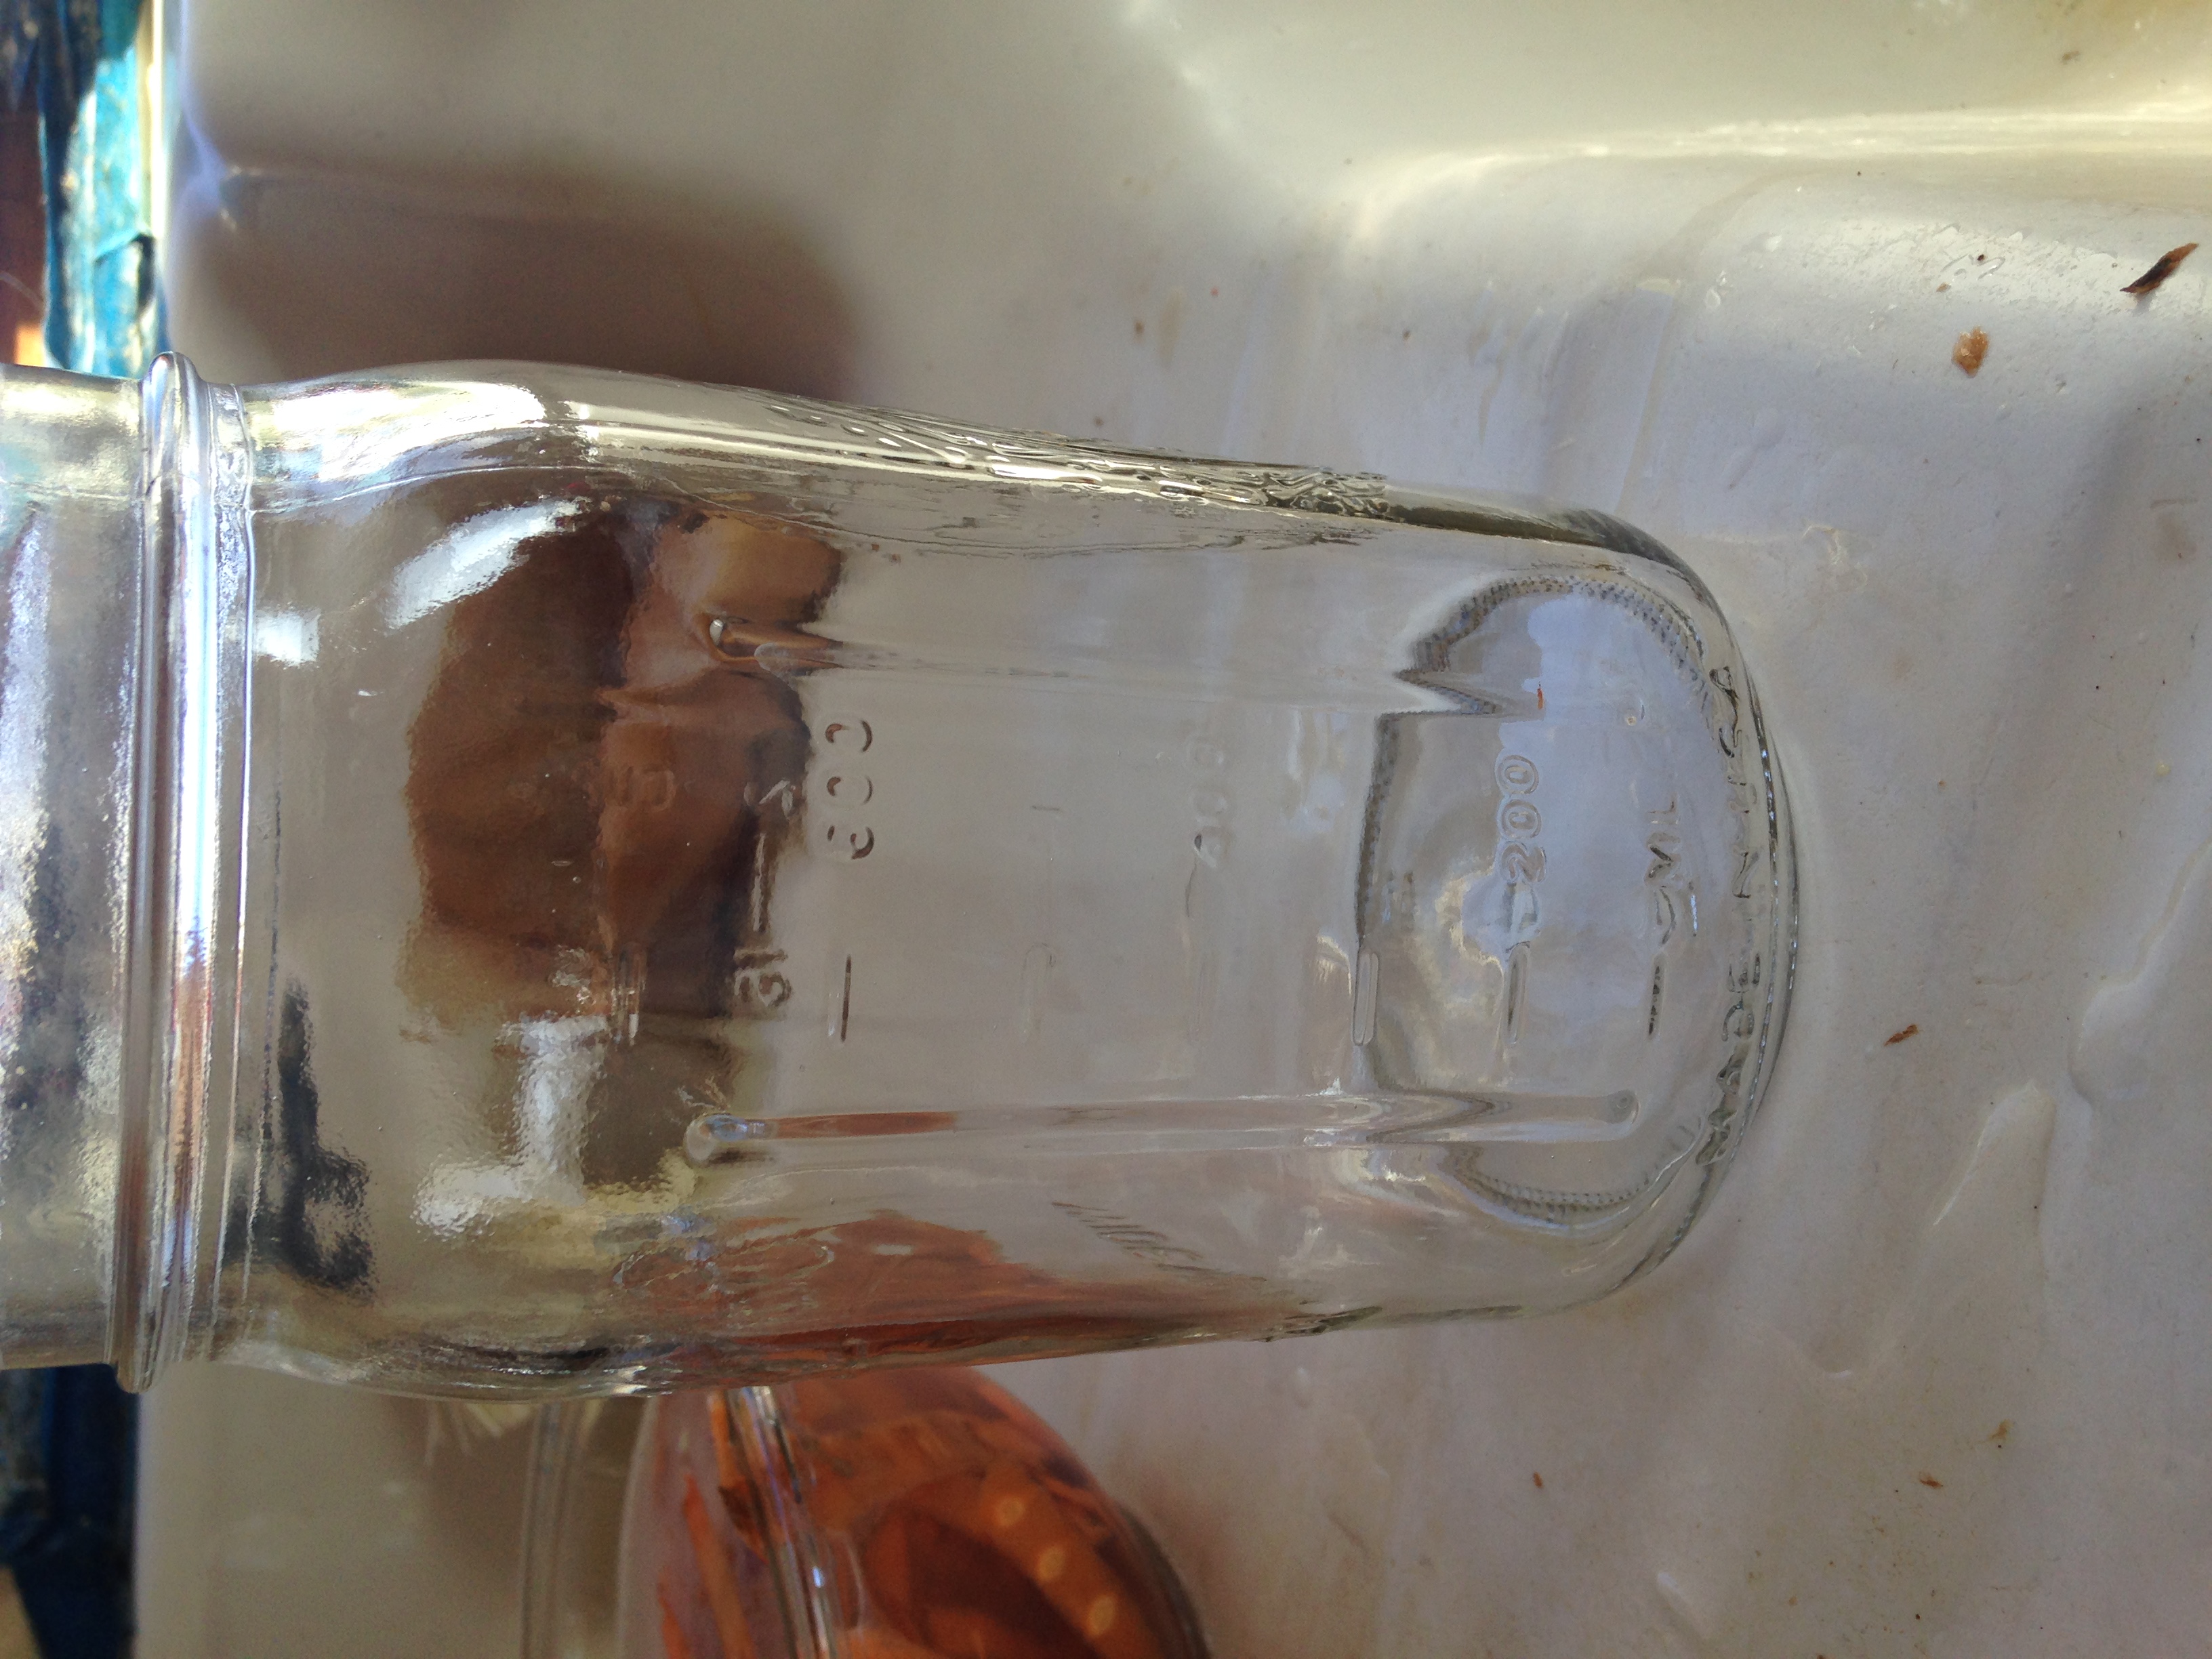 Clean canning jar
 food processor grating blade
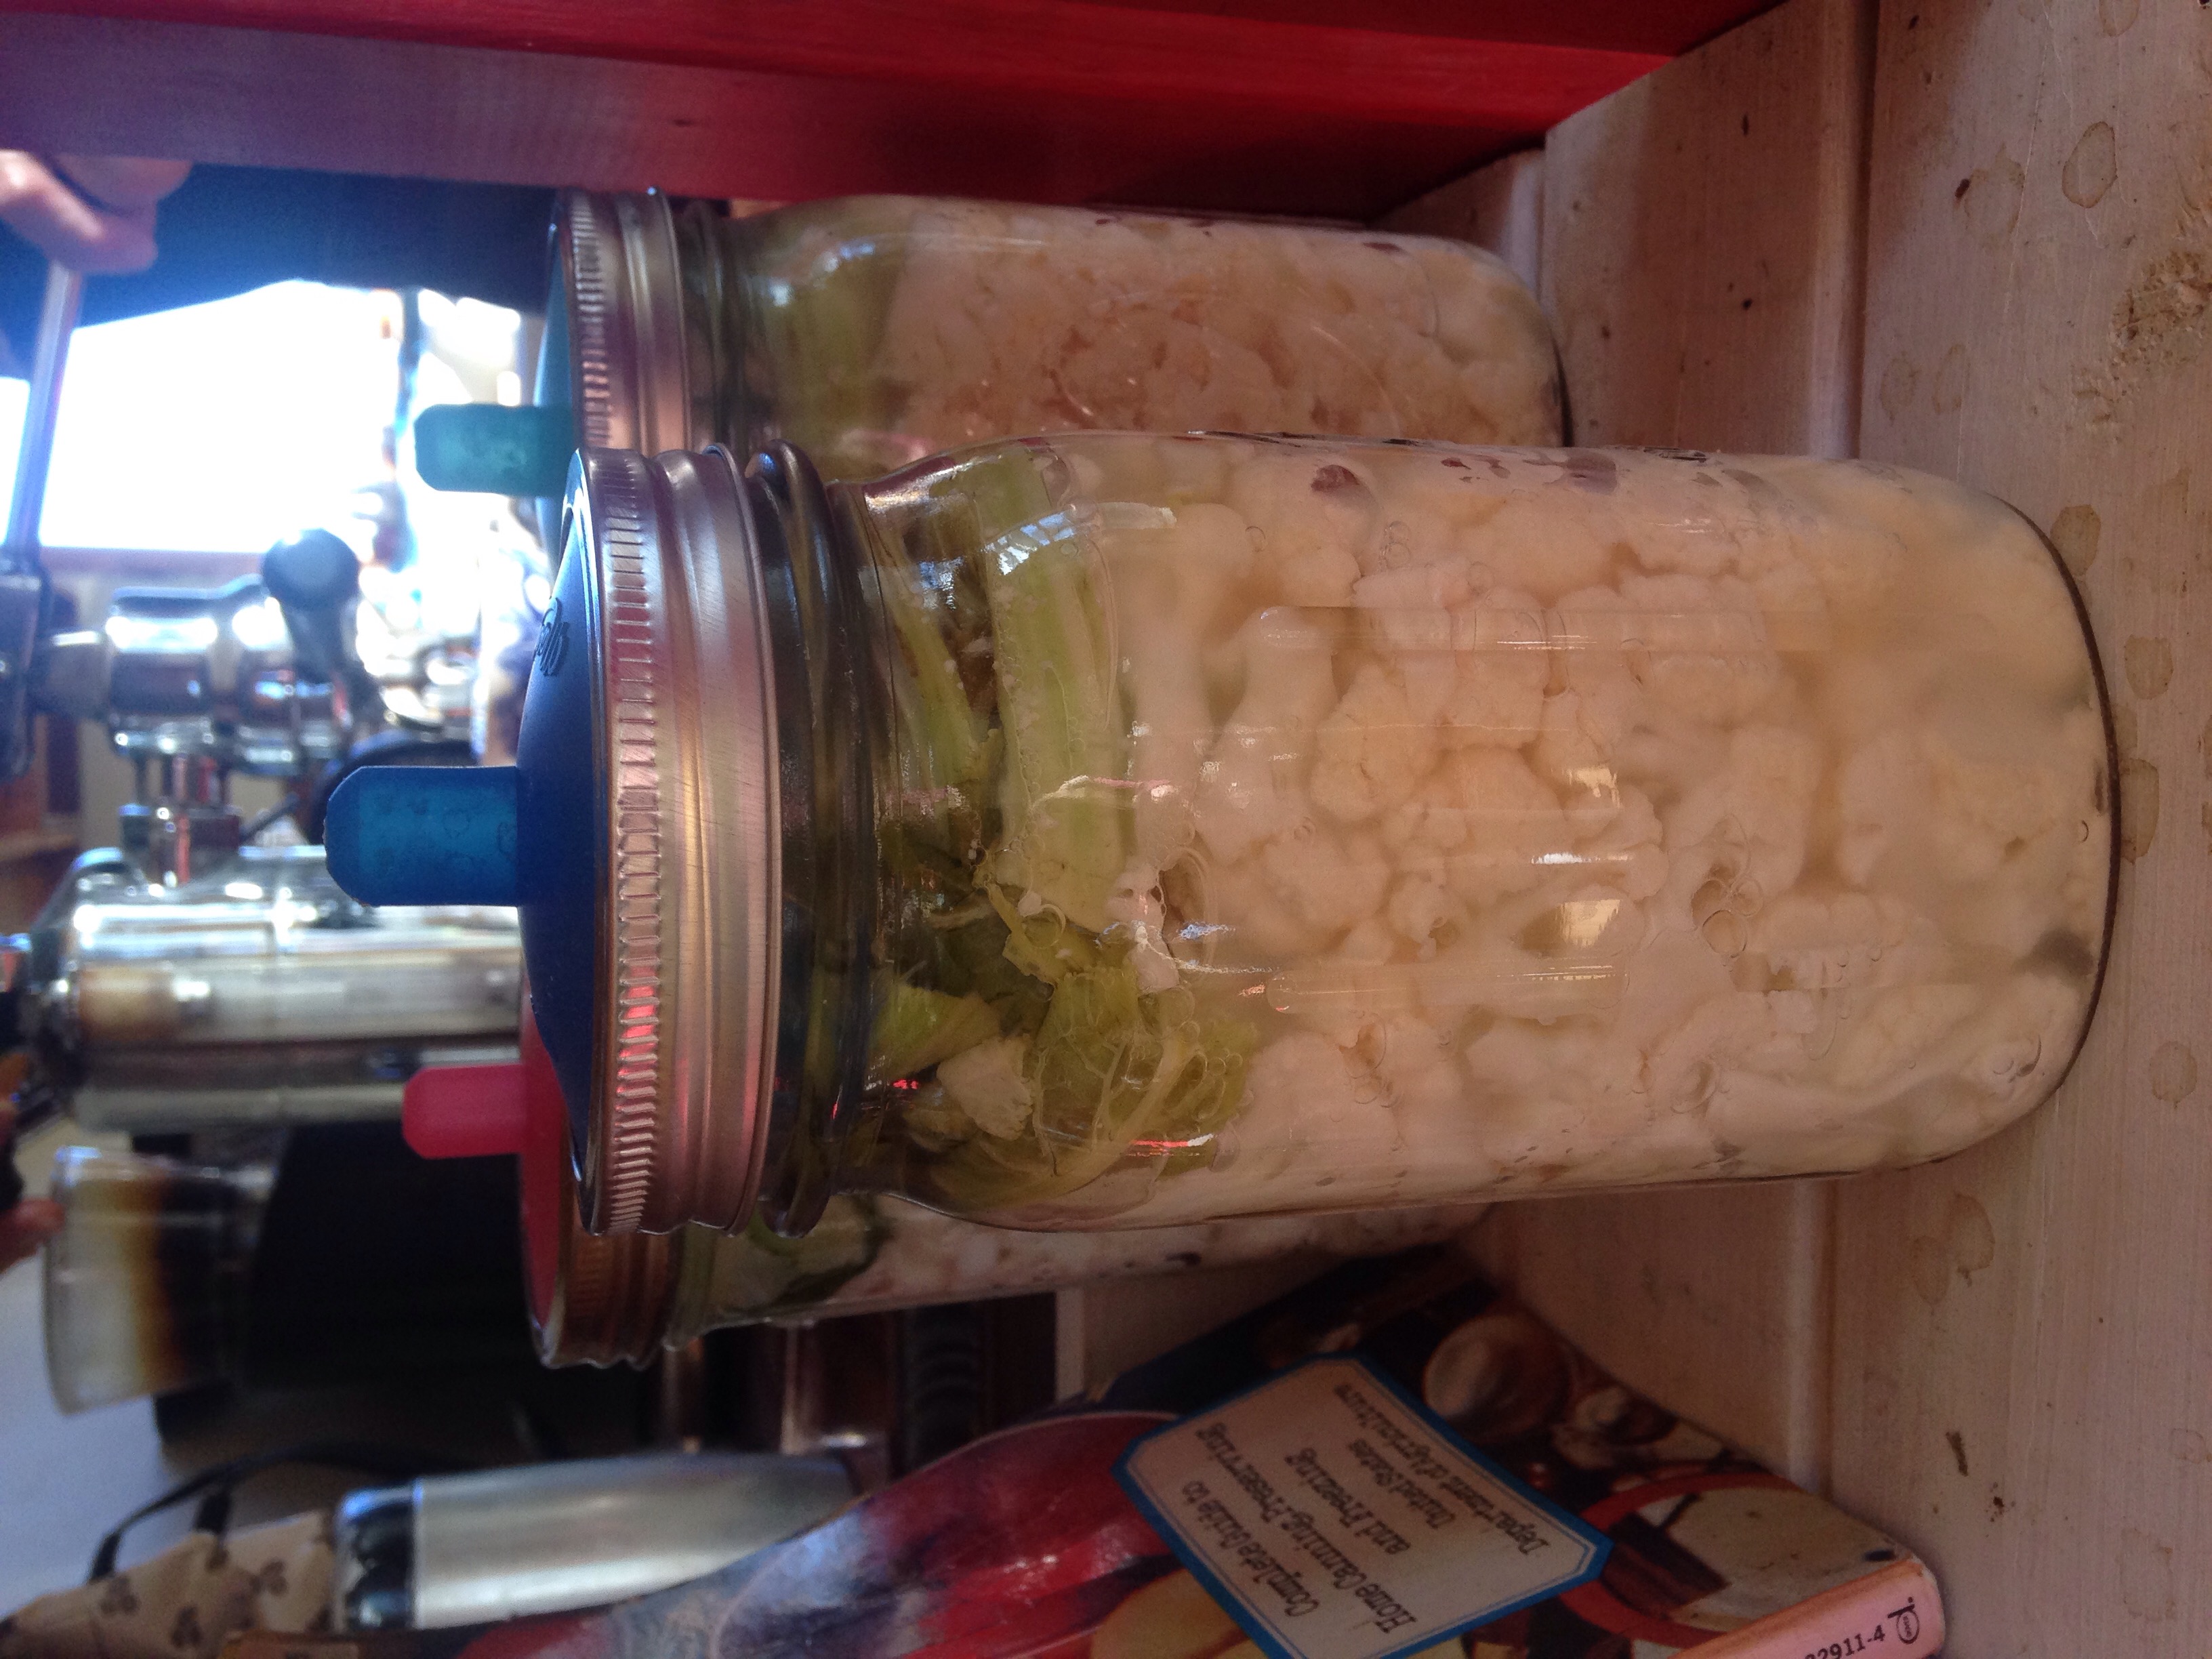
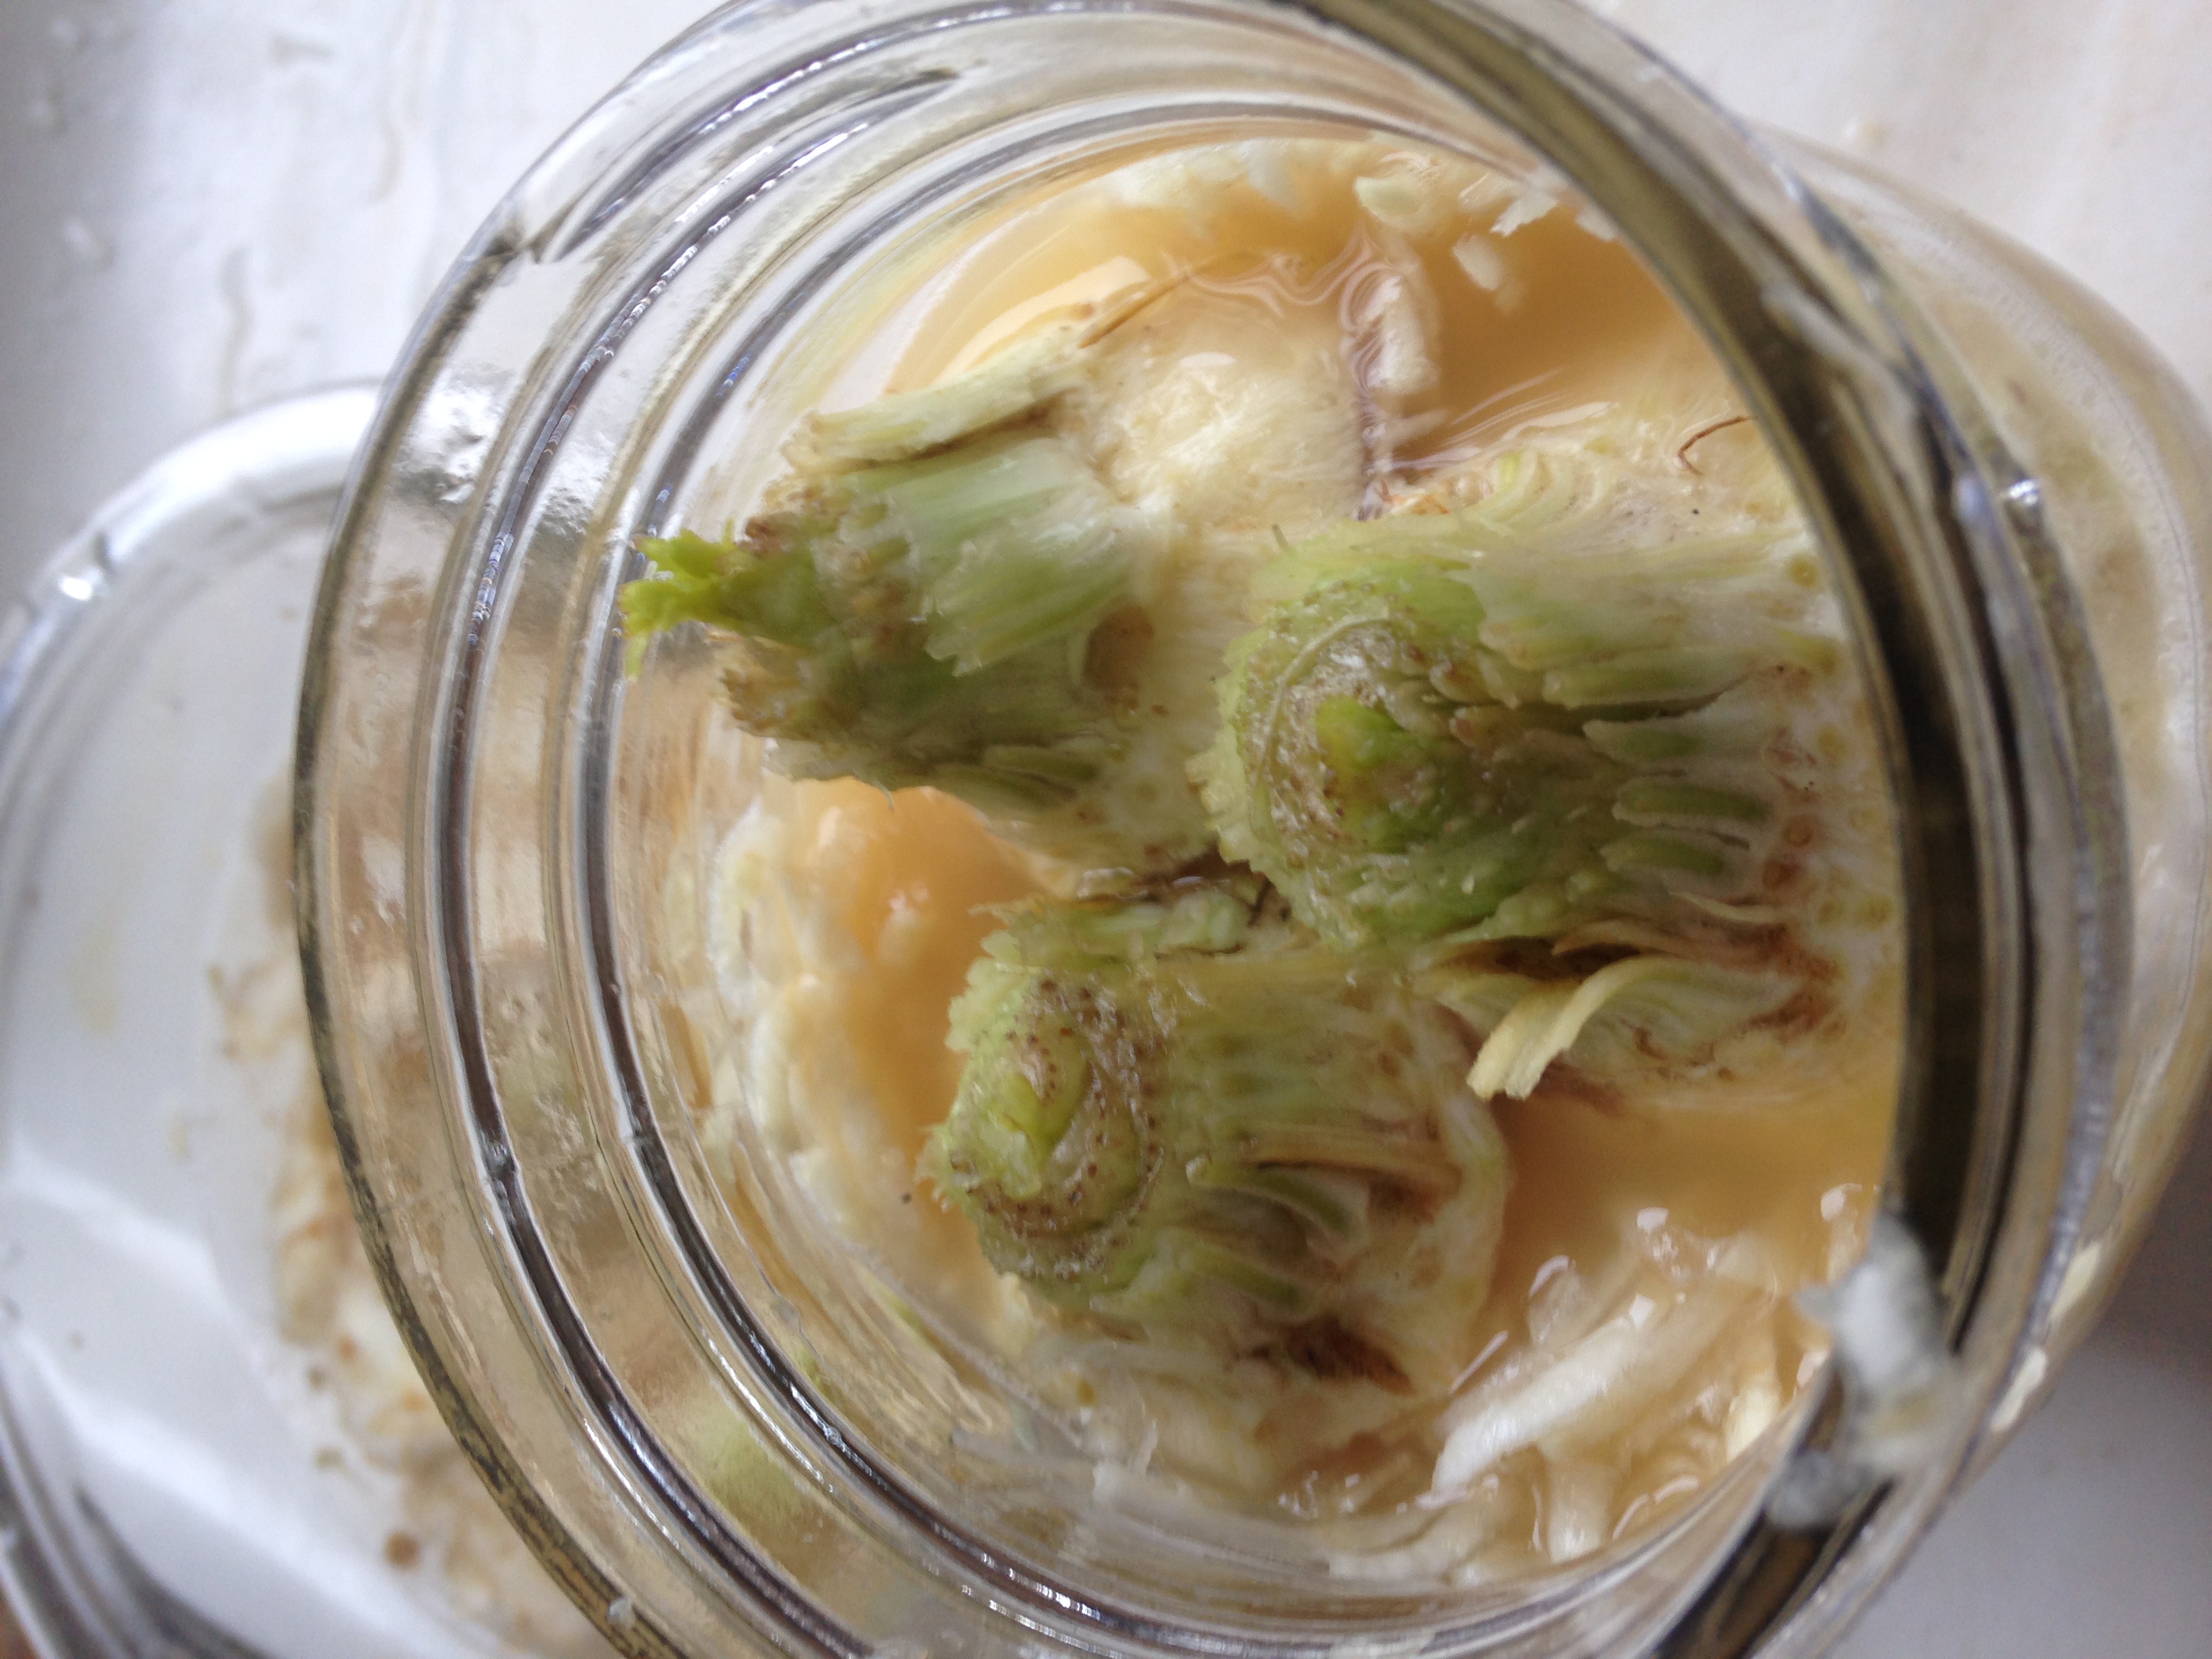 packing the washed celeriac tops in the jar as weights
Recipe or instructions
Grate the celeriac and place in a big bowl. Salt. You can find many discussions about salt brine percentages and measurements. I find that these salt quantities are usually too salty, especially for celeriac, which is a high sodium content vegetable. So I sprinkle about 1 measured teaspoon of salt over the top of my 3 grated celeriac roots. After you make this recipe a time or two, you can adjust the salt to your preference.
Mix the salt throughout the grated celeriac. I use something to gently pound and bruise the celeriac as I distribute the salt. A big metal or wooden spoon, a wooden pounding tool especially for fermenting, that you can make or purchase. Your hands are a good tool, if you don't mind the salt drying our your skin. Sometimes, I use the blade end of my stick blender. Whatever you have.
You will notice the celeriac to begin to sweat. Let it sit for 5-30 minutes, while you prepare your jar, pickle pipe, and bits of peeling weights.
 Celeriac packed with tops as weights. Notice the little bit of water on top
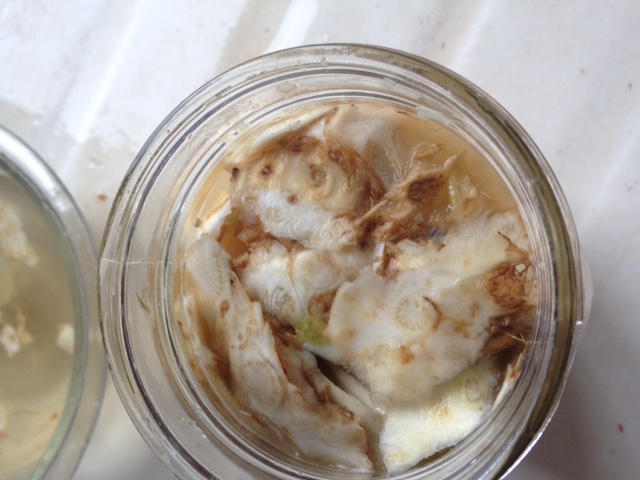 More peel bits packed on top
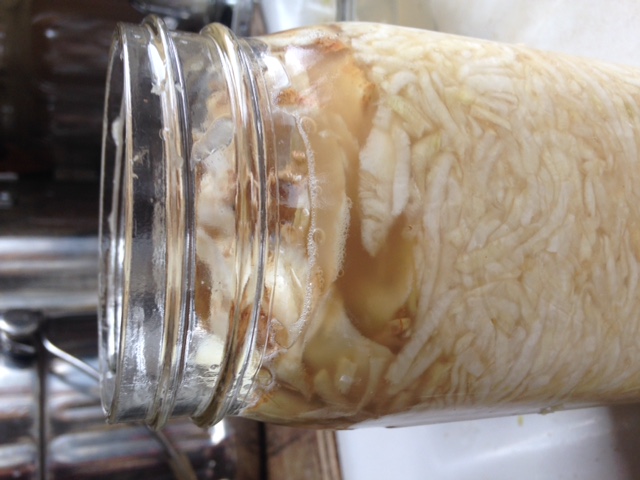 This jar will be ready for the pickle pipe after the bits are topped off with water
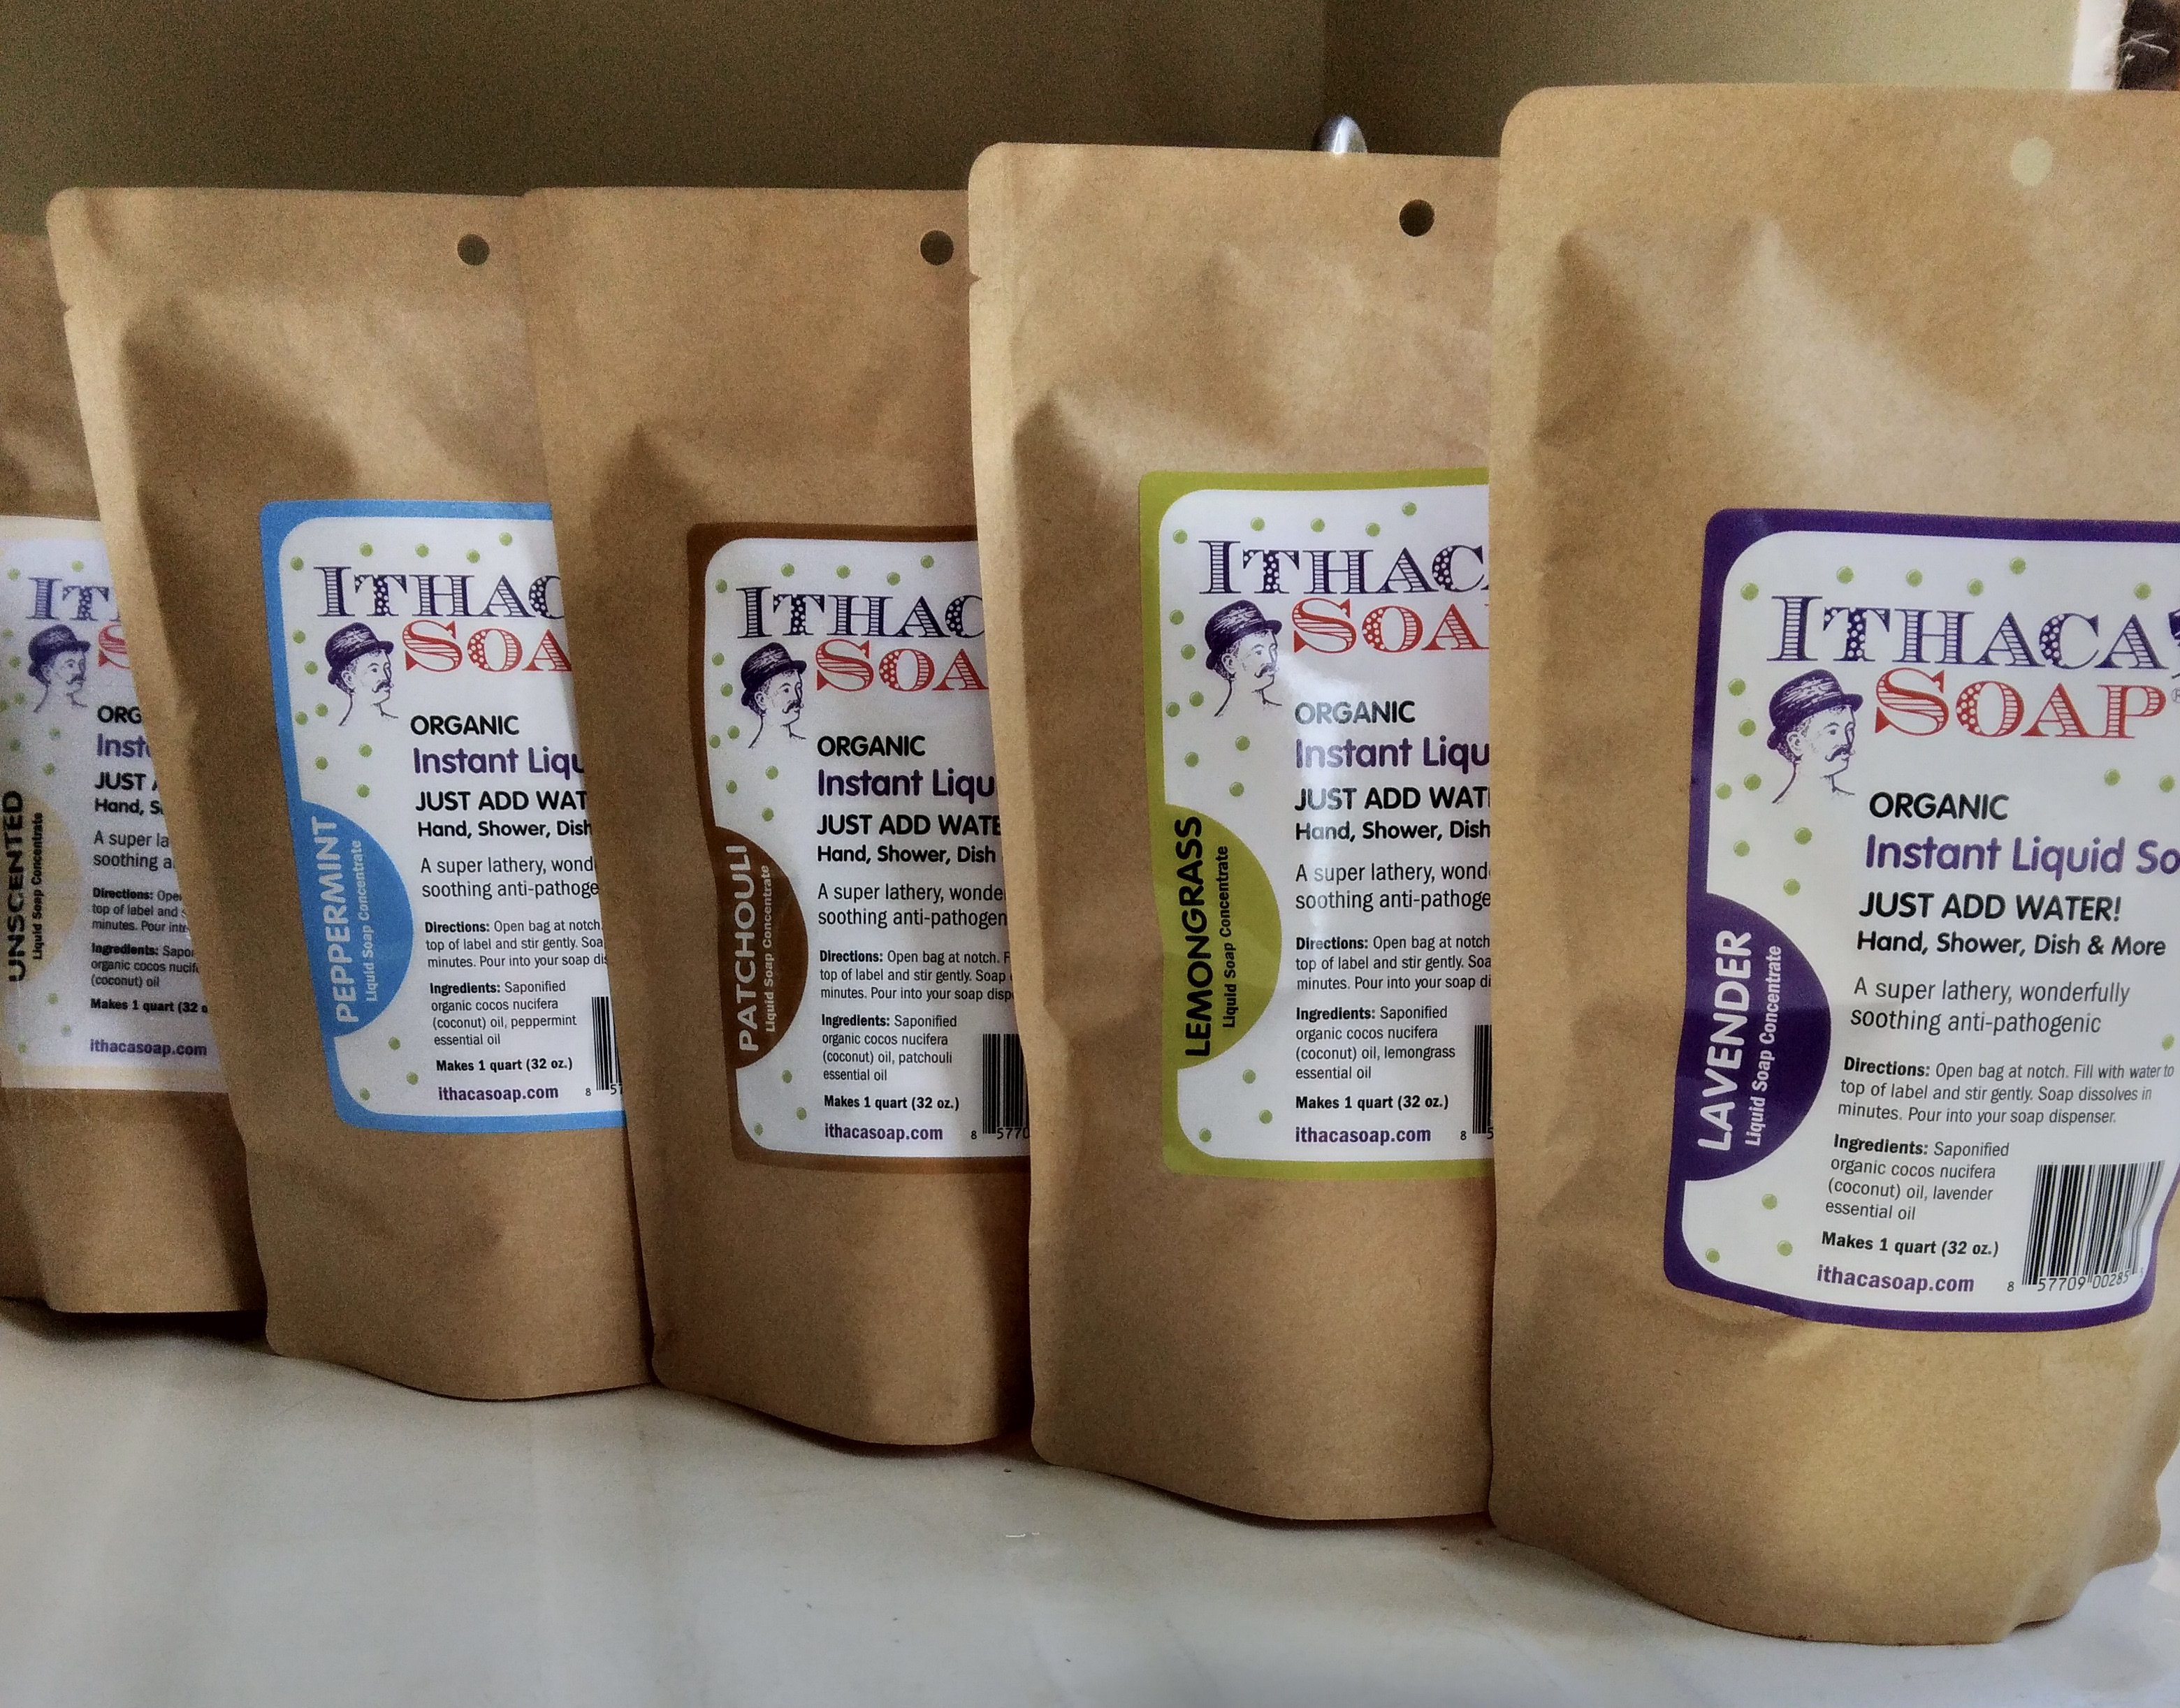 Choose from 5 different natural essential oil scents
Instant Liquid Soap is the perfect stovetop cleaner. It's gentle on your hands while being tough on built up, caked on grease. Click here to read How to Clean your Greasy Stovetop using zero waste natural soap methods
- Tear open pouch at notch
- Fill pouch with water to top of label. Gently stir.
- Pour into a reused plastic bottle. Use.
The future starts now as you end single use plastic bottles. Click here
Jar packing instructions
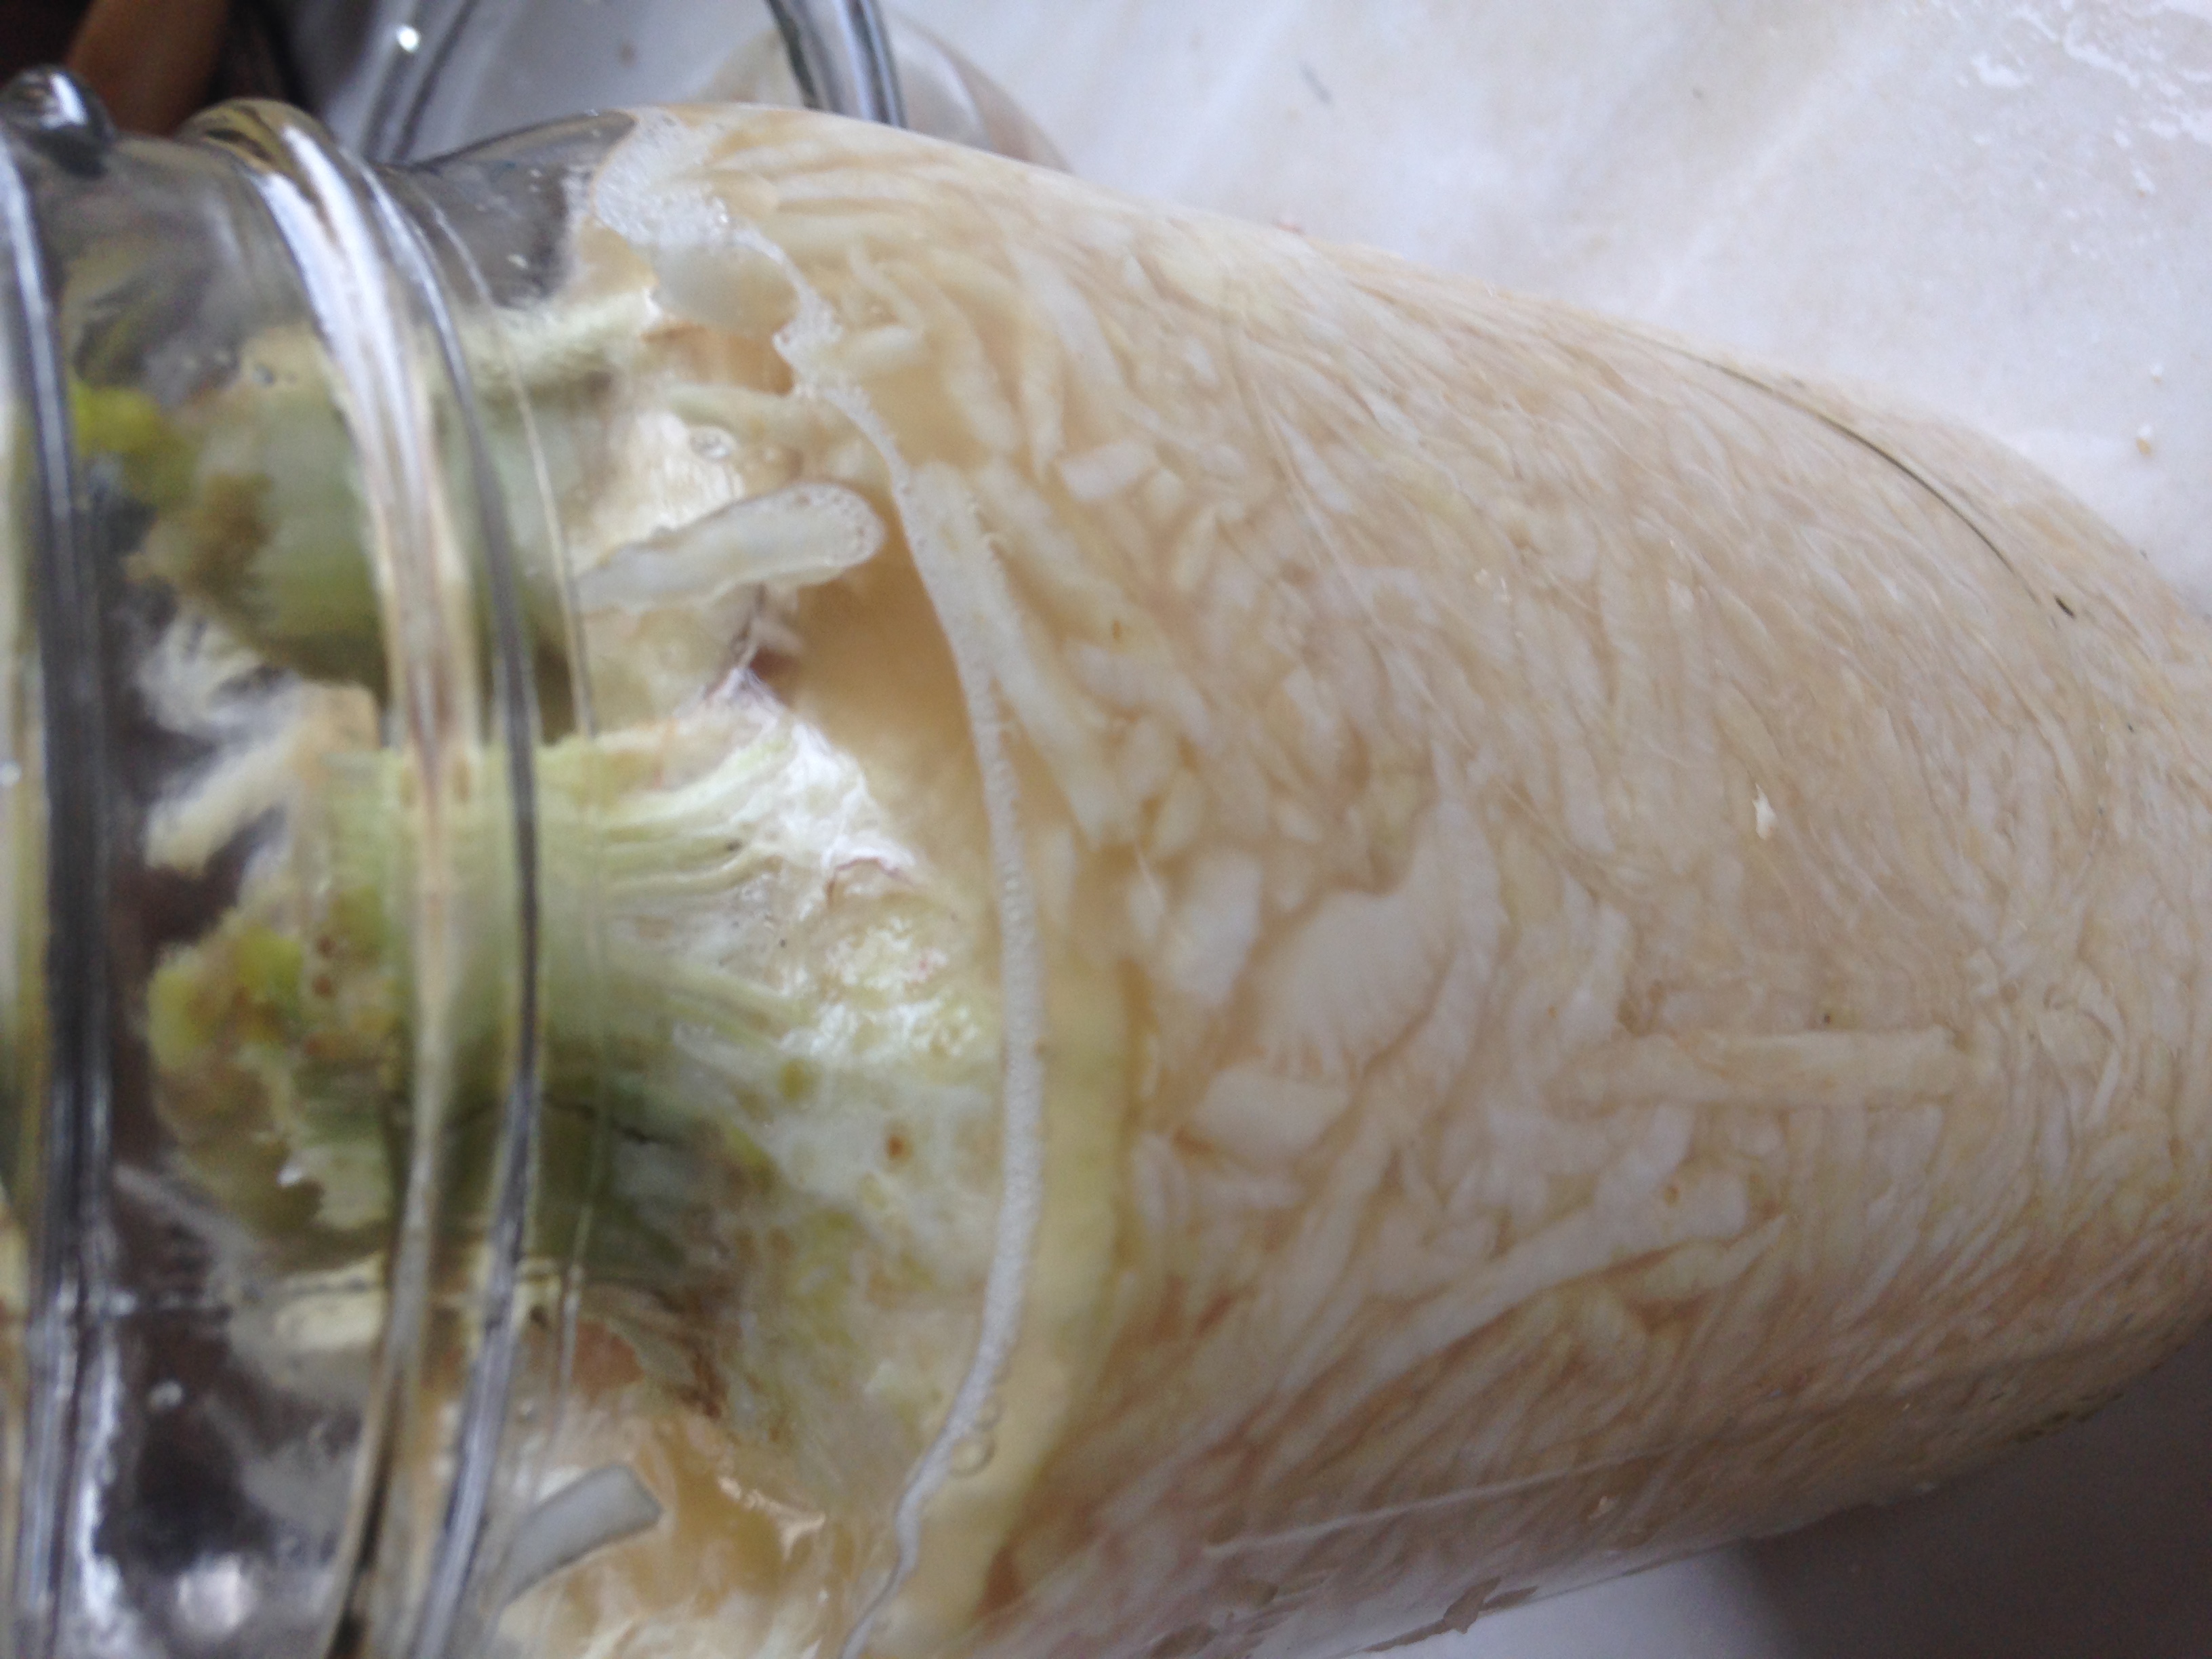
Wash your hands again with soap and water (again, I prefer bar soap), before packing the jars . I pack my jars with one handful of prepped celeriac and tamp it down with a tool or my hand. Repeat this until your jar is filled 2 inches from the neck.
Carefully select your vegetable bits for weights, and pack them on top, making sure to cover every spec of vegetable you want to have for eating. Tamp it down as best as you can. Fill up to the neck.
As you fill and tamp, you will notice water making a brine. This is the water coming out of the vegetable of choice. As it seeps out of the vegetables and mixes with the salt, this creates the brine.
Cover the vegetable weights with water. If there's any salt left in my bowl, I rinse it with drinking water and pour it into the jar to cover the vegetables, so all of the salt is used and none is wasted. If you are fermenting a lot, you can waste a LOT of salt, which will go into your waste water system.
Carefully place your pickle pipe so it will seal the jar and put your canning jar lid band on and tighten. Place on your designated shelf and wait.
After 1-3 days you will notice the pipe swell up. It will begin to burp and fart. It will smell like kraut. You have successfully begun your vegetable fermentation journey.
rinsing
For Salad de celeri, I ferment the celeriac for 7-10 days. Unlike other fermented vegetables, I rinse the celeriac and squeeze out any excess water, before I dress it in the roulade.
Storage: pack the dressed salad loosely in a glass jar with a loose fitting lid in the refrigerator. One time, I made the mistake of storing this dressed salad with a closed tight fitting lid and the celeriac turned to mush. It still tasted great, but it lost its crispness.
bon appetite!
 Fermenting cauliflower
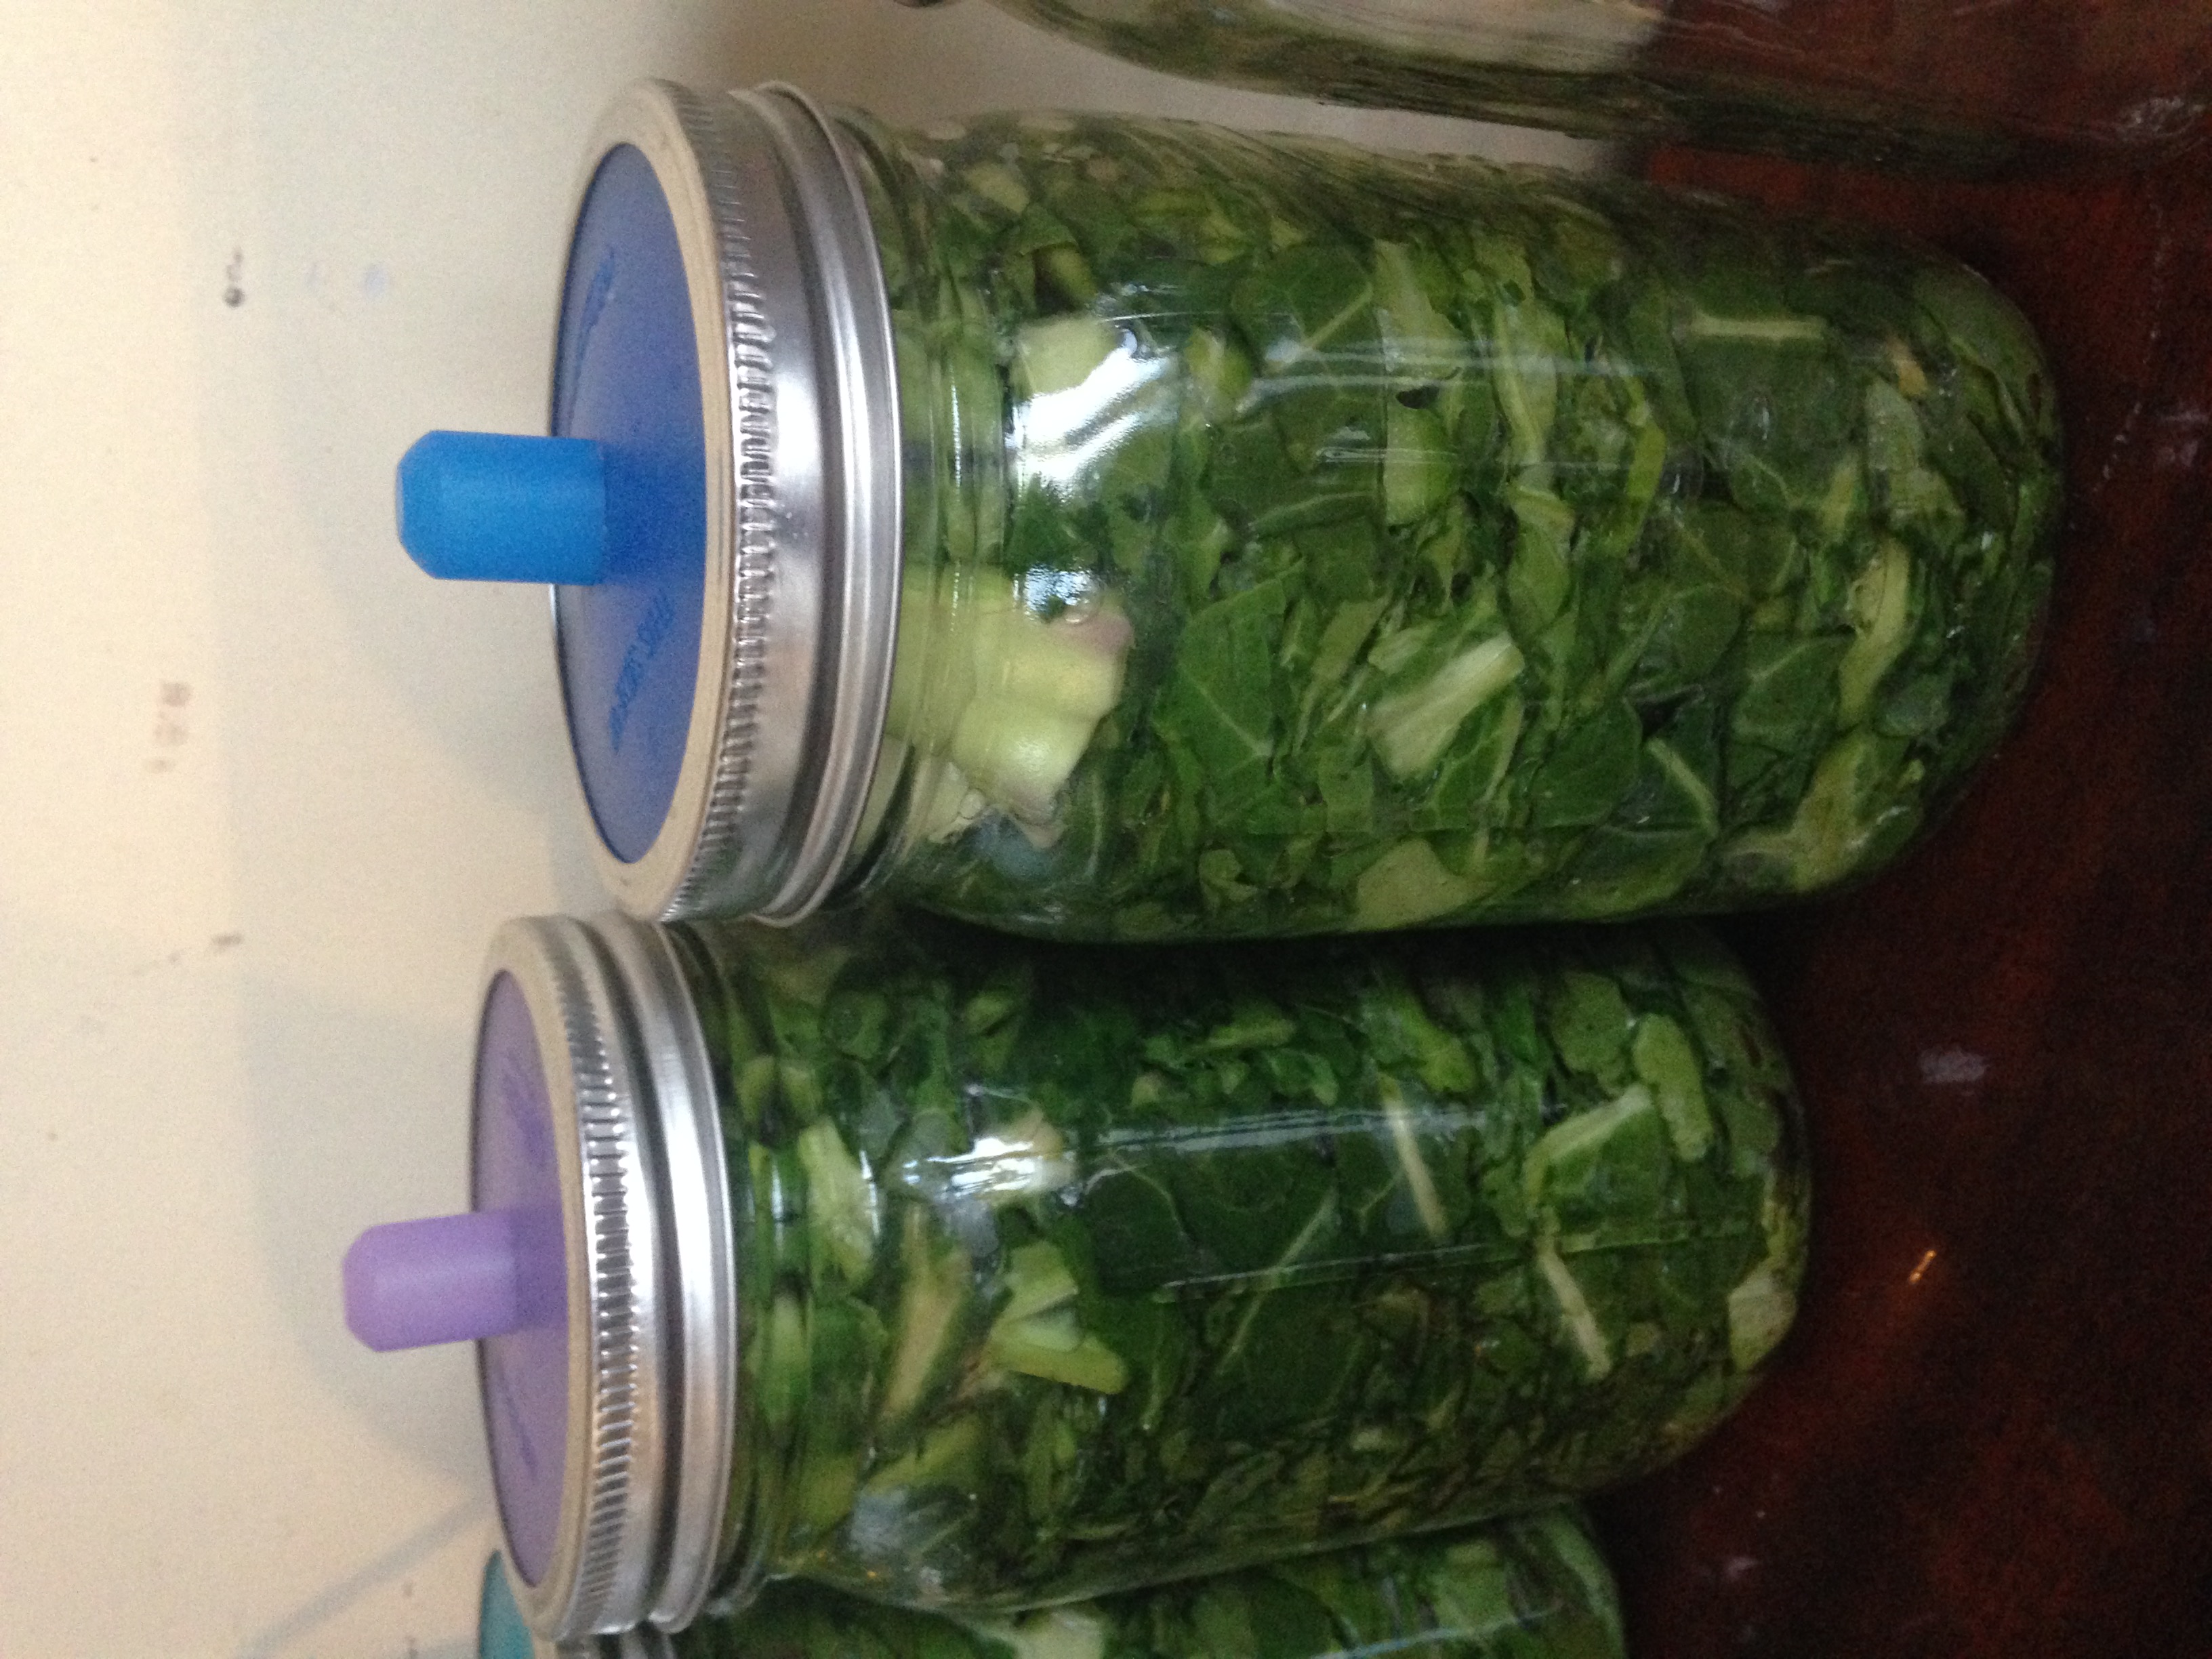 Fermenting collard greens
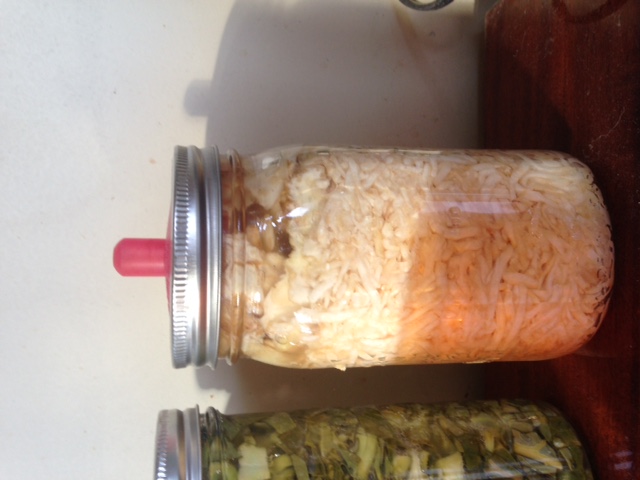 Fermenting celeriac
In the photos above, notice the color of the collards in the center, and how bright green they are. Then look at the celeriac photo to the right. To the left of the celeriac is that same jar of collard greens a few days later. Notice the color change to a kaki green.
In the cauliflower photo on the left, notice the pickle pipe is bubbled up. It's getting ready to burp and fart. Sometimes, there will be a little bit of brine juice that spits out of the vent. When that happens, I take note to make adjustments to my salt and how full I pack my jars to avoid spitting the next time. It doesn't hurt anything when it does happen. I simply use it as a salt gauge for my own taste preferences.
Sign me up now
for a 25% off coupon
ithacasoap.com
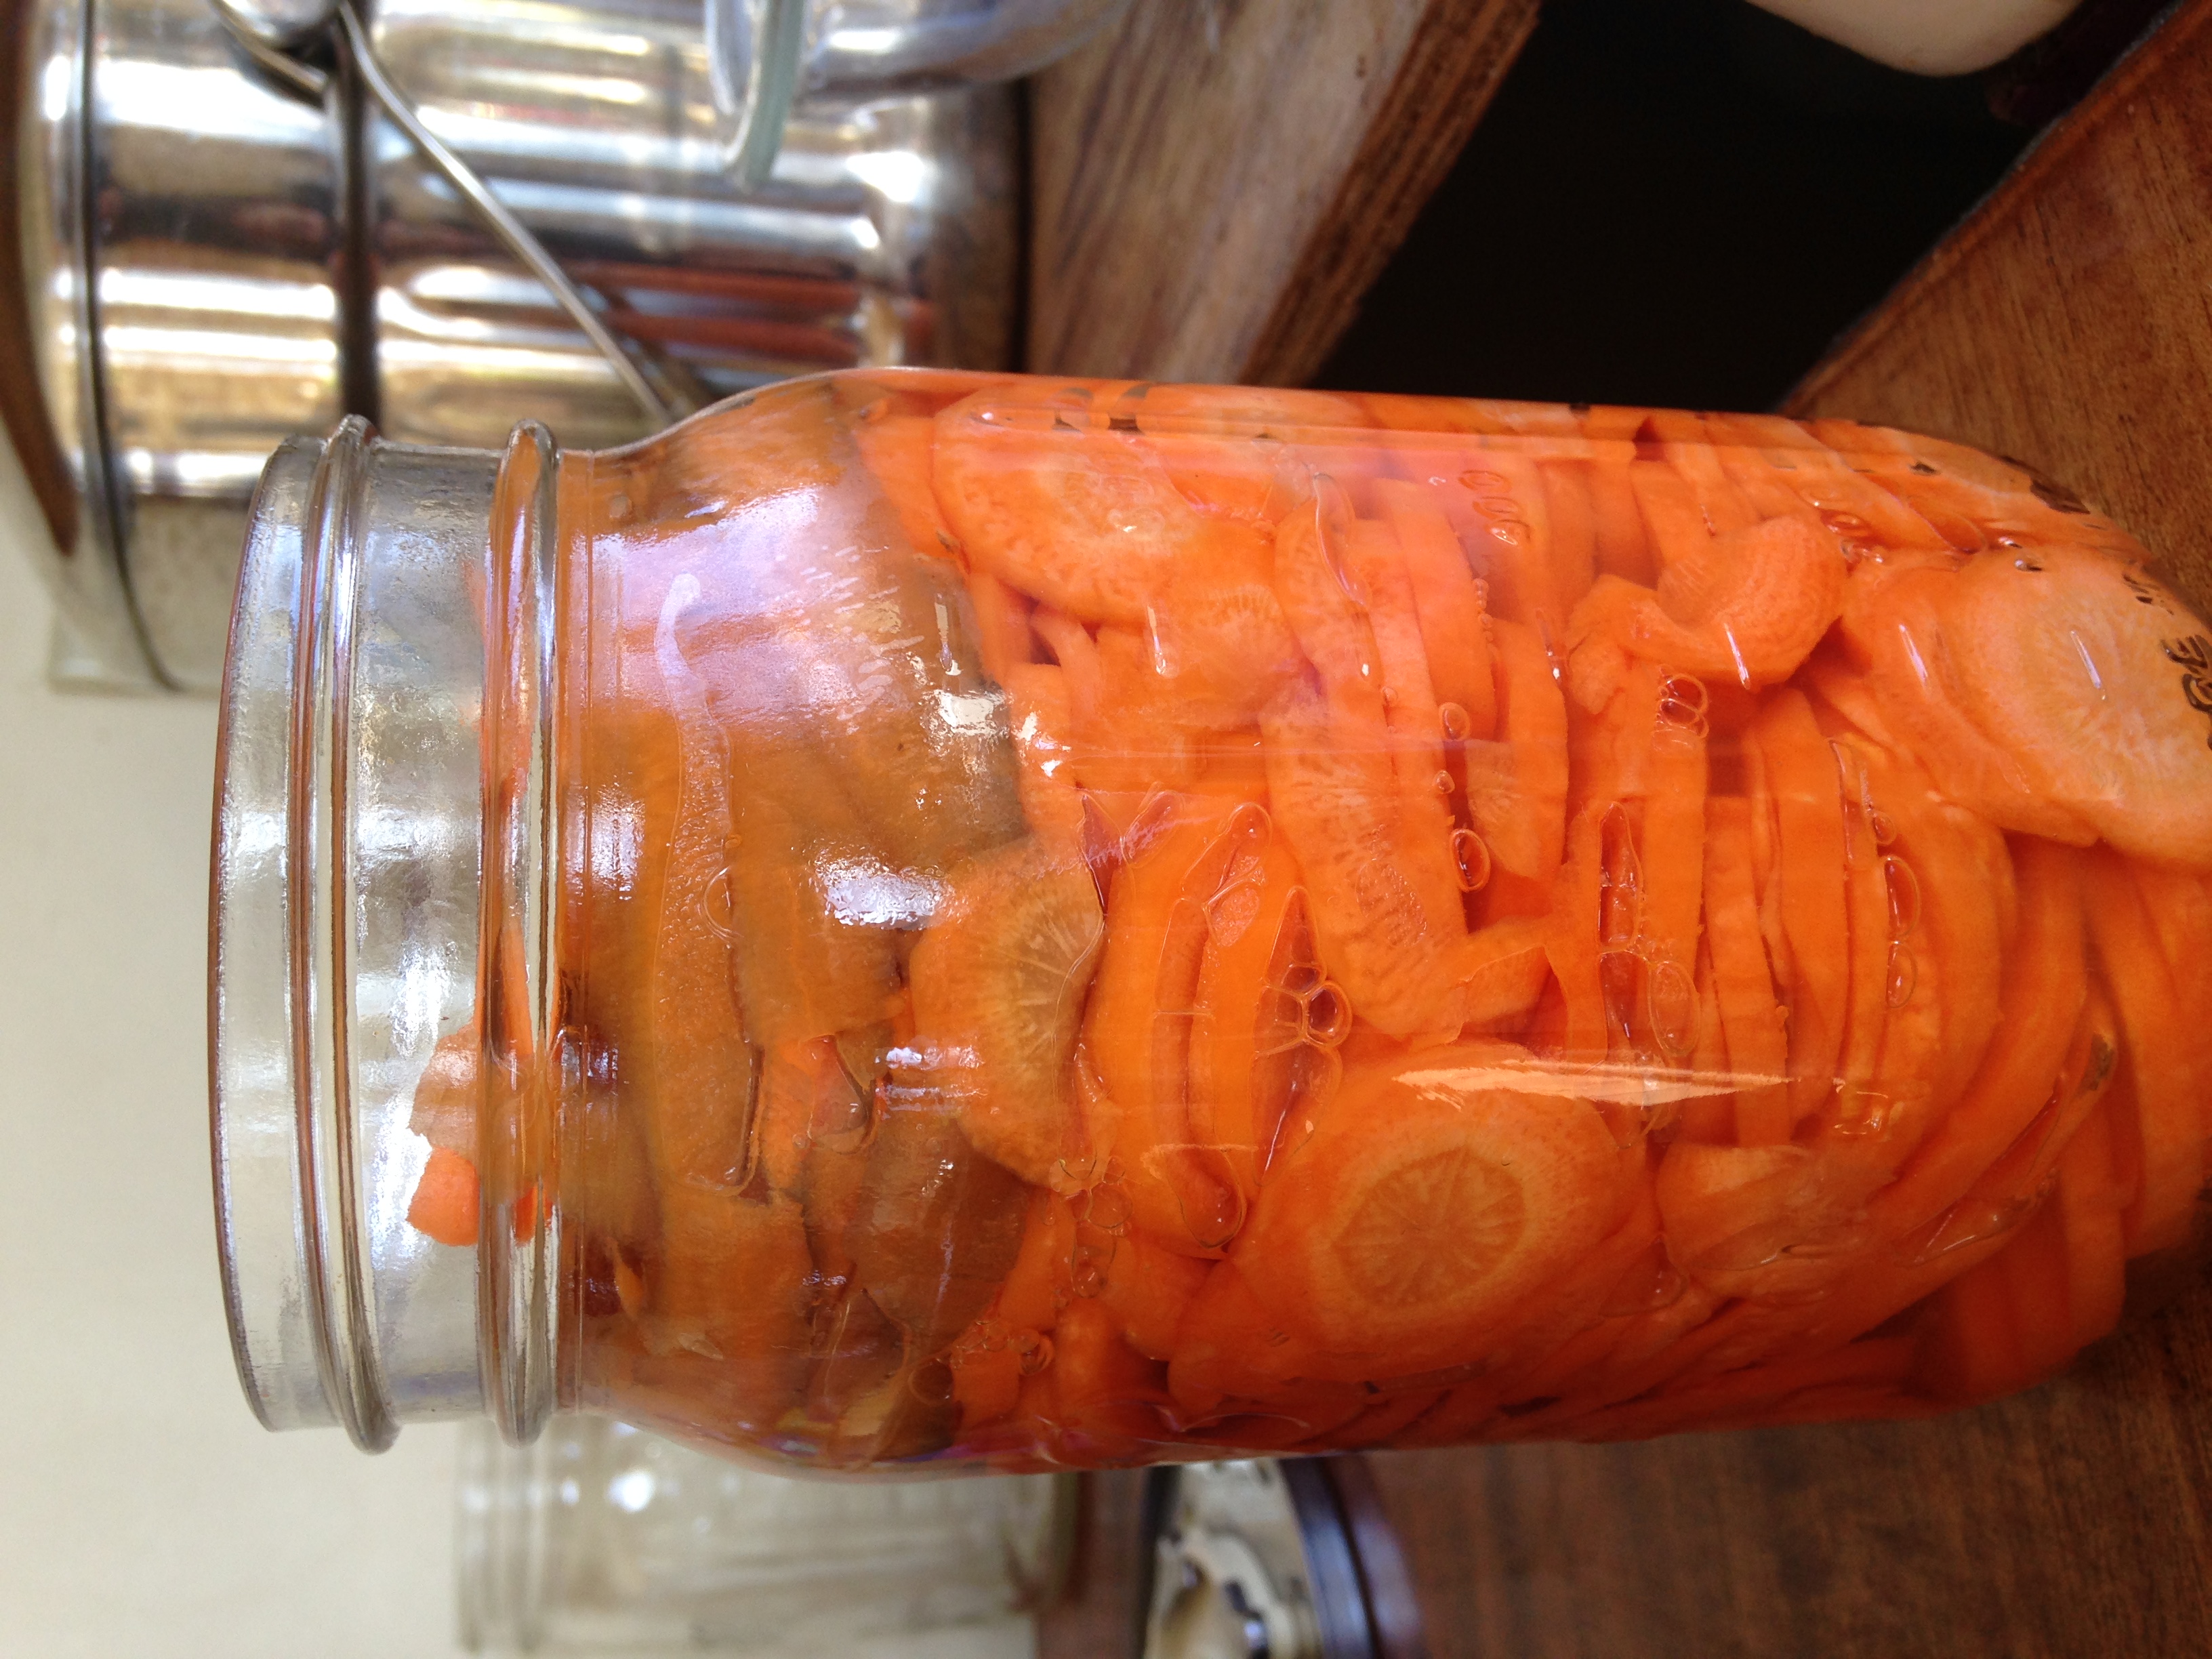
Fermented Carrots
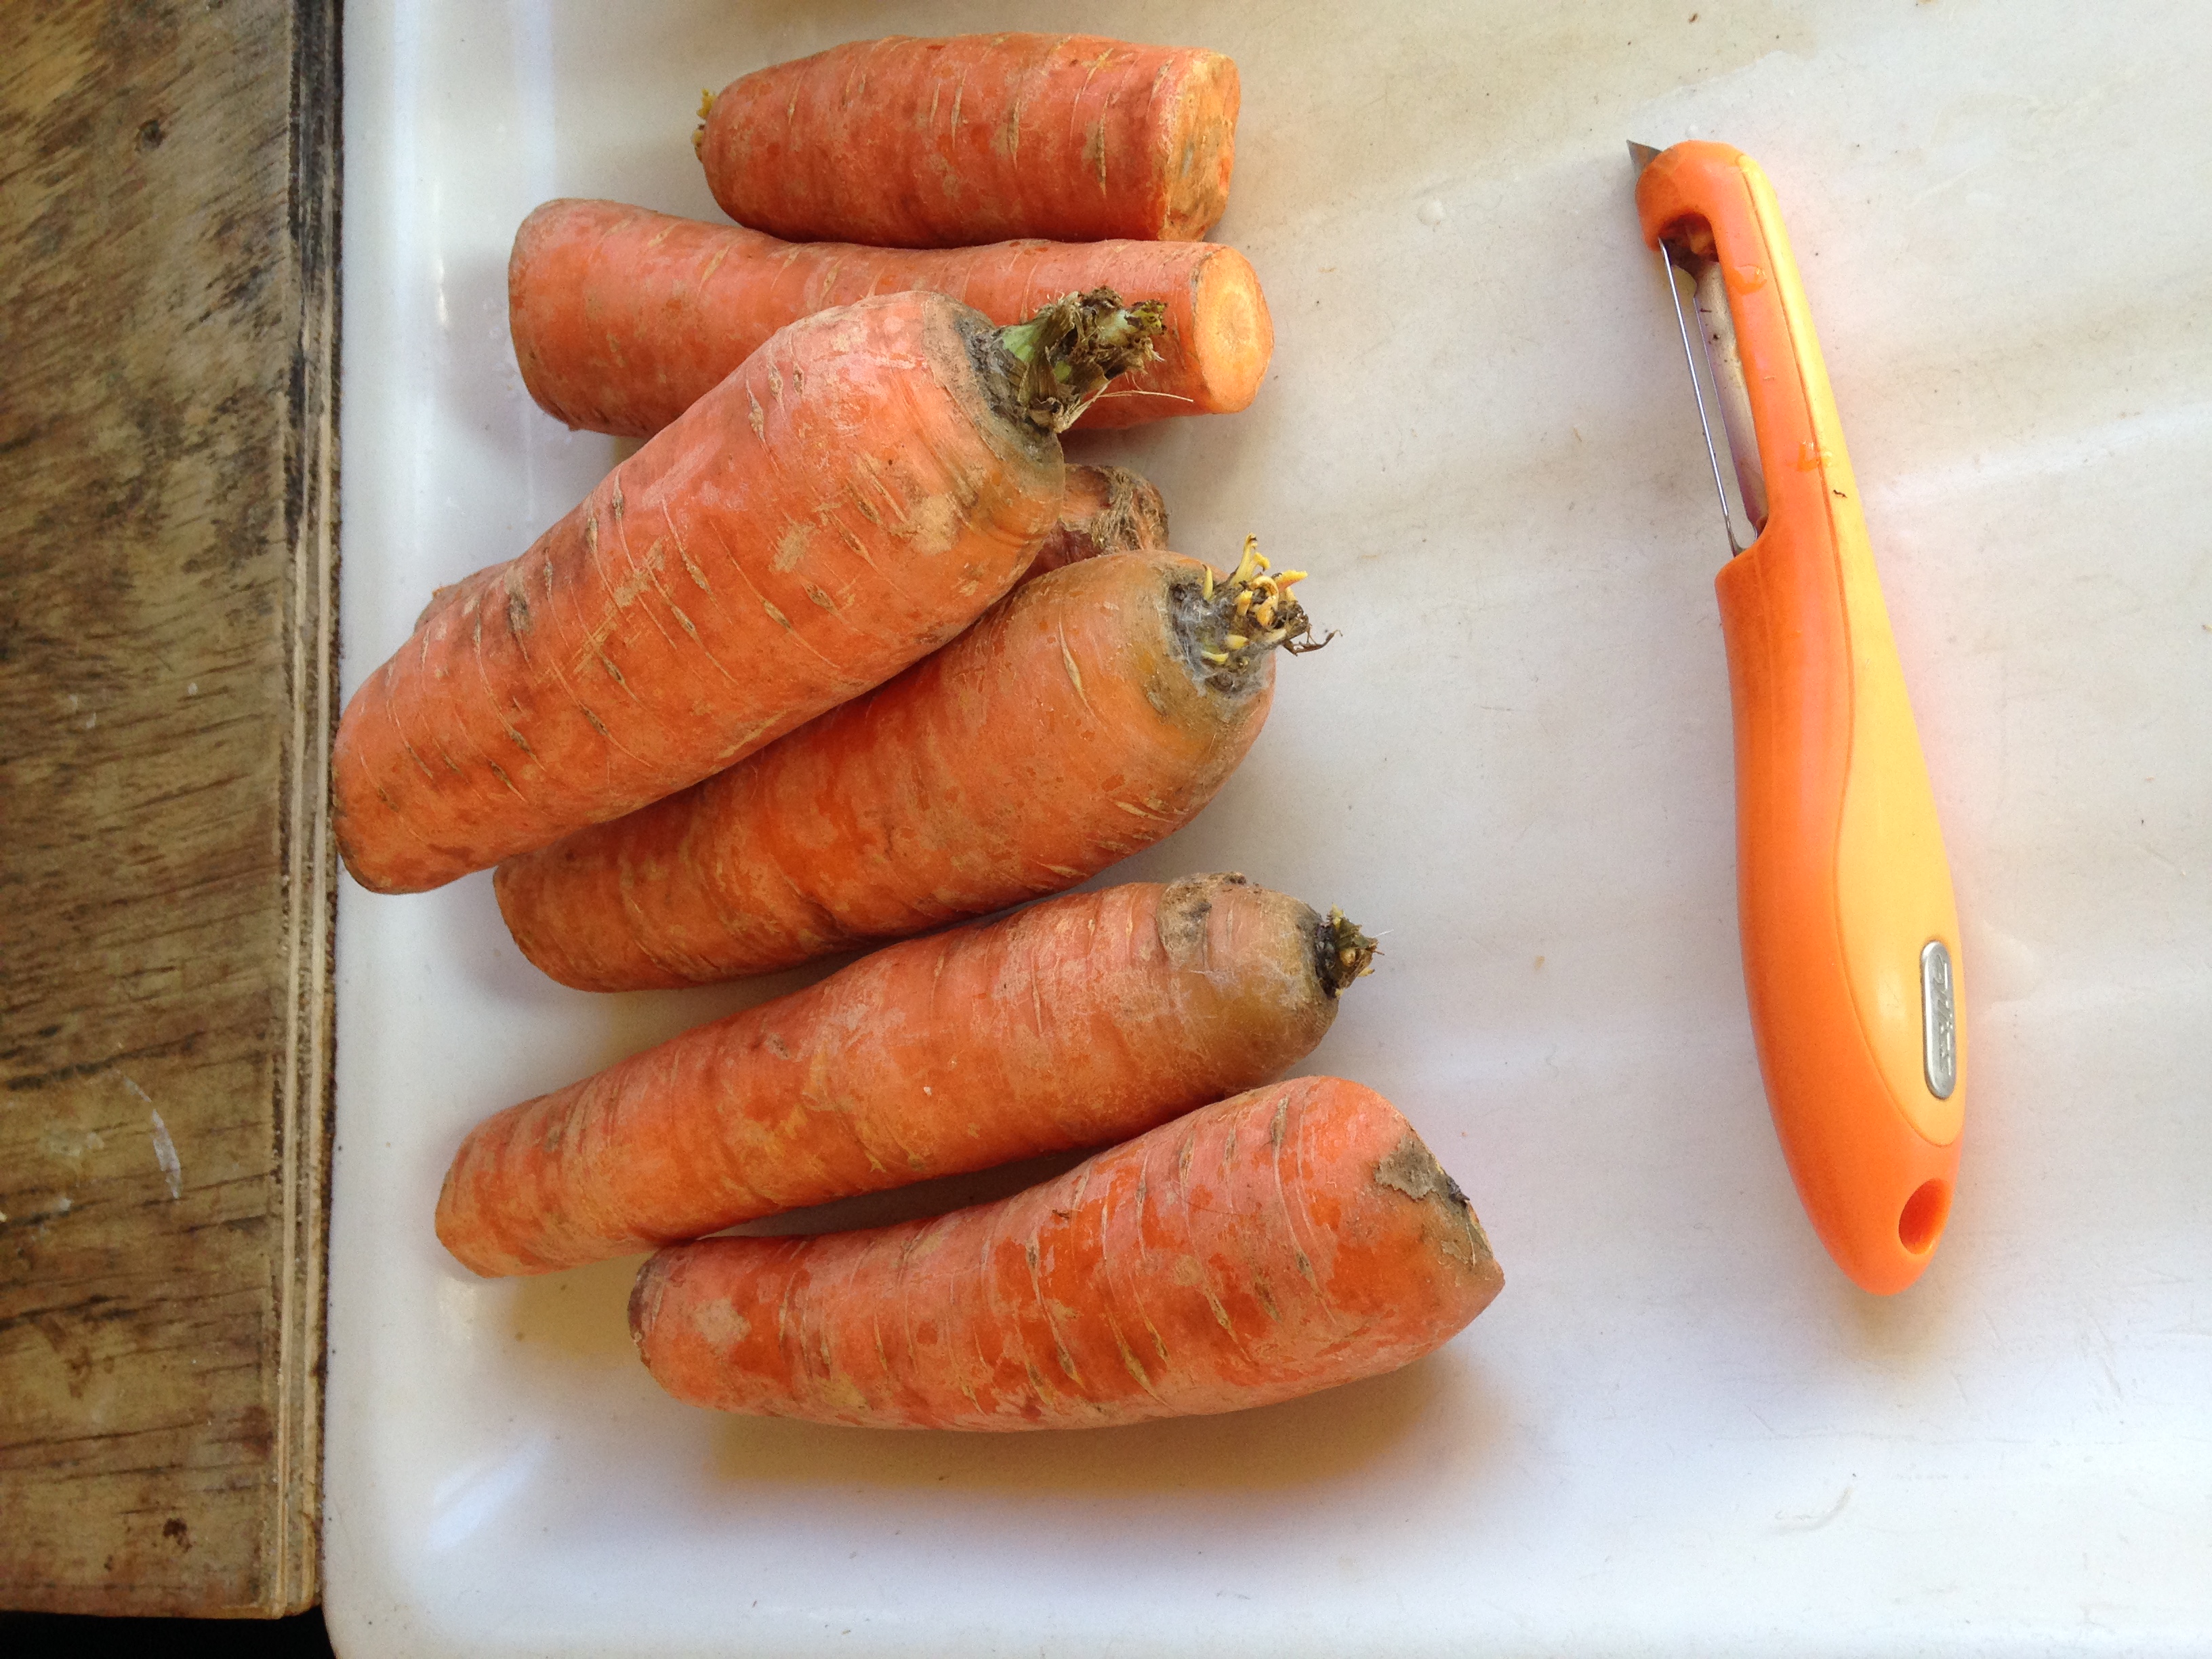
Fermented carrots are delicious. Carrot sweet, pickle sour, and crunchy. Even the ugly utility carrots used for making juice, make beautiful, bright glowing orange sour pickles. I like to eat these with roulade sauce or simply oil and vinegar dressing.
The directions are the same as making any other fermented vegetables, with some slight variations.
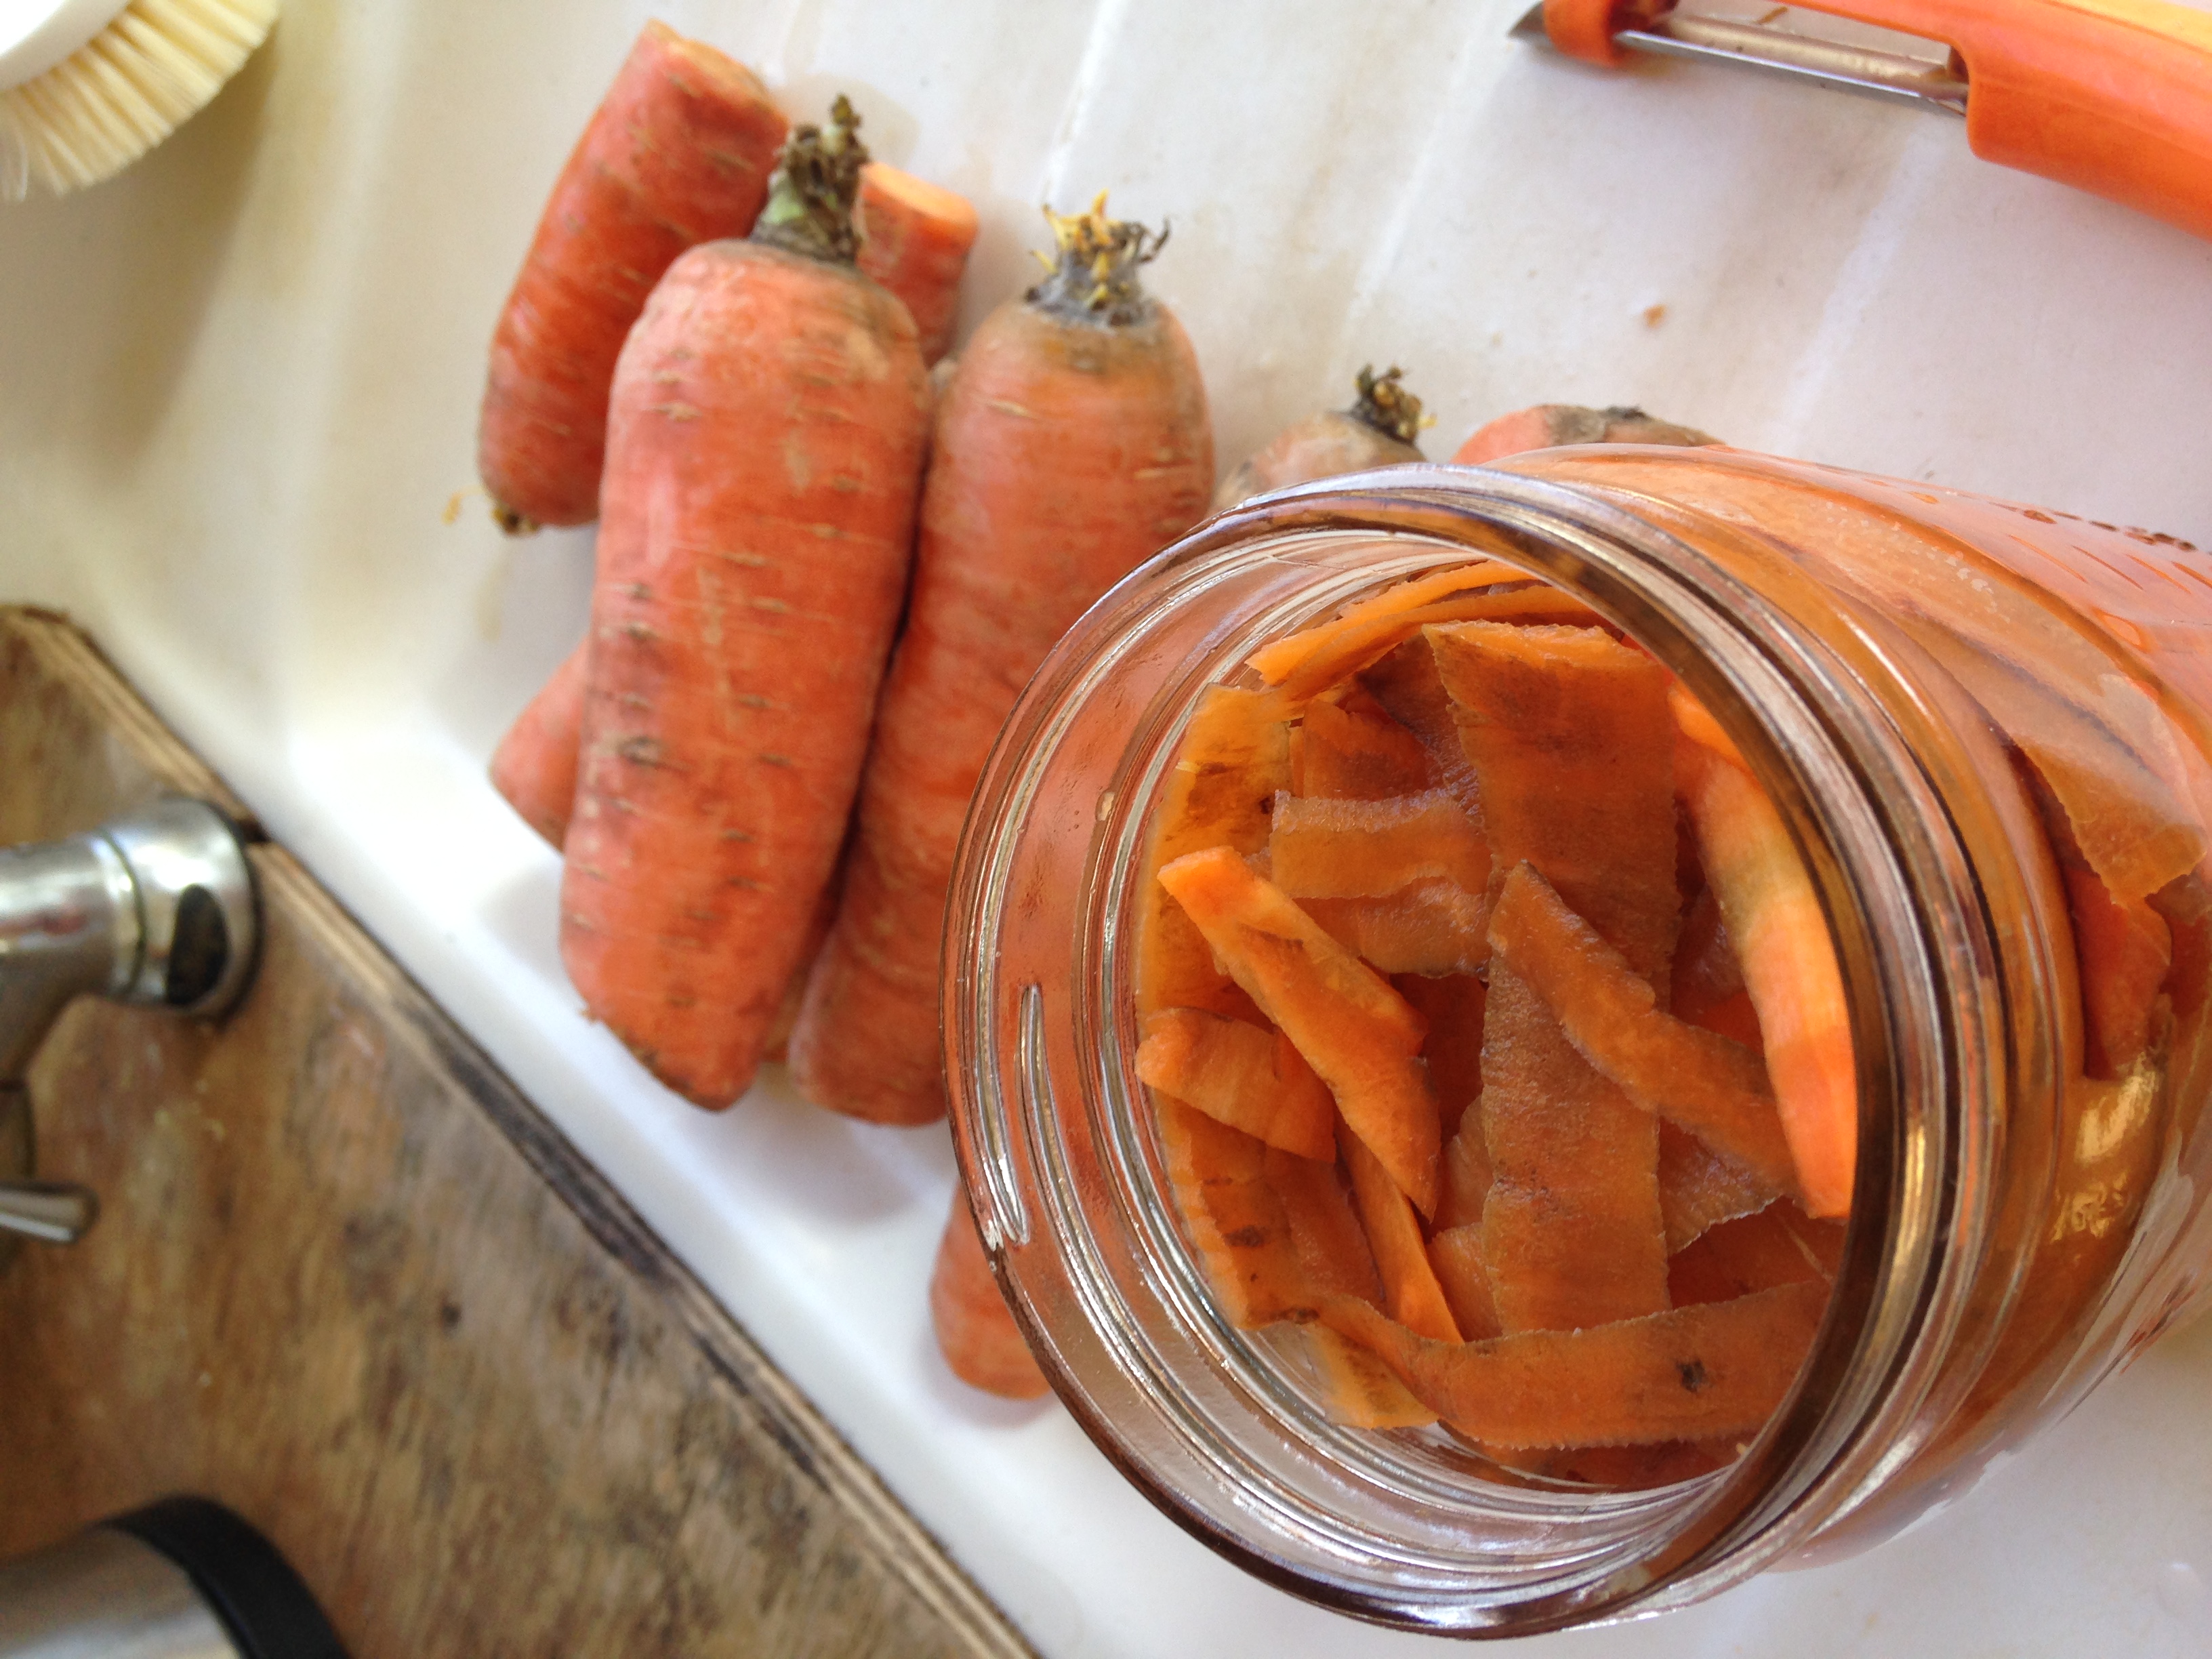
- Peel the carrots. For 2 wide mouth quart jars, I will use 6-8 large carrots.
- Wash the peelings to use as your weights. Soak in drinking water, with a squirt or 2 of Liquid Soap Refill.
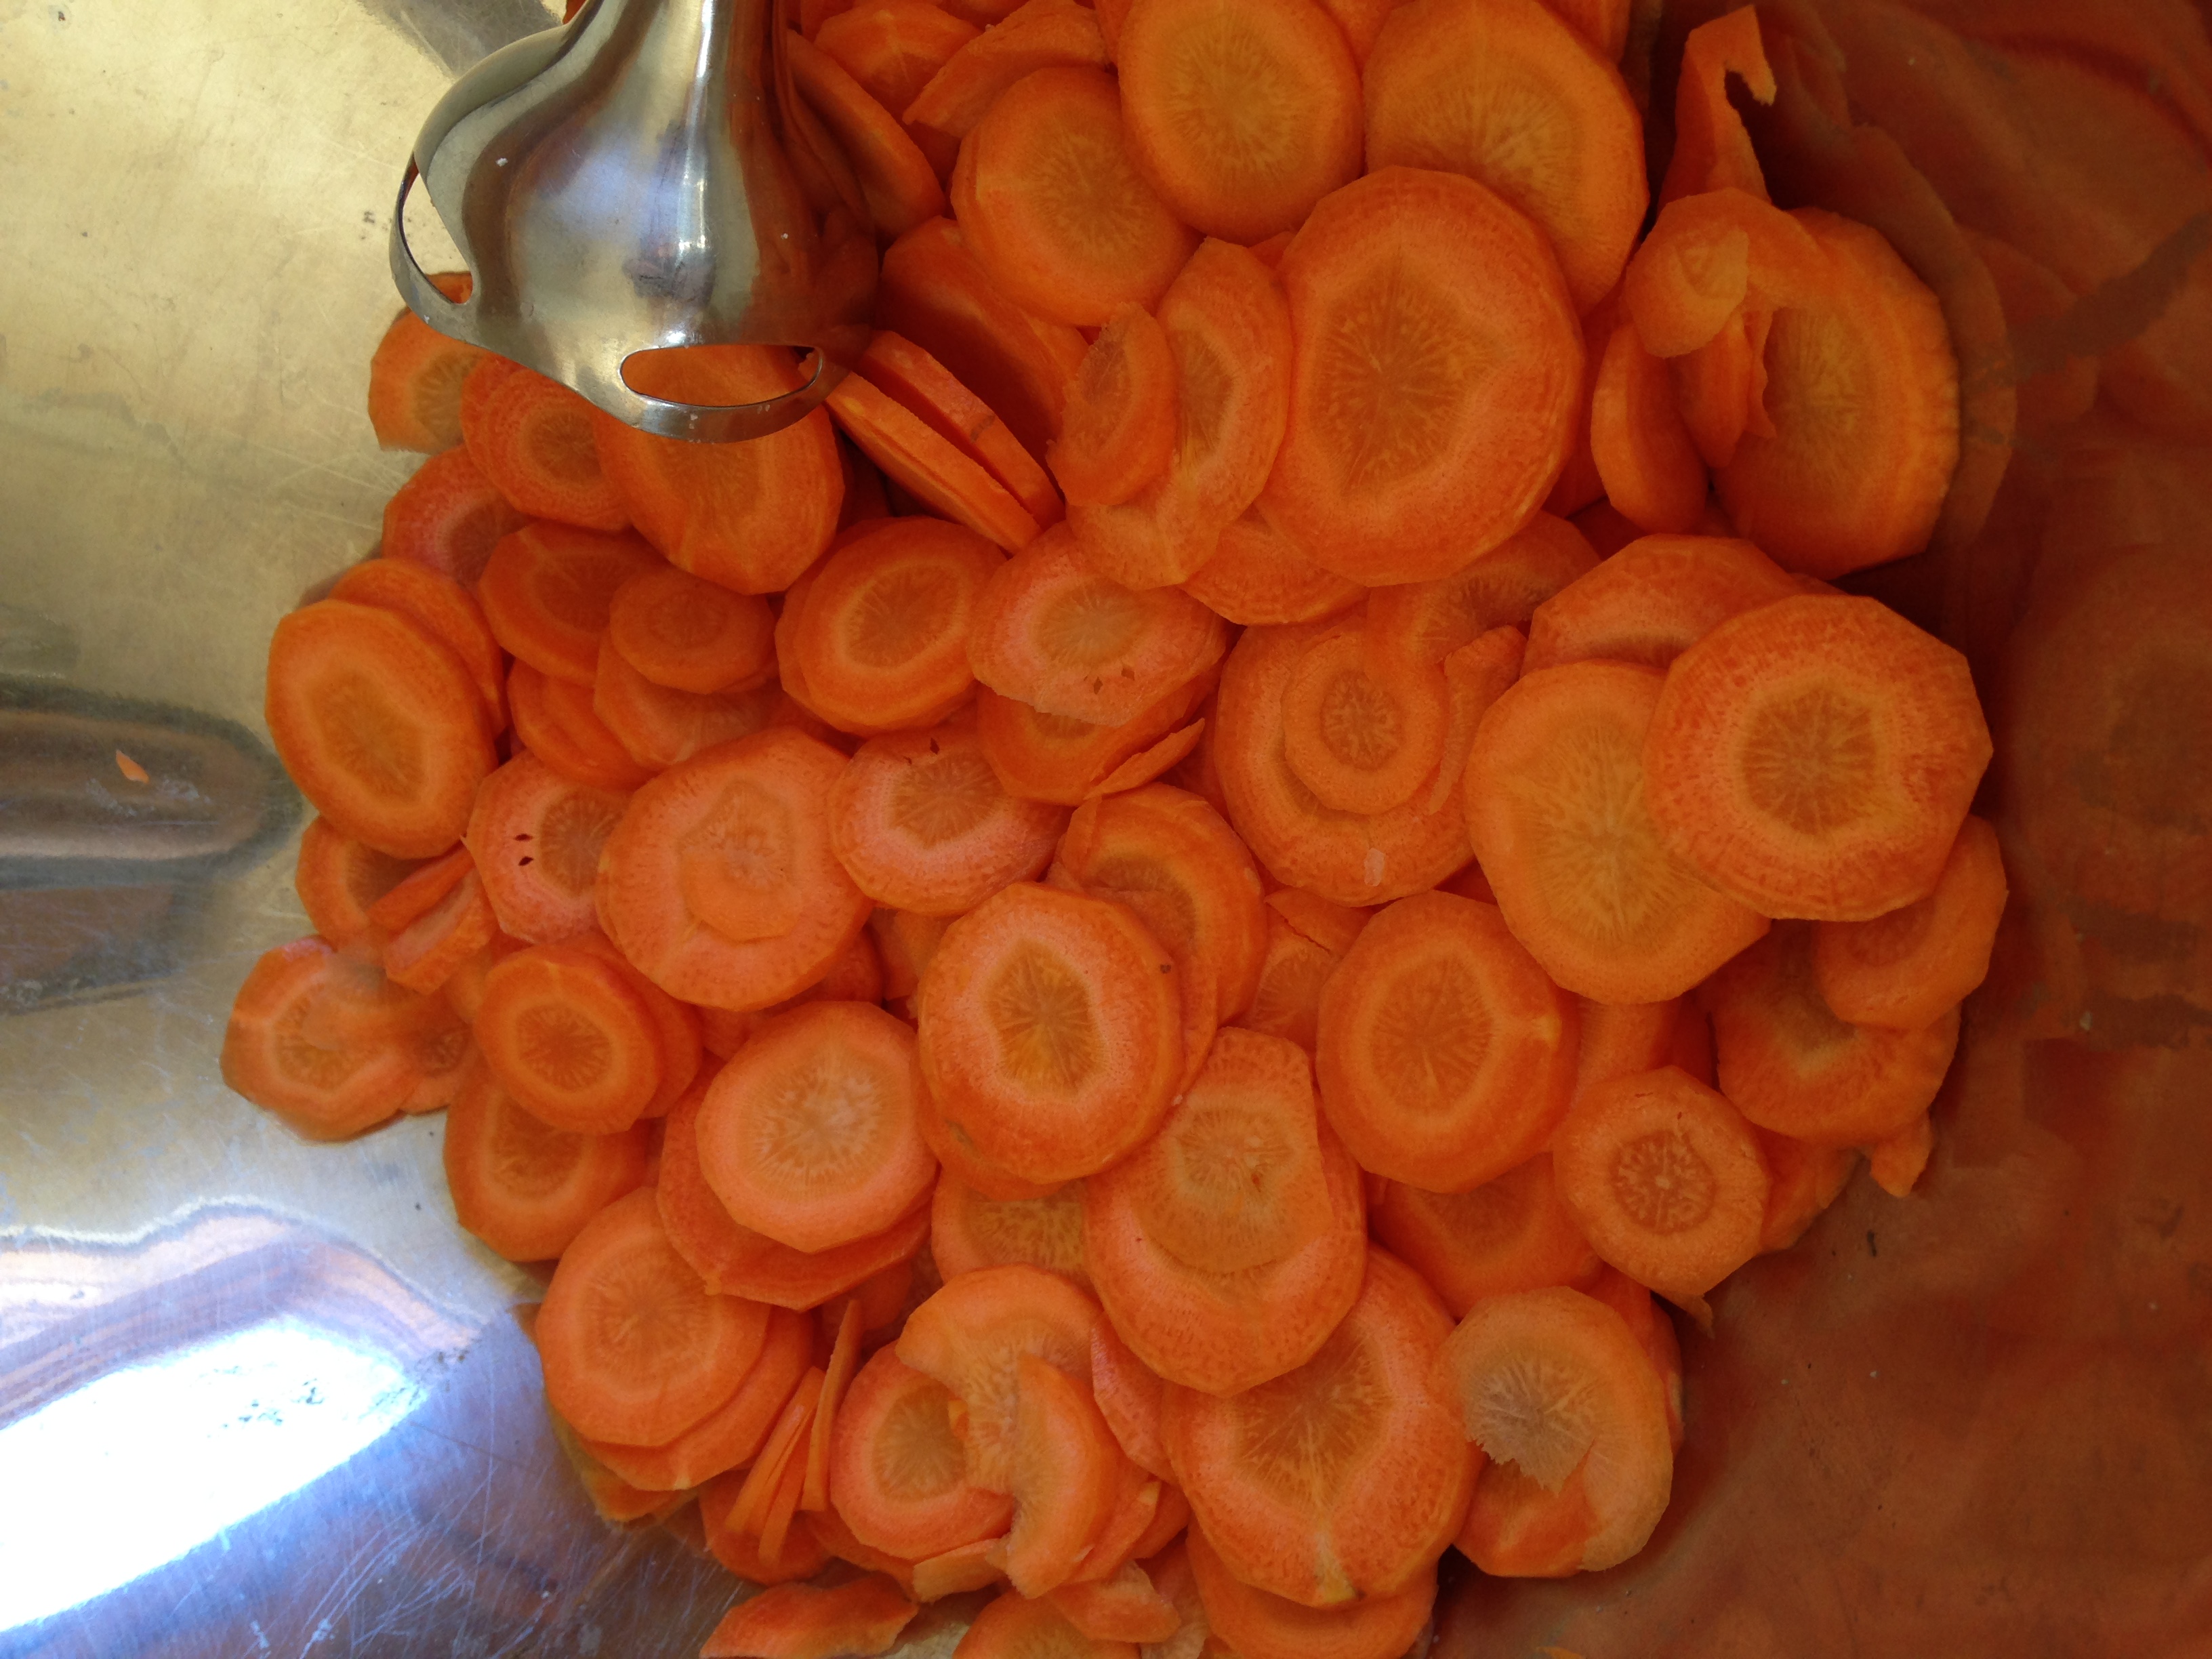
- Slice. I use my food processor.
- Place in a big bowl and sprinkle about 2-3 teaspoons of salt on top. Mix and bruise the carrots. This will make them sweat.
- Pack into jars, tamping down as you go, but not as hard as you would for celeriac or sauerkraut. Fill up to 2" below the neckline.
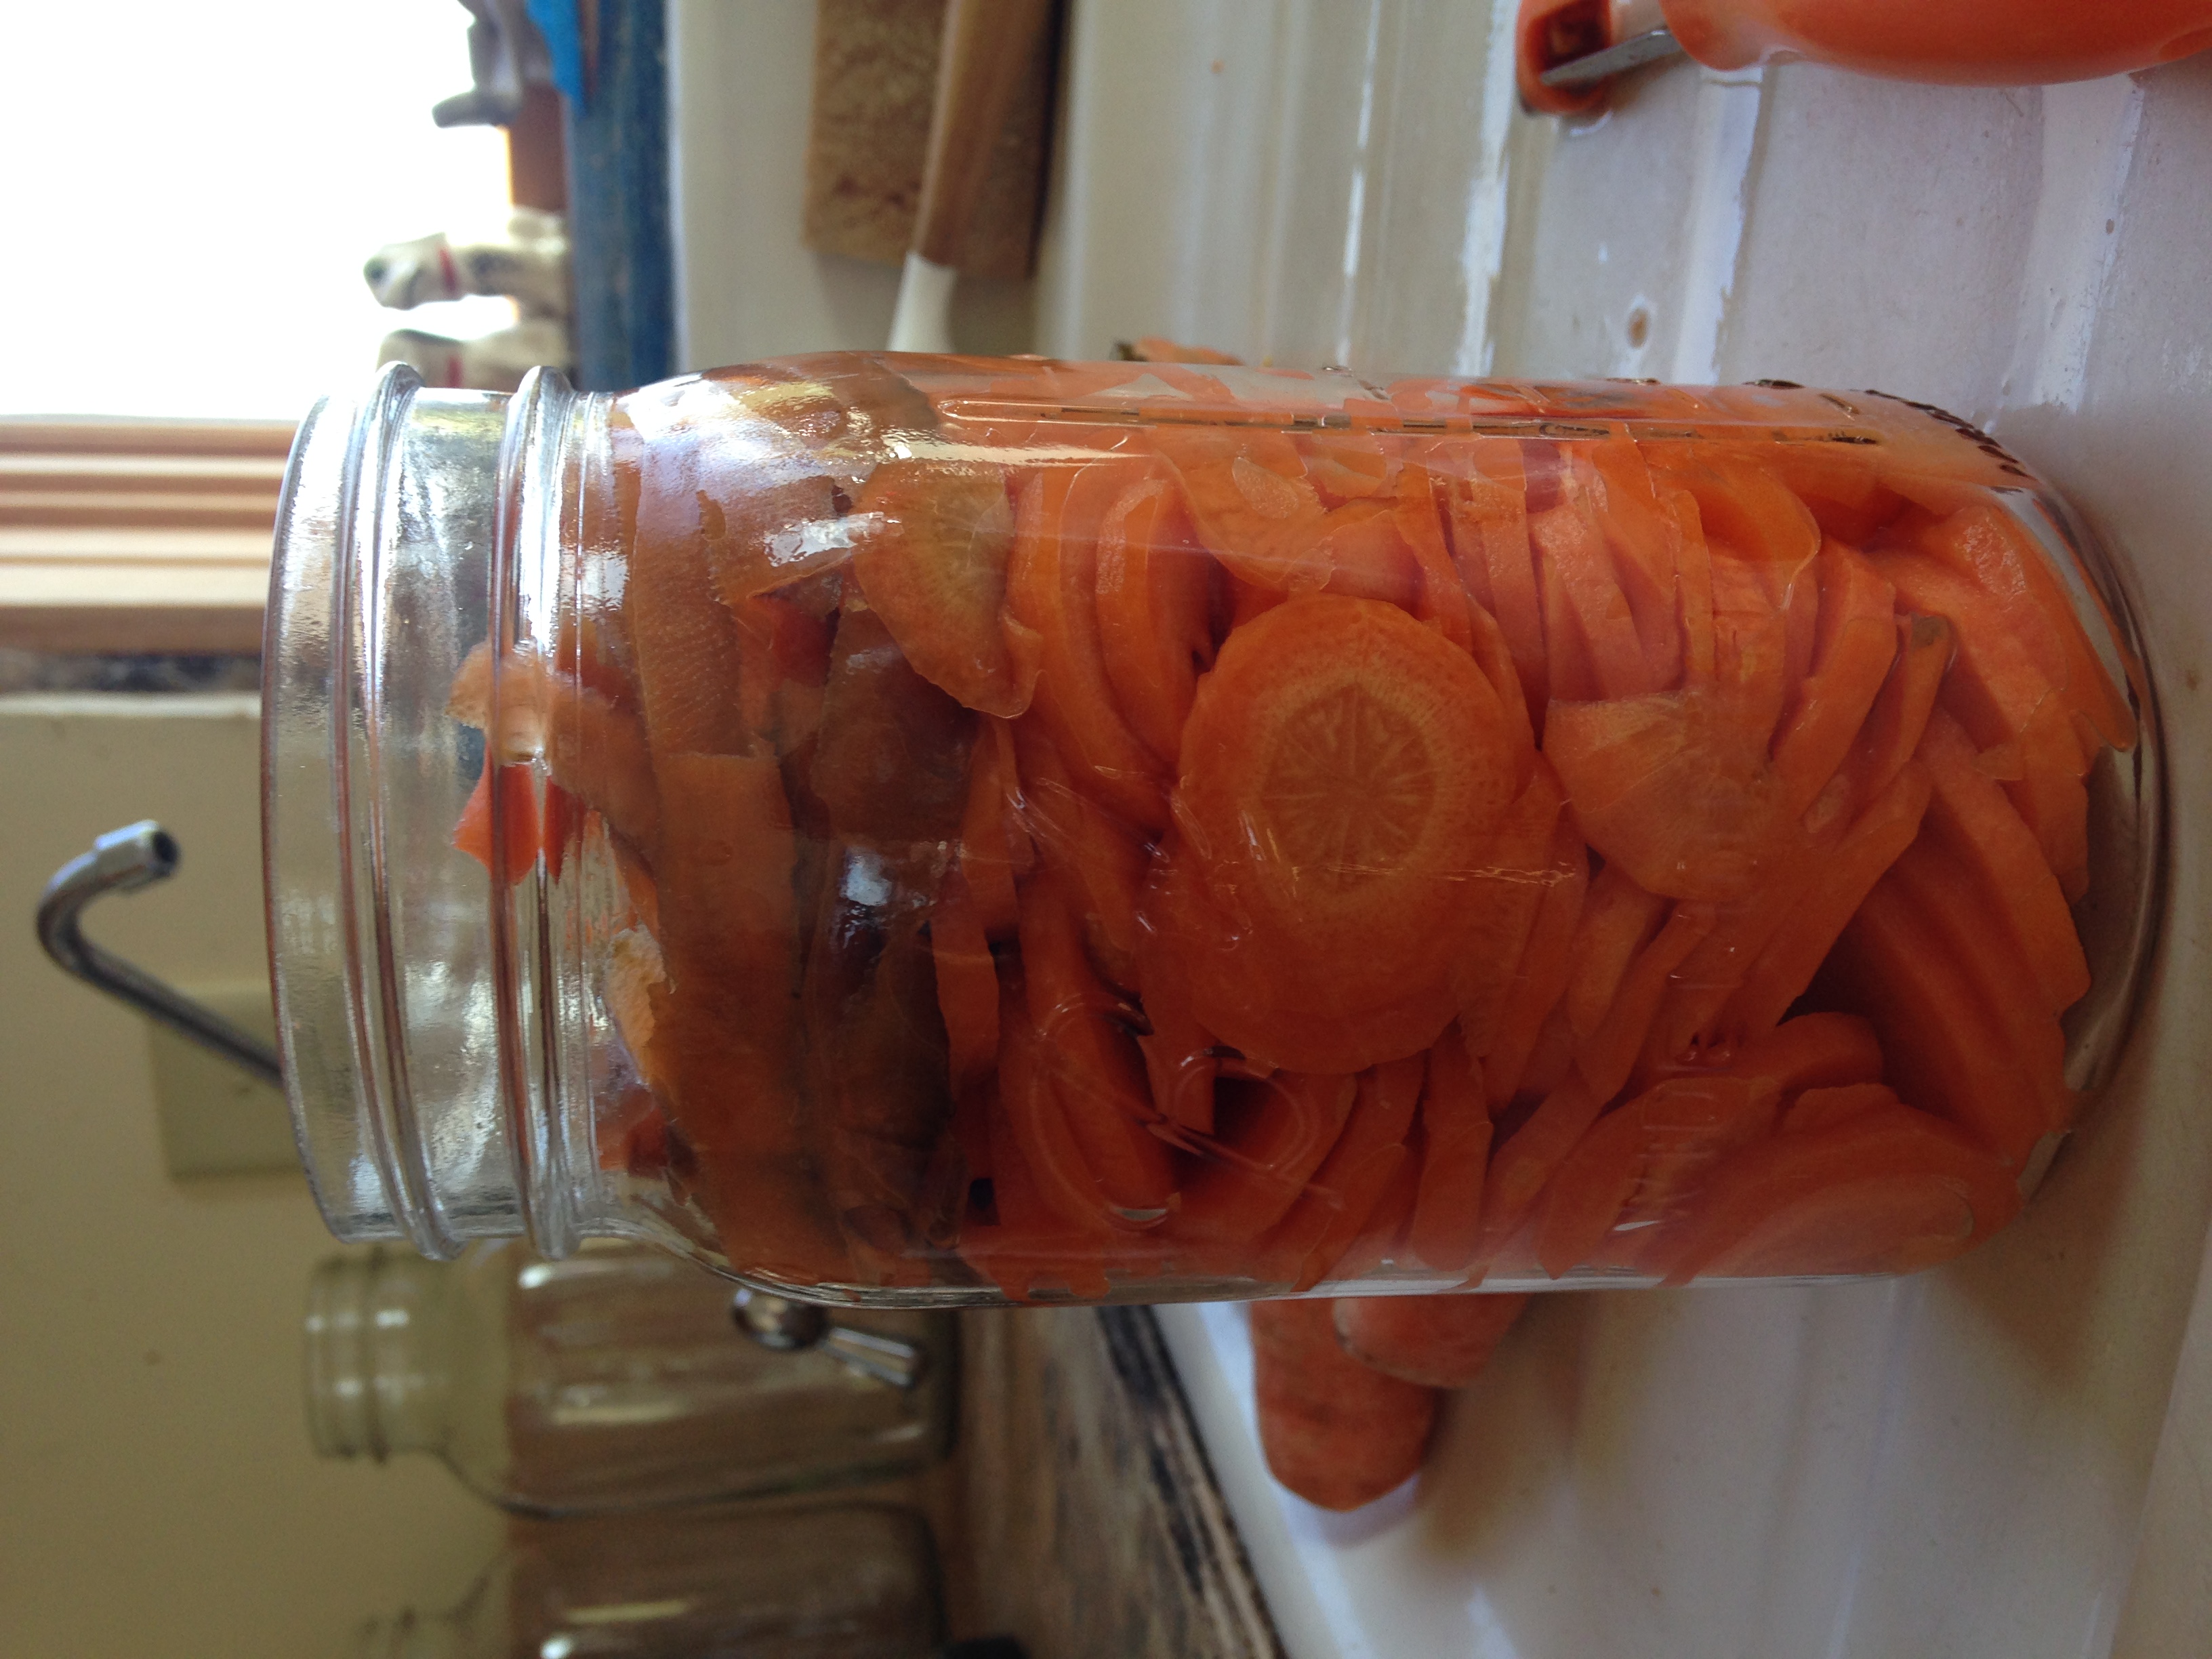
- Rinse the carrot peels a few times to make sure they are free of soap. Place on top, tamp down and fill in the jar edges, to make sure any carrot slices will be covered.
Wipe the jar edge with a clean sponge or dish towel. Place your pickle pipe, being careful to center it and secure it with your jar ring.
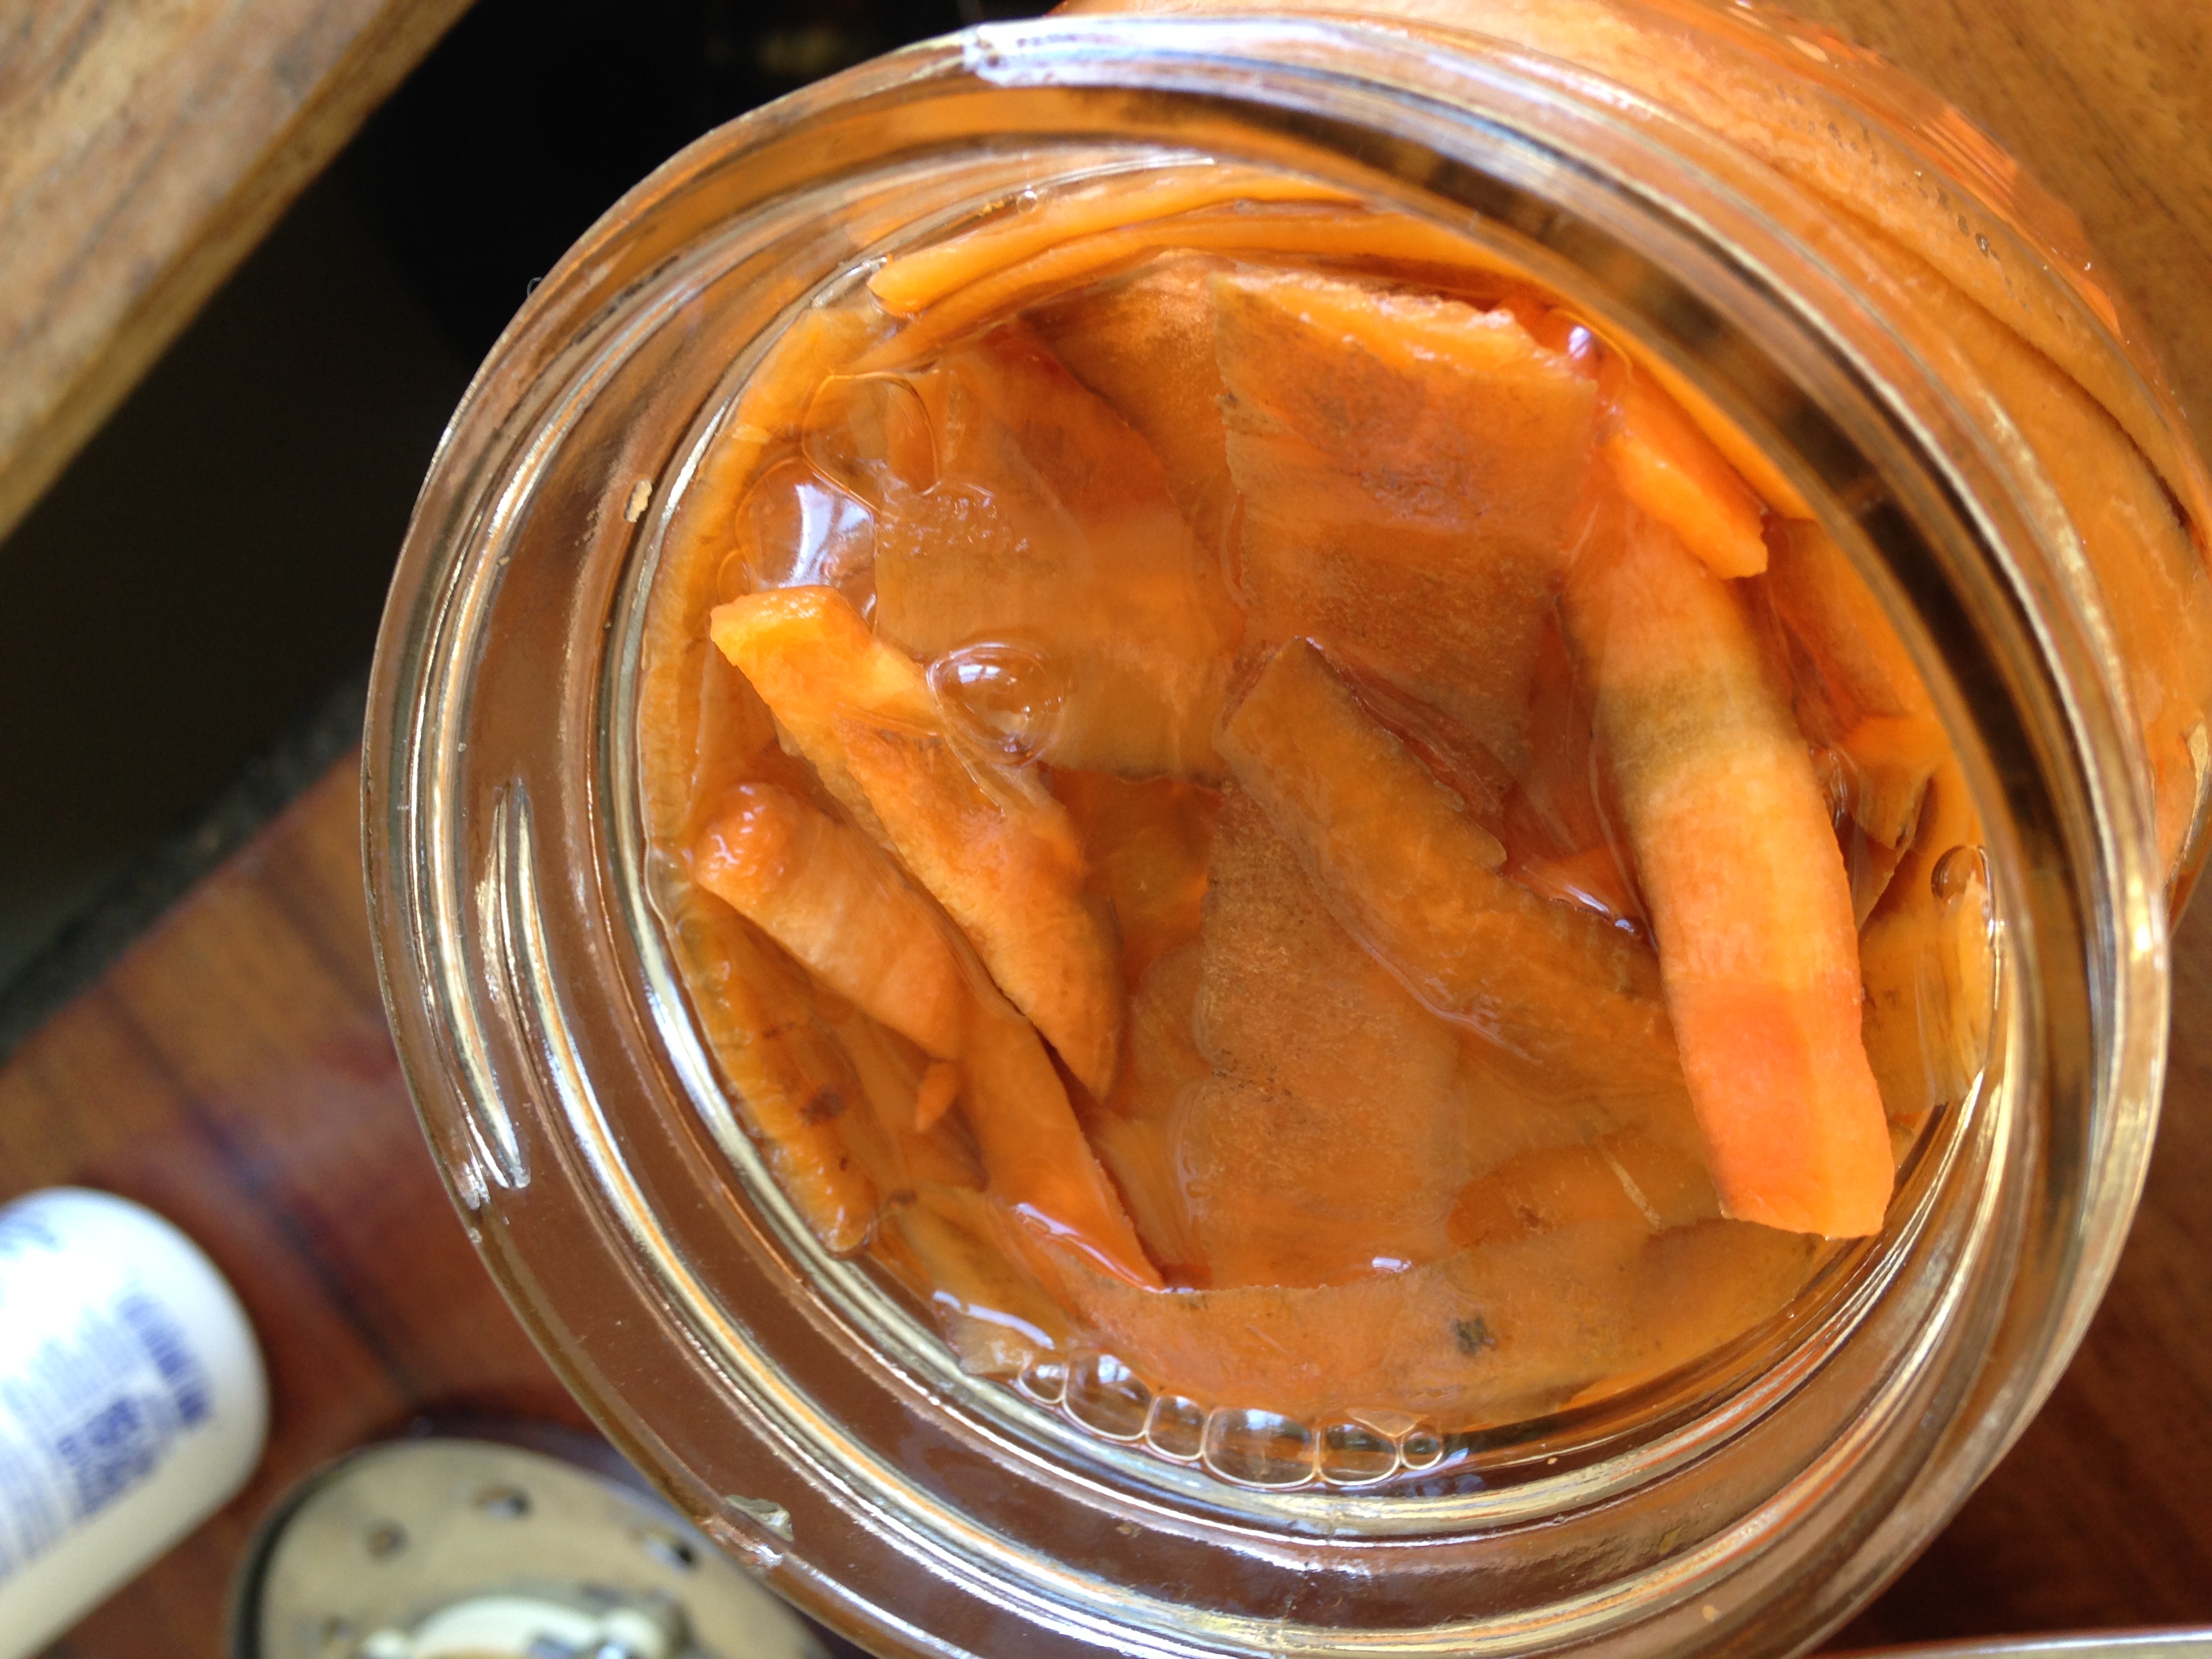
I have opened the carrots after 3 days and they are perfect. I leave them in the brine and put them in the fridge with a canning jar lid disc only. No ring.
Sometimes, I'm busy, and don't get to opening the carrots for a week or more. The brine gets a little slimy, likely from the natural carrot sugars. They are too sour for me to leave them in the brine, although some of you may like them extra sour.
I remove my peel weights and compost them. Then I empty the jar into a big mixing bowl and rinse the carrots a few times. Make sure to stir the carrot slices, to separate them, so they are well rinsed. Then I loosely pack them in a clean jar and fill with clean drinking water. Cover with a jar lid disc and refrigerate. They are delicious, crunchy and will last for weeks.
Add onions
Adding onions to your fermented vegetables will change the taste. For example, fermented carrots are sweet and sour. Oddly enough, adding onions cuts the sweetness, making the carrots more tangy.
Experiment freely, keeping to the same guidelines for sanitation, with mixing in spices, herbs, onions, garlic, or whatever your palate desires.
Storage notes
Theoretically, fermented vegetable pickles should last in your refrigerator for between 6-18 months. That's a long time. Mine haven't lasted that long yet. We eat them. But, I make sure that the lids do not get bumped off. check your lids often to make sure they cover the jar opening.
Fermented Mixed Baby Greens
Baby greens are a real treat! Small tender leaves of vegetables that normally grow too big to eat raw. Andy loves them. My father-in-law, Albert used to call Spring greens "Spring tonic". I bought Andy a 10 pound box. The greens were vibrant and fresh.
There was kale, collards, Swiss chard, spinach, mizuna (a Japanese mustard green), bok choi - green and purple, arugula. I separated them into categories:
- what must be eaten fresh now
- too big to eat raw in salad, so it must be cooked
- what to store for a few days to have fresh in 3-5 days.
- Chicken treats
- fermenting weights
- fermented baby greens, kimchee / Korean pickle style
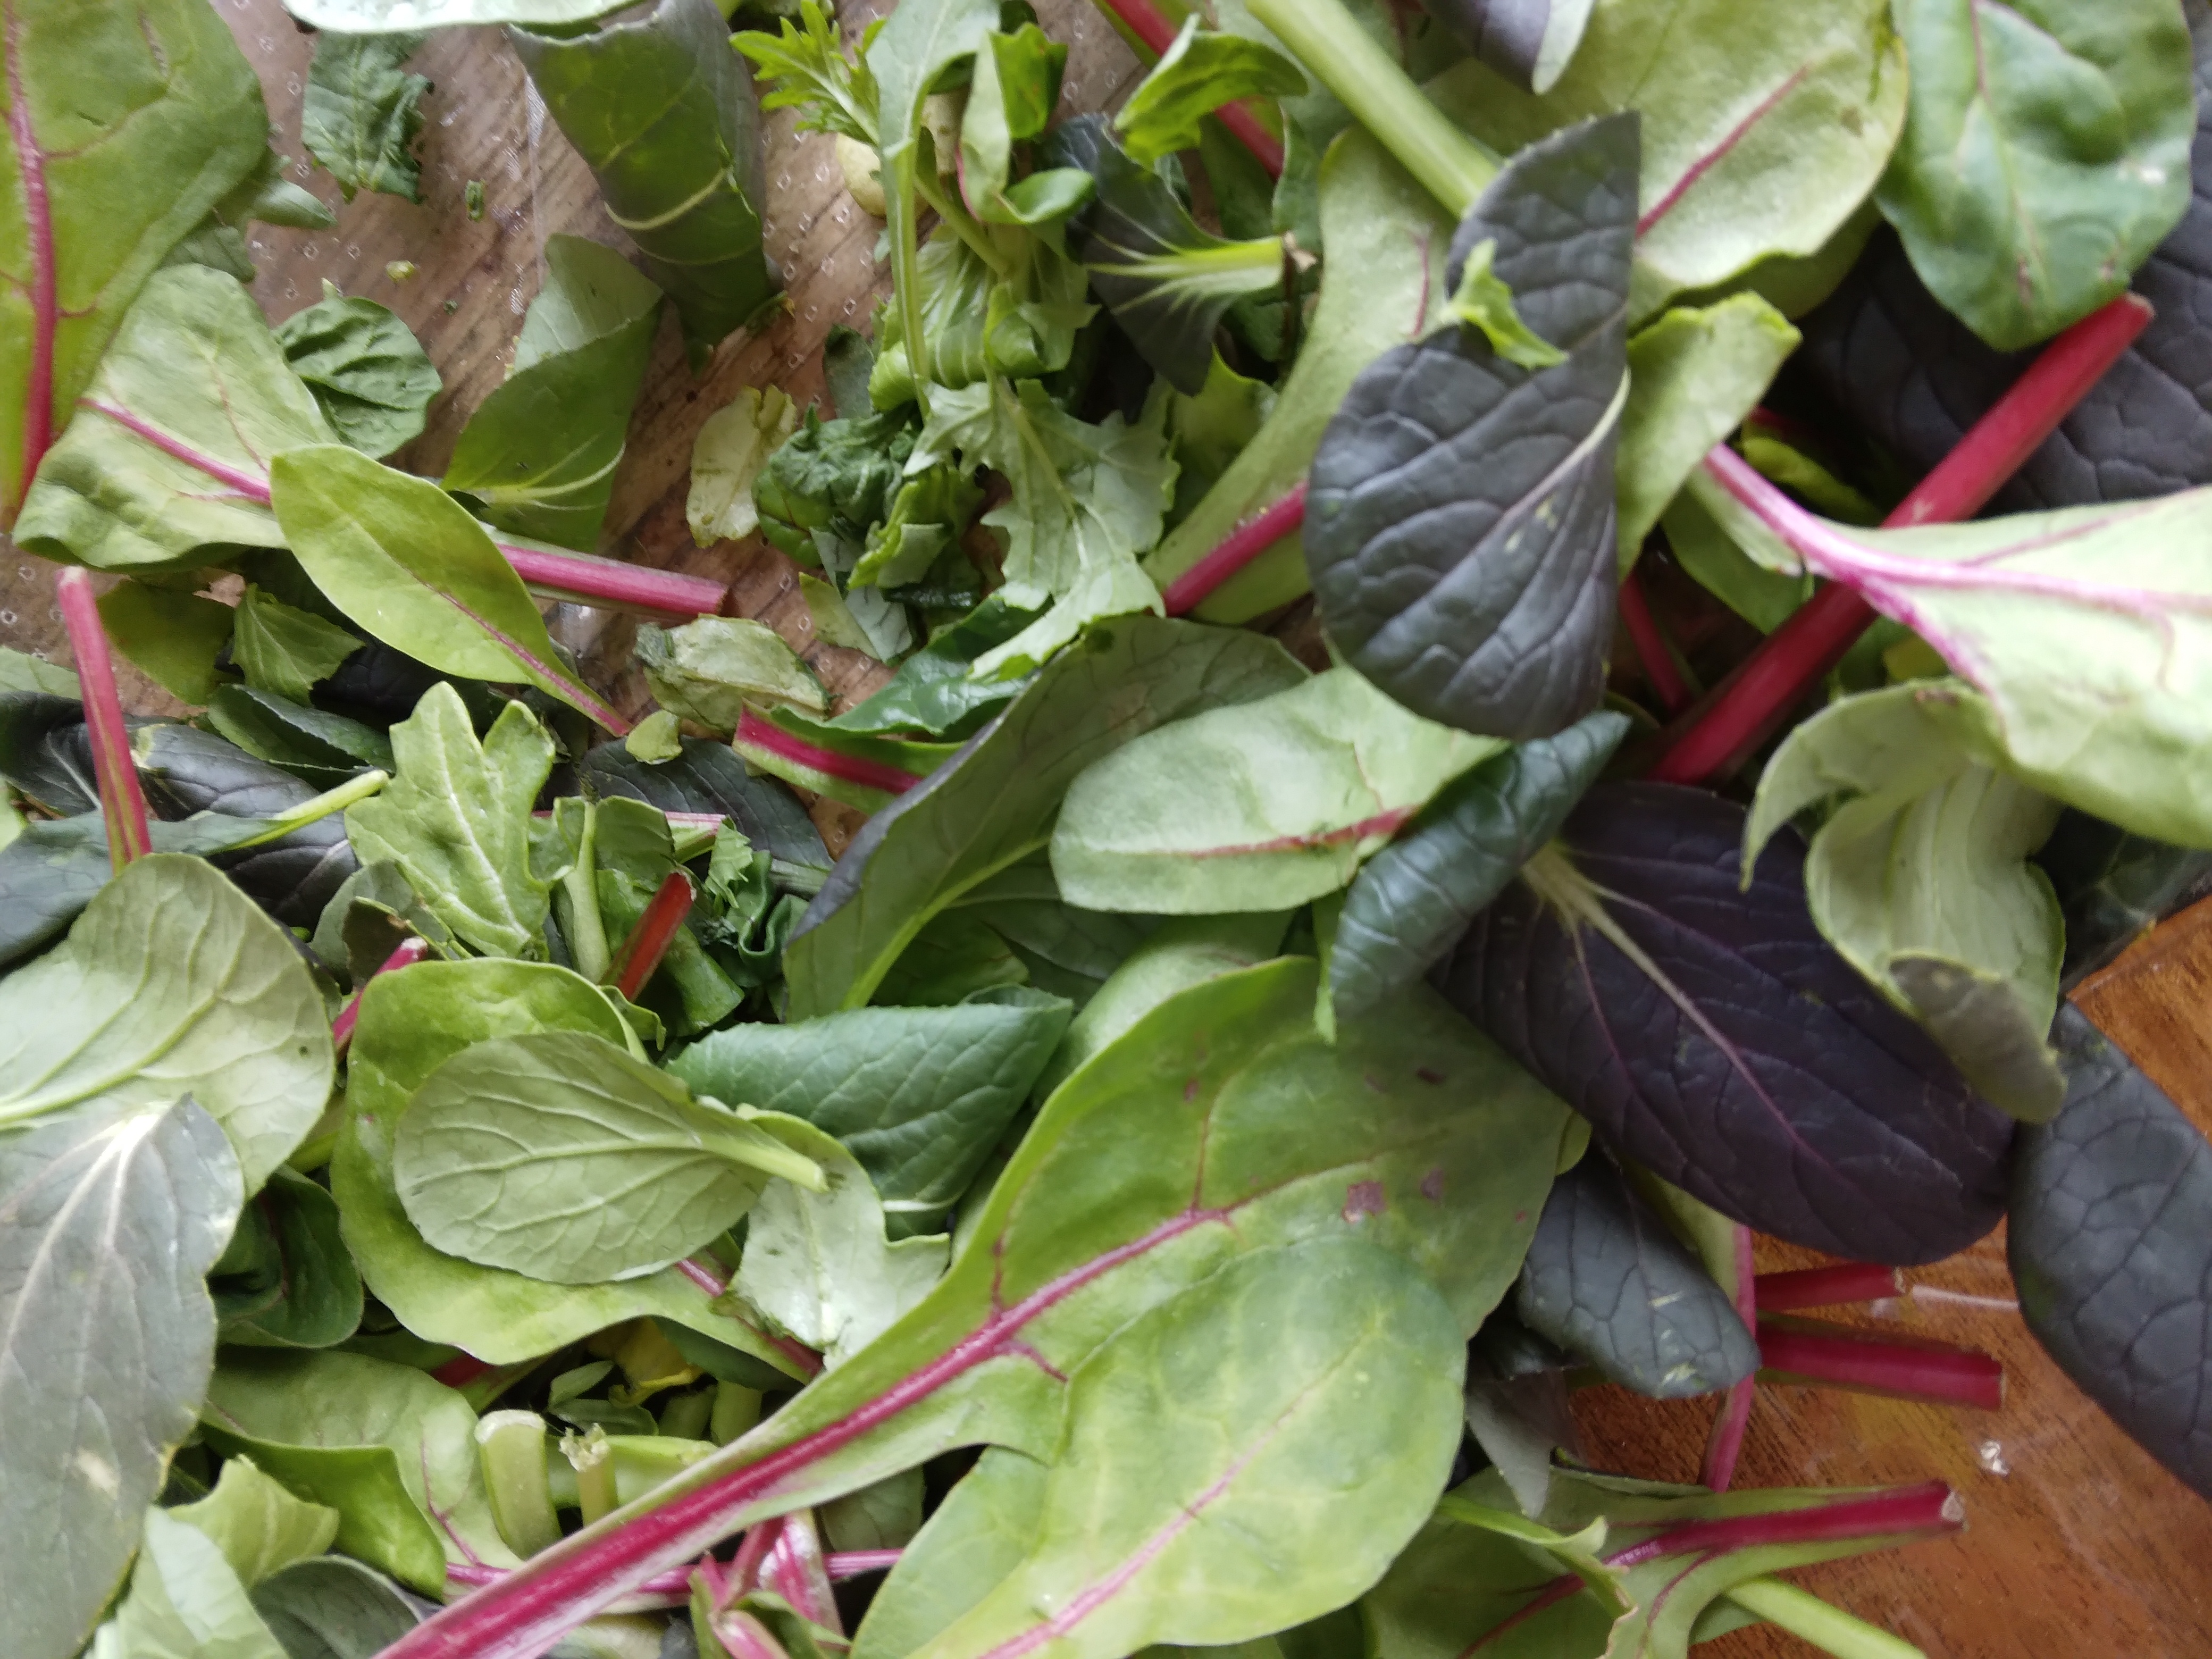 Fresh greens with arugula, spinach Swiss chard, kale, bok choi - green and purple, mizuna
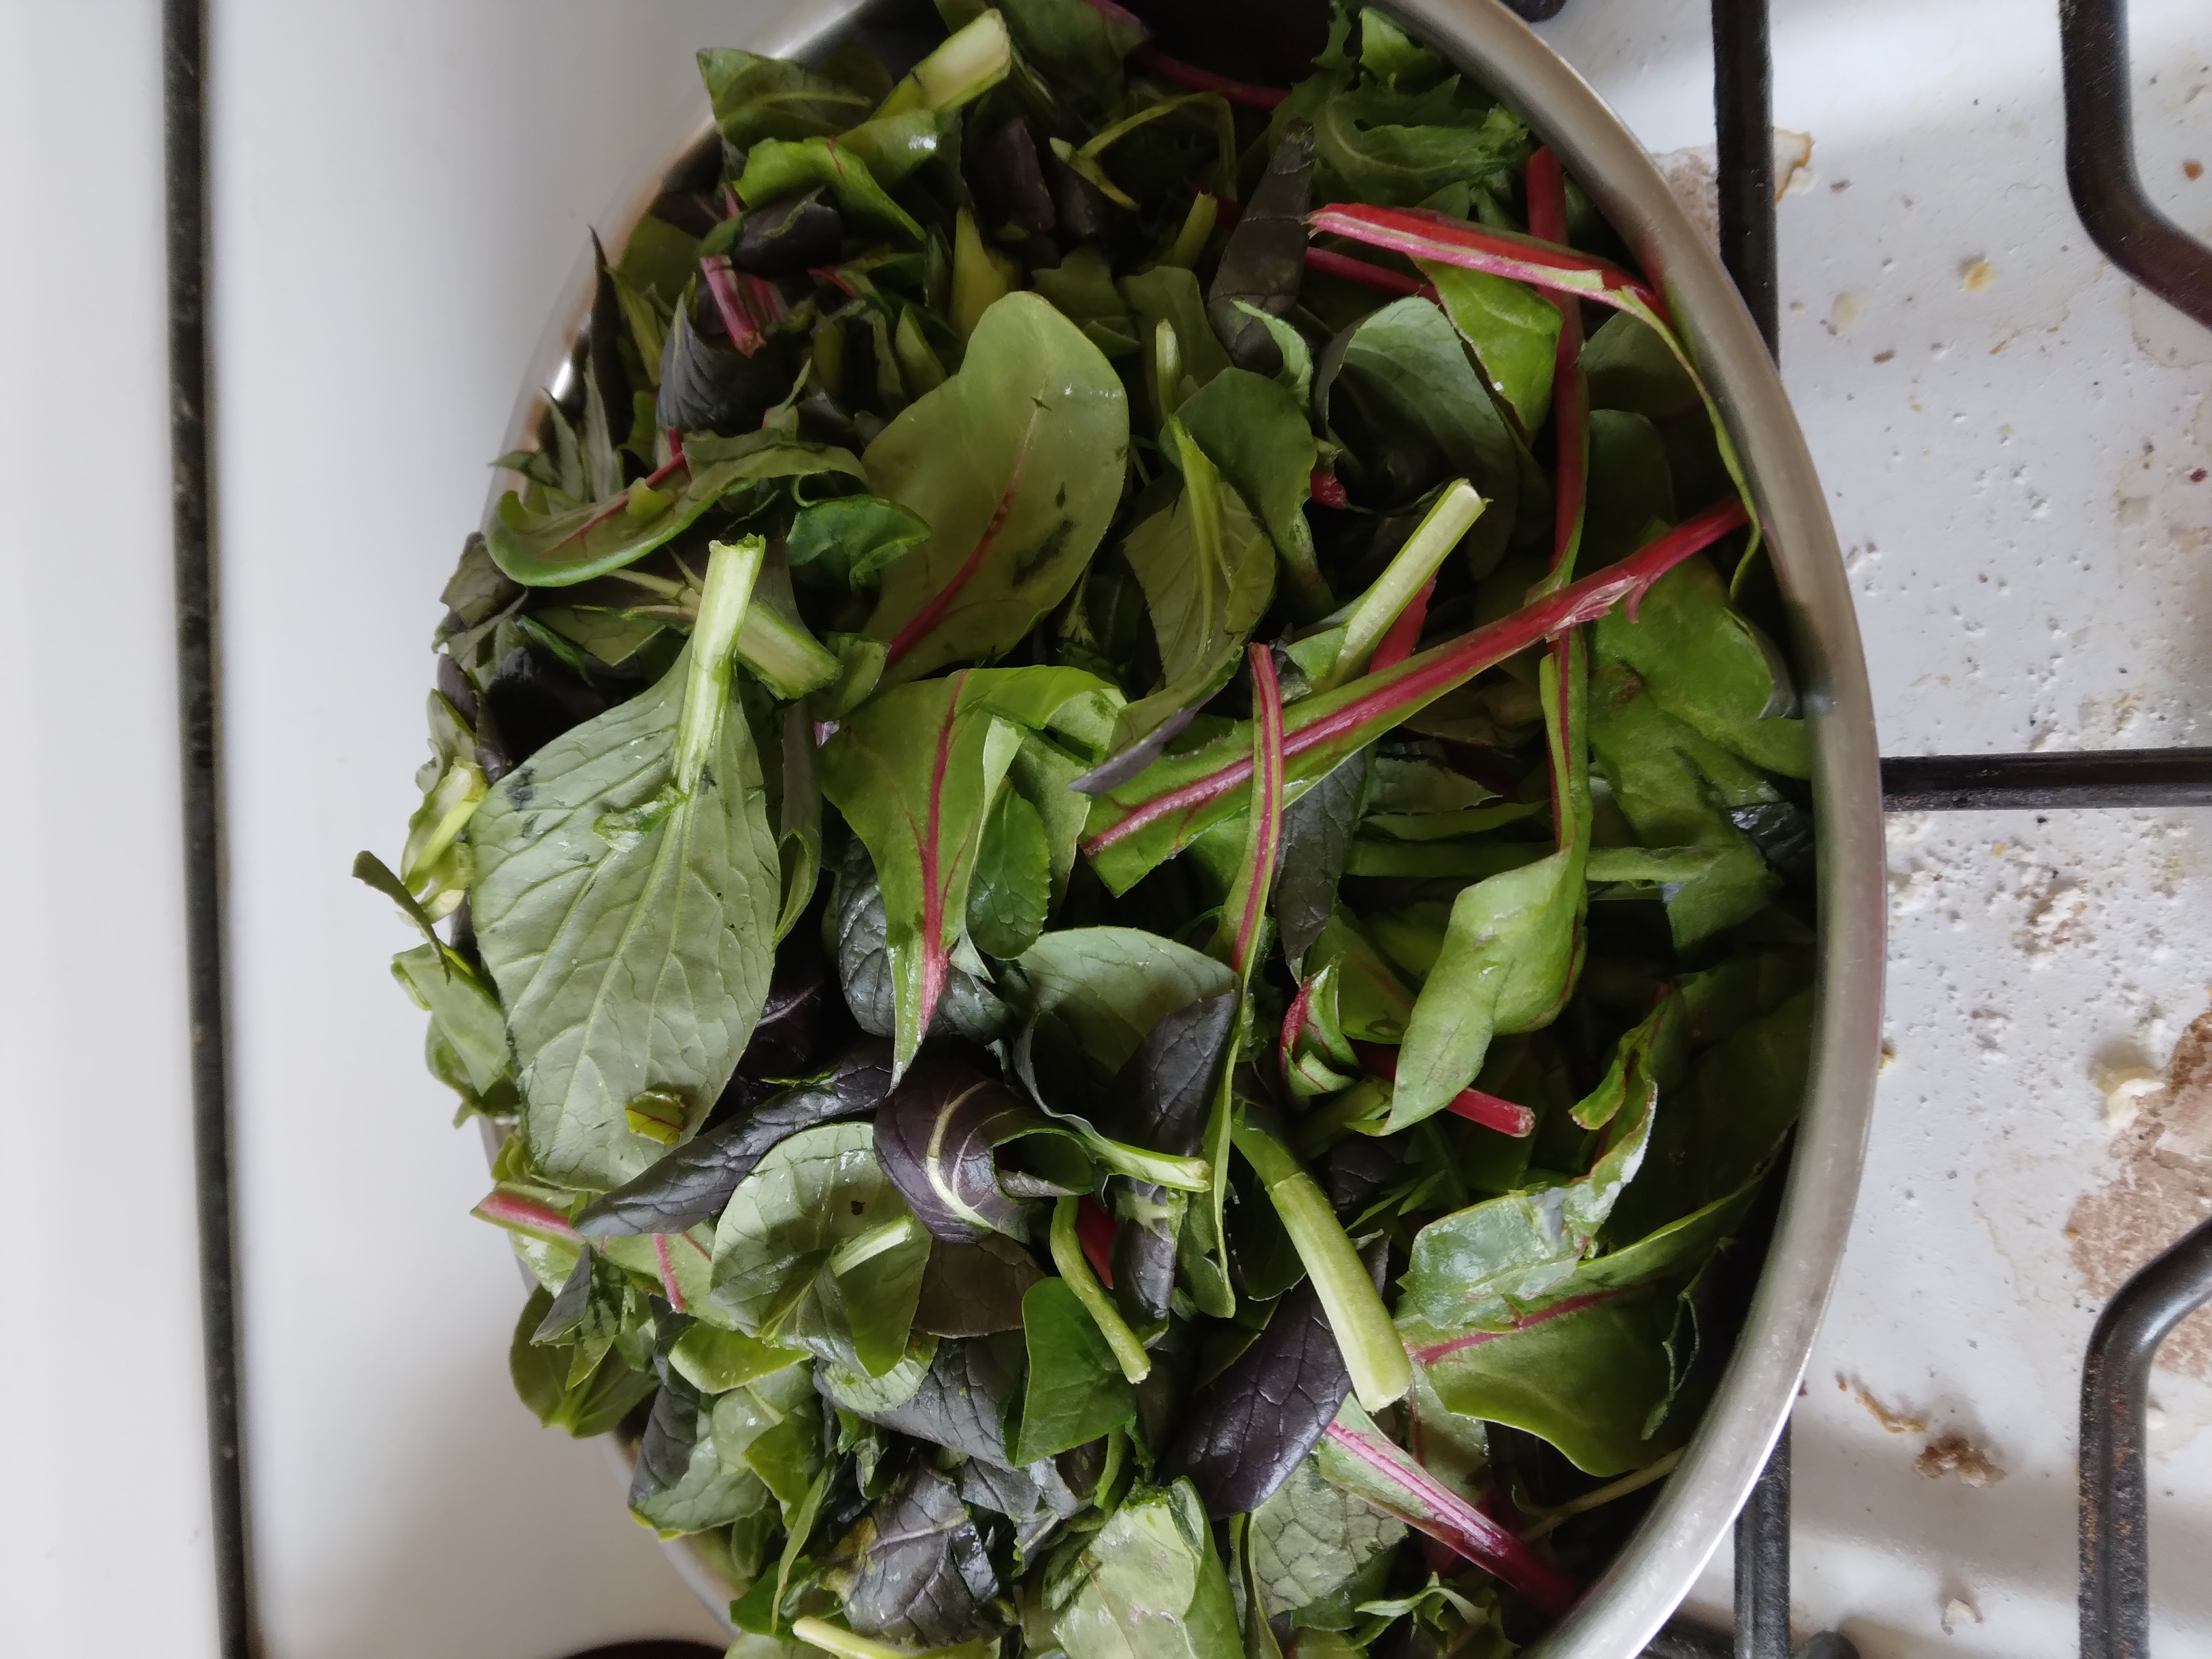 1 large metal bowl = about 2-3 lbs and filled 2 jars
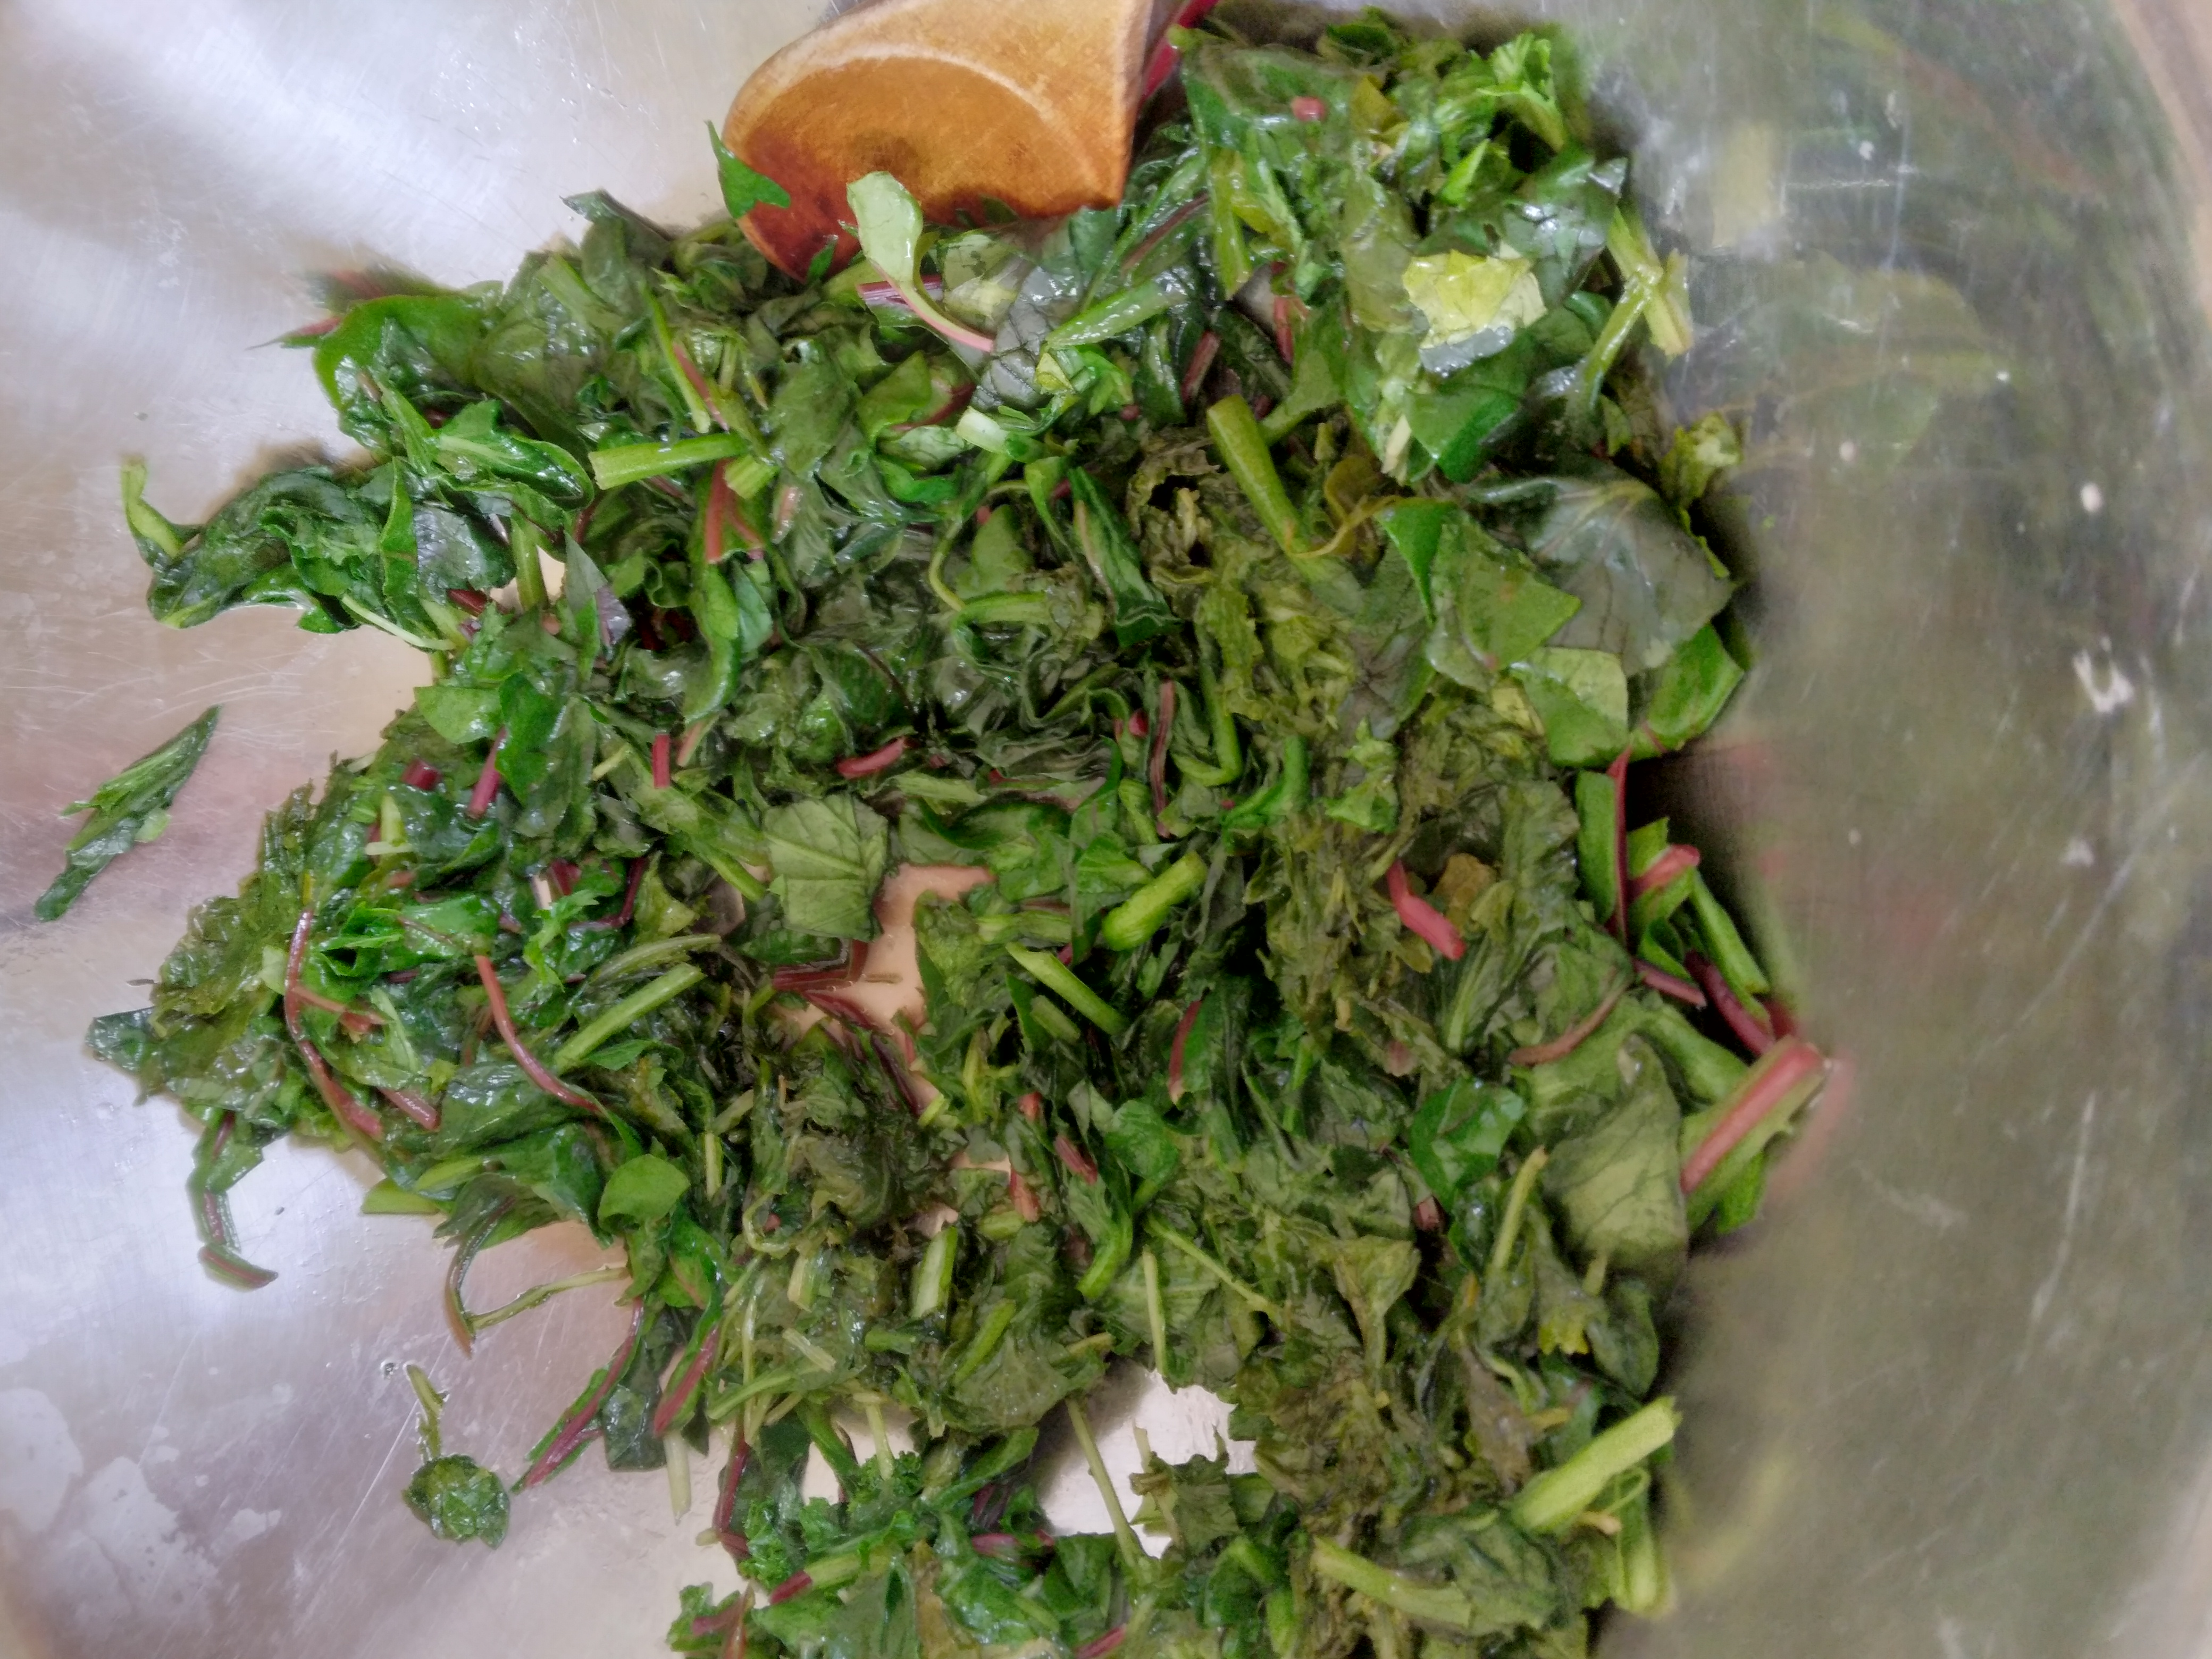 Fresh baby greens salted, lightly pounded, and ready to be packed into the fermenting jars
What must be eaten now was mostly the arugula and mizuna. The mizuna had a very short freshness window, so the yellow-ish leaves went into the Chicken treats pile. I would say out of 10 lbs, about 30% was mizuna and arugula. I made a large fresh salad to be eaten right away.
The rest from this category was blanched and made into a stuffed, 1/2 gluten-free, sourdough bread that was rolled up and sliced into buns, like cinnamon buns or a jellyroll.
Too big to eat raw in salad, so it must be cooked was a few full size leaves of box choi, kale, Swiss chard. I removed the spines from these to use as my fermenting weights. This got chopped up and made into soup with some turkey broth I had just made.
What to store for a few days to have fresh in 3-5 days was the most robust of the of the baby Swiss chard, spinach, and bok choi. I saved about 2 large salads worth.
The rest of the 10 pound box of fresh baby greens was fermented. Aside from the tedium of separating everything, this was a very simple ferment.
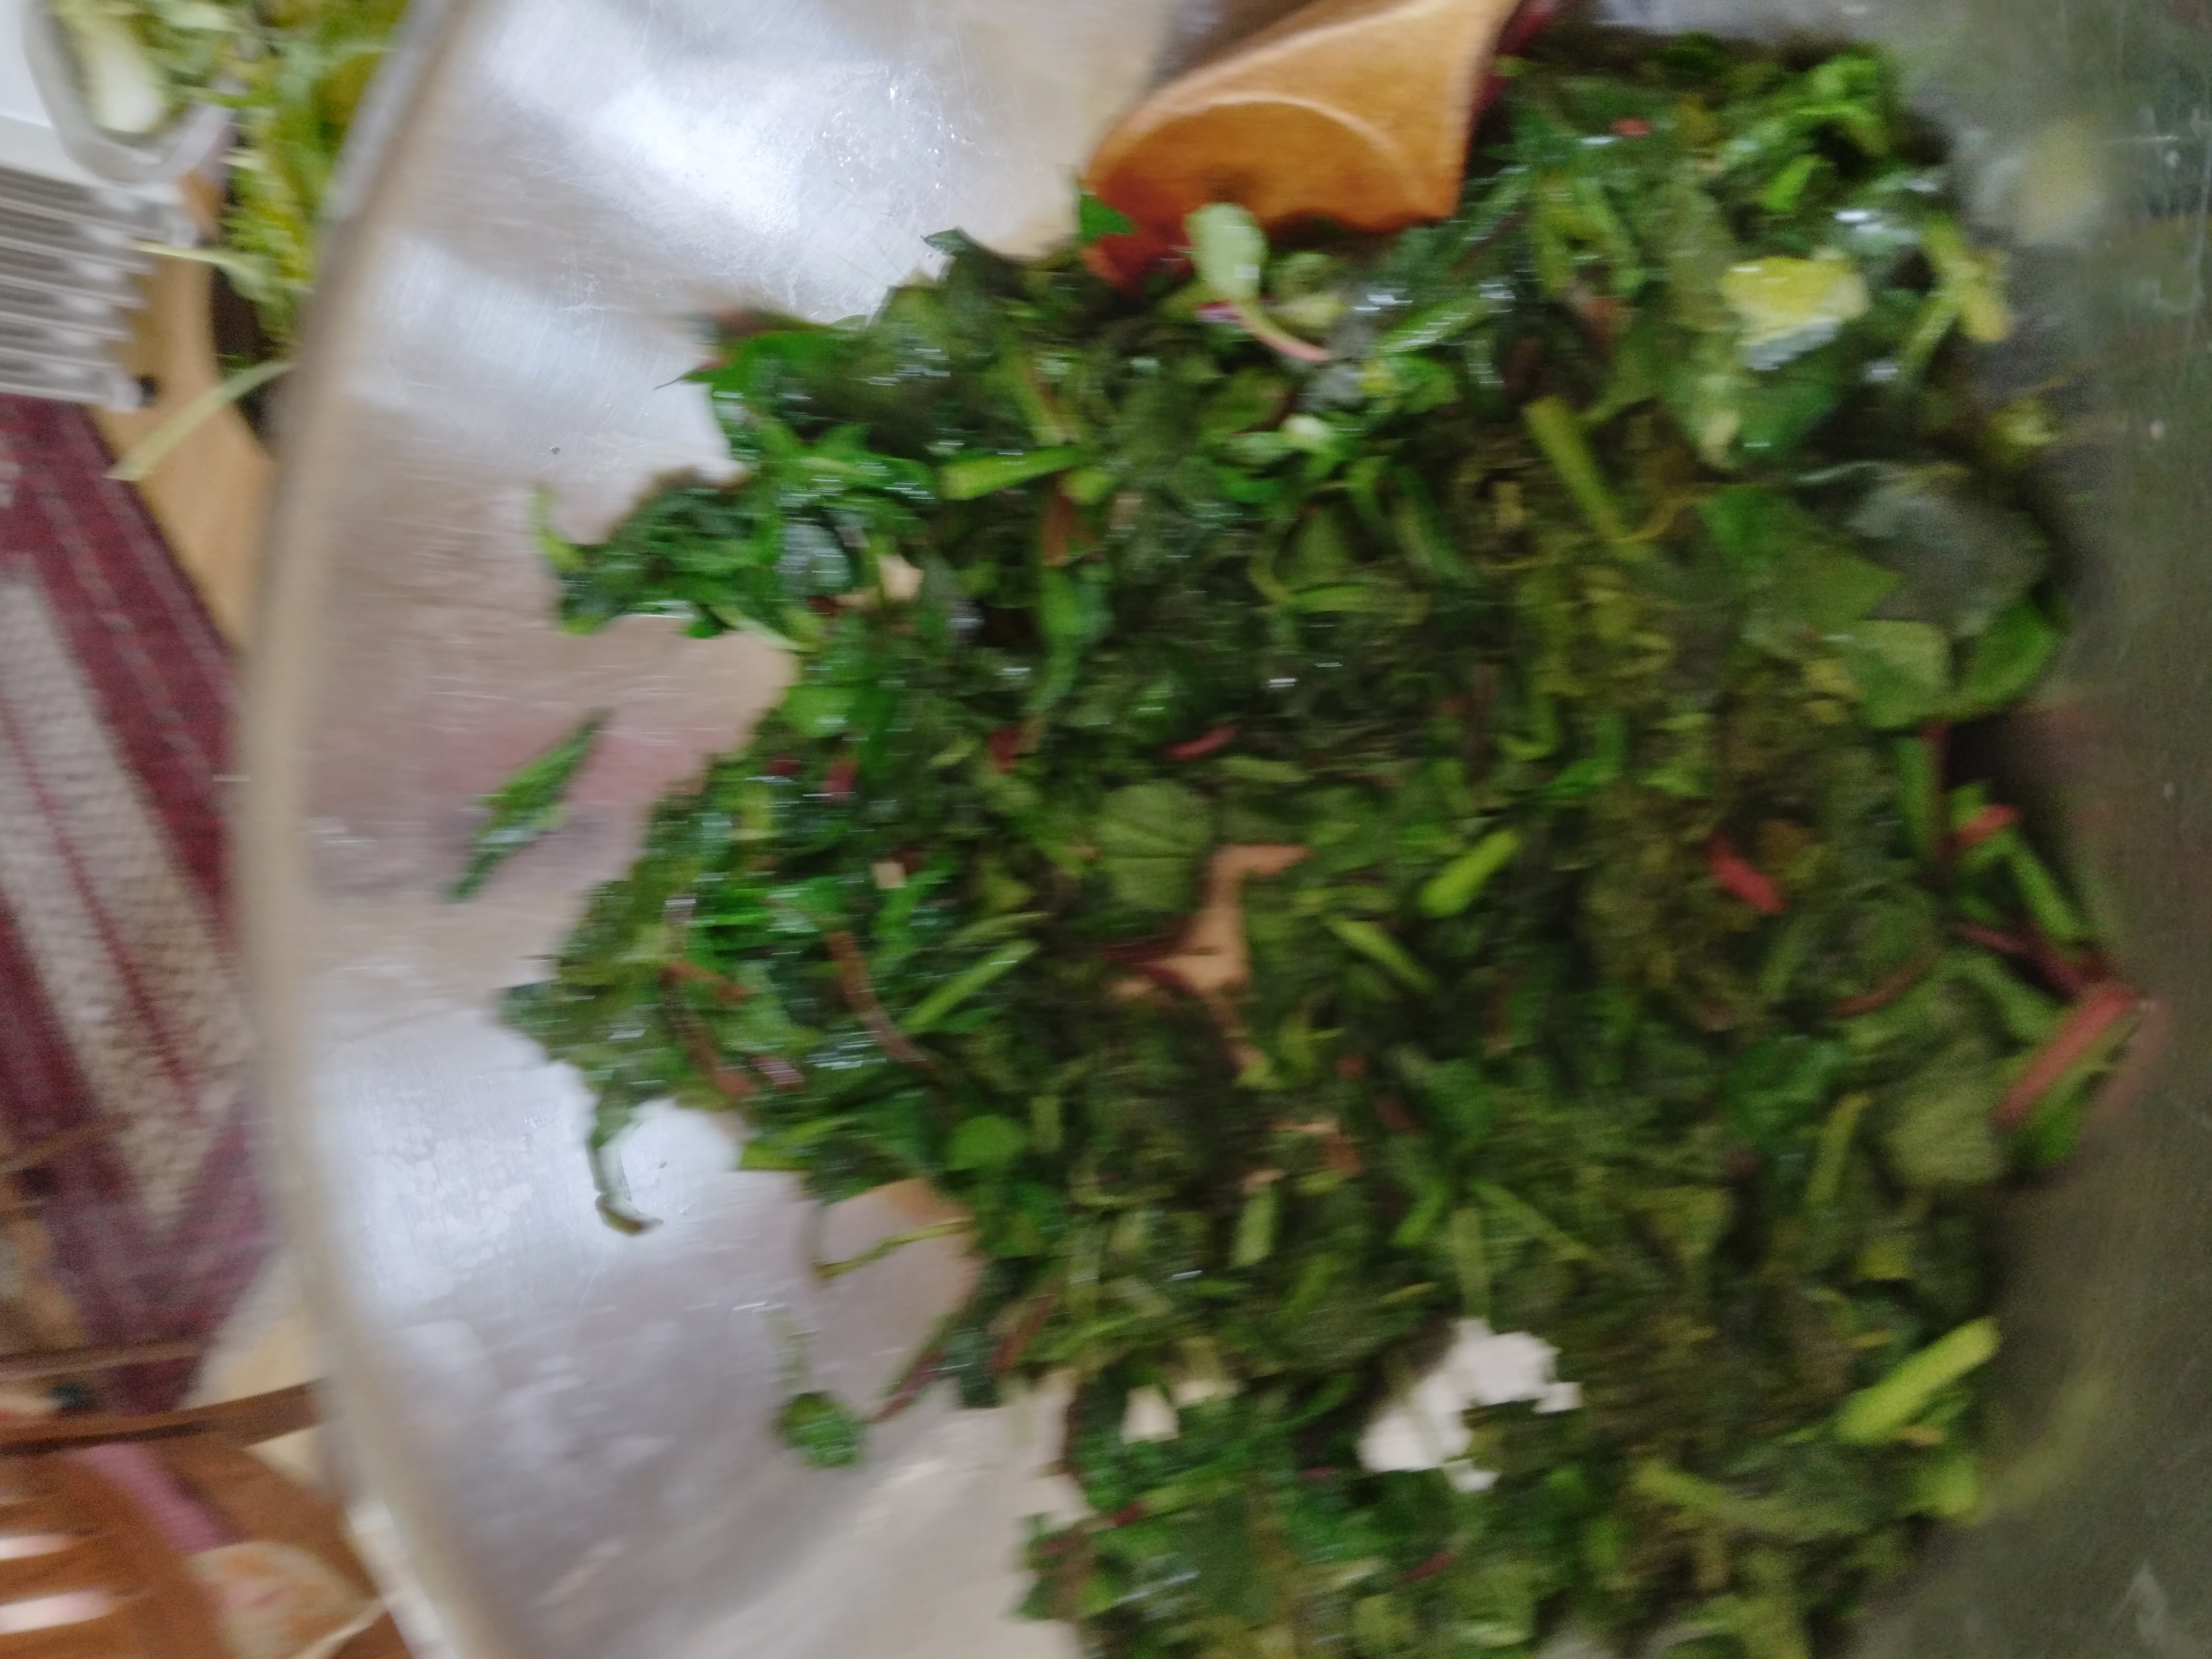
I washed the baby greens in my salad spinner. Put them in a big metal bowl, like the one pictured above. I sprinkled them with about 2 teaspoons of salt, and pounded them lightly to bruise them and packed them into the jars, the same way as all of the other vegetables. I then packed in my weights, rinsed the salt out of the bowl to add to the jars, fill the jars to the bottle neck with drinking water, and capped them with pickle pipes and metal bands.
In 3 days they were ready to eat as a salad.
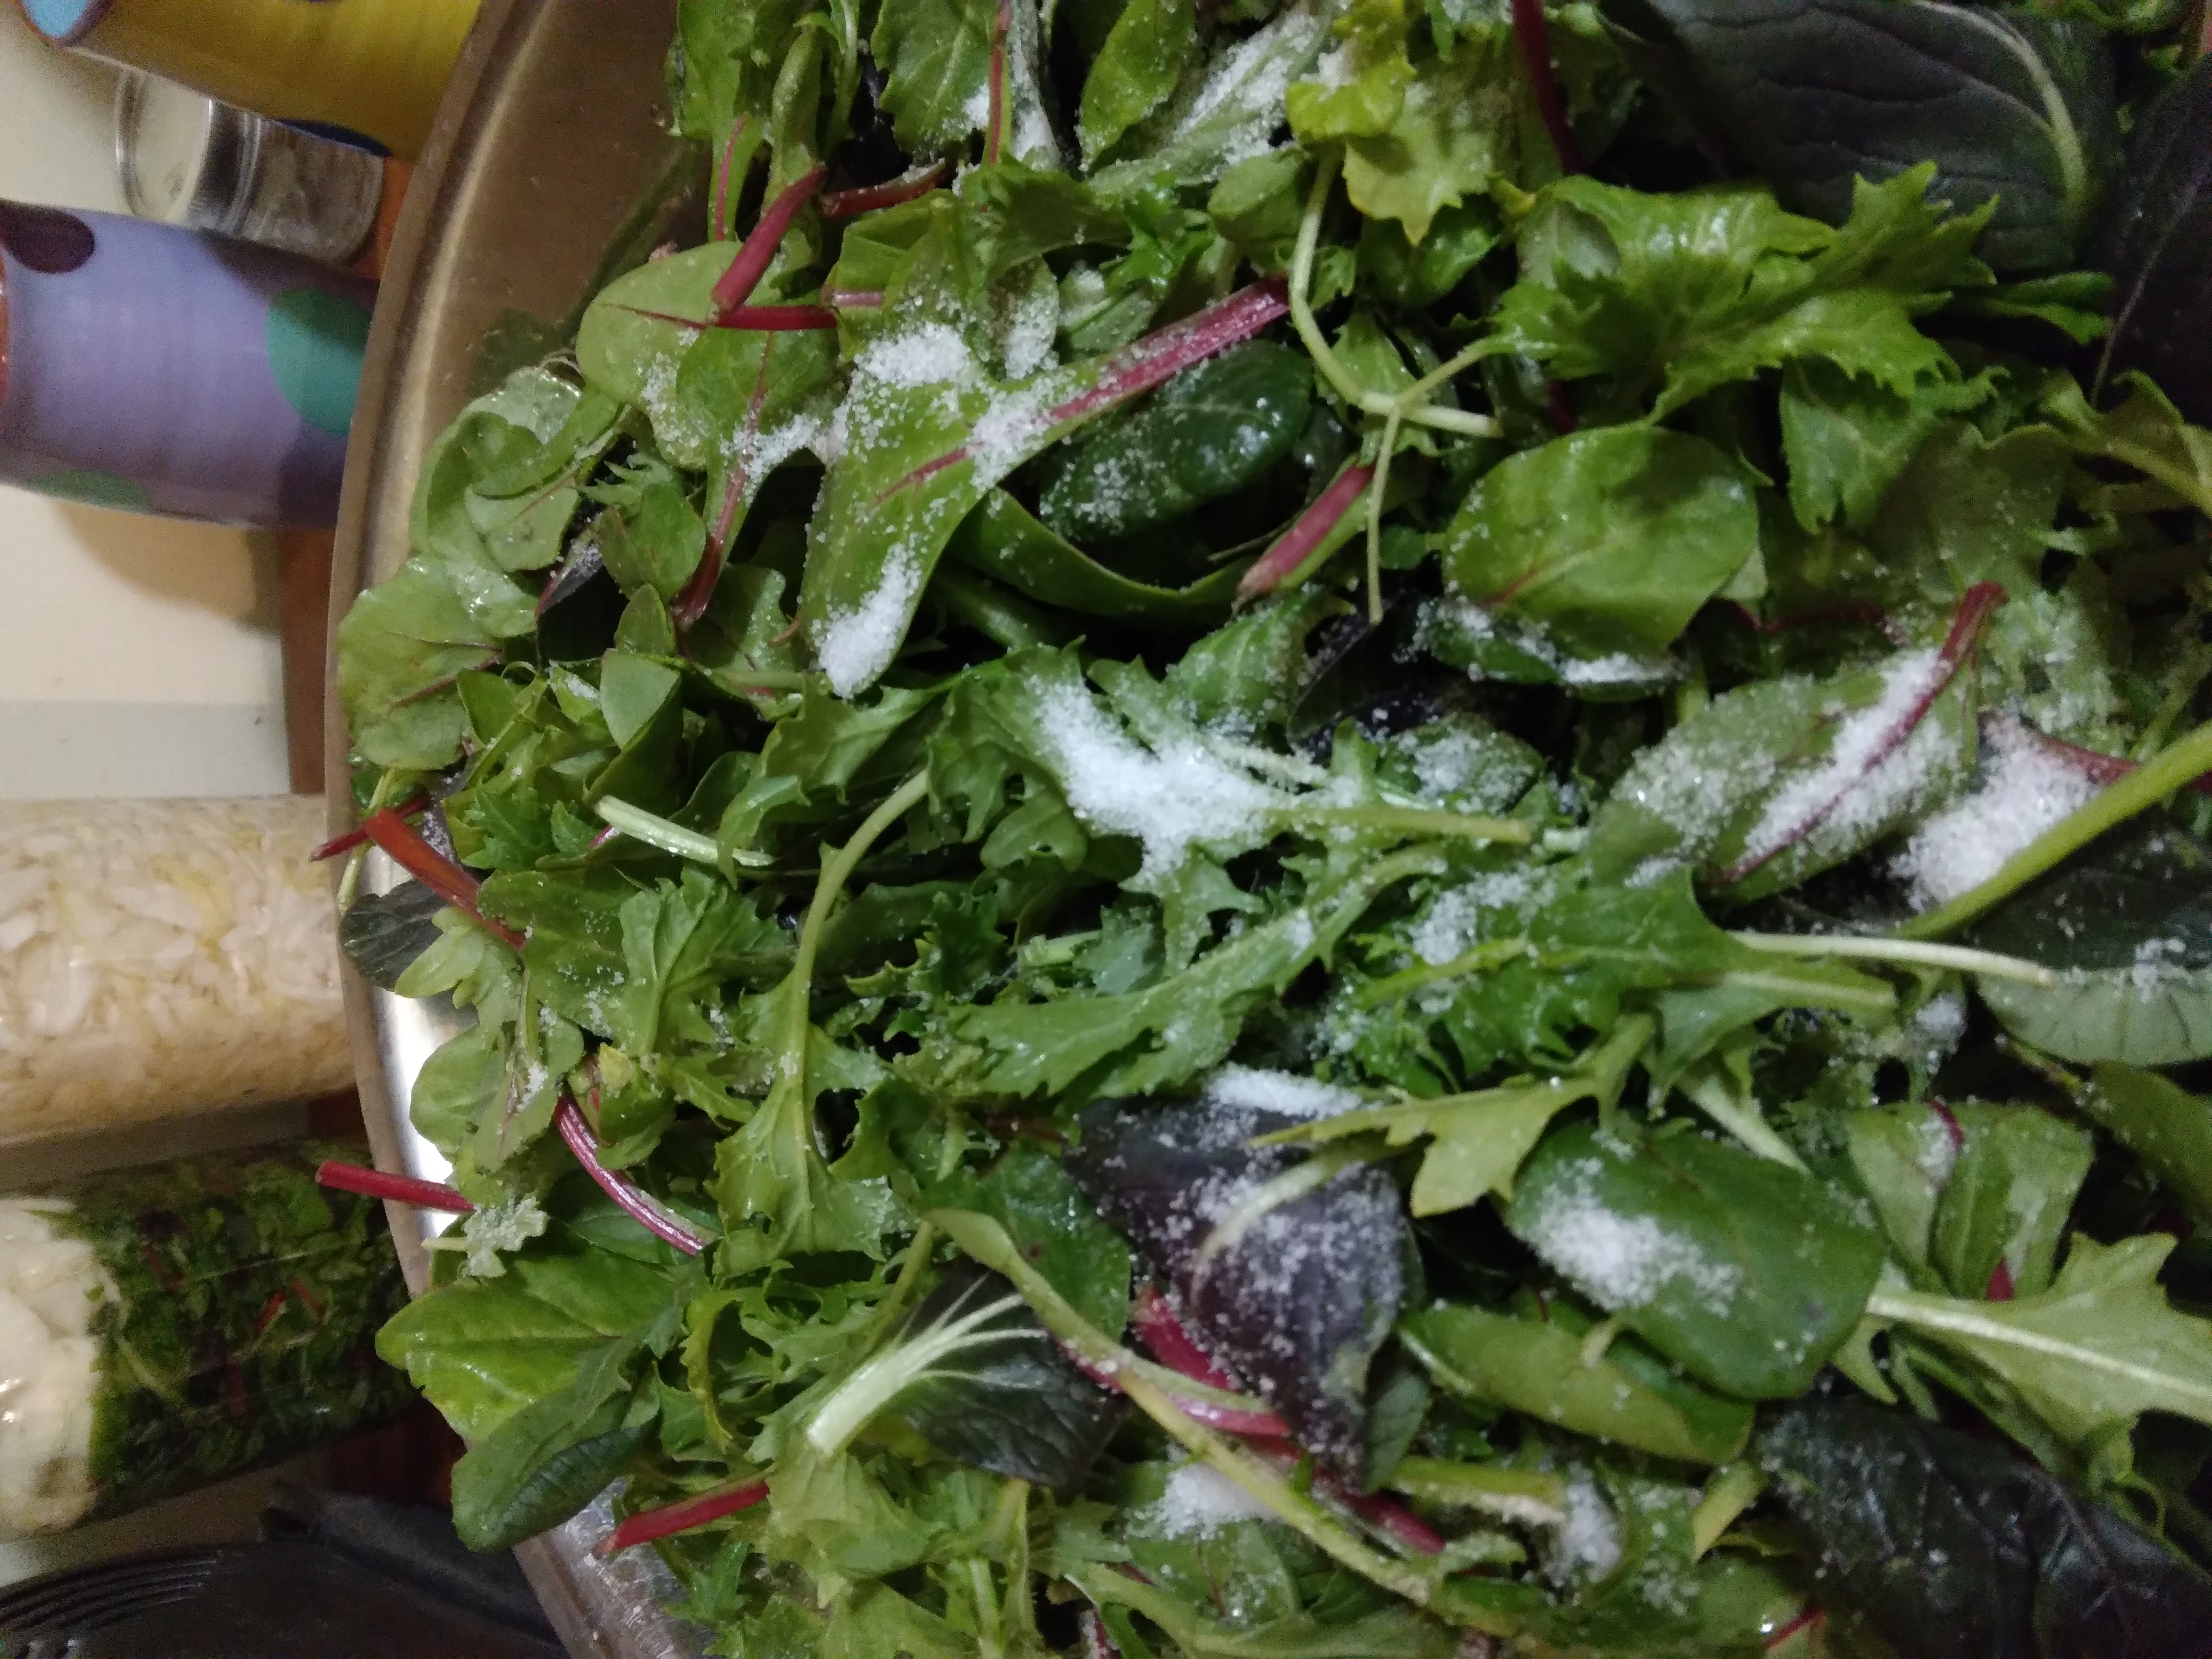
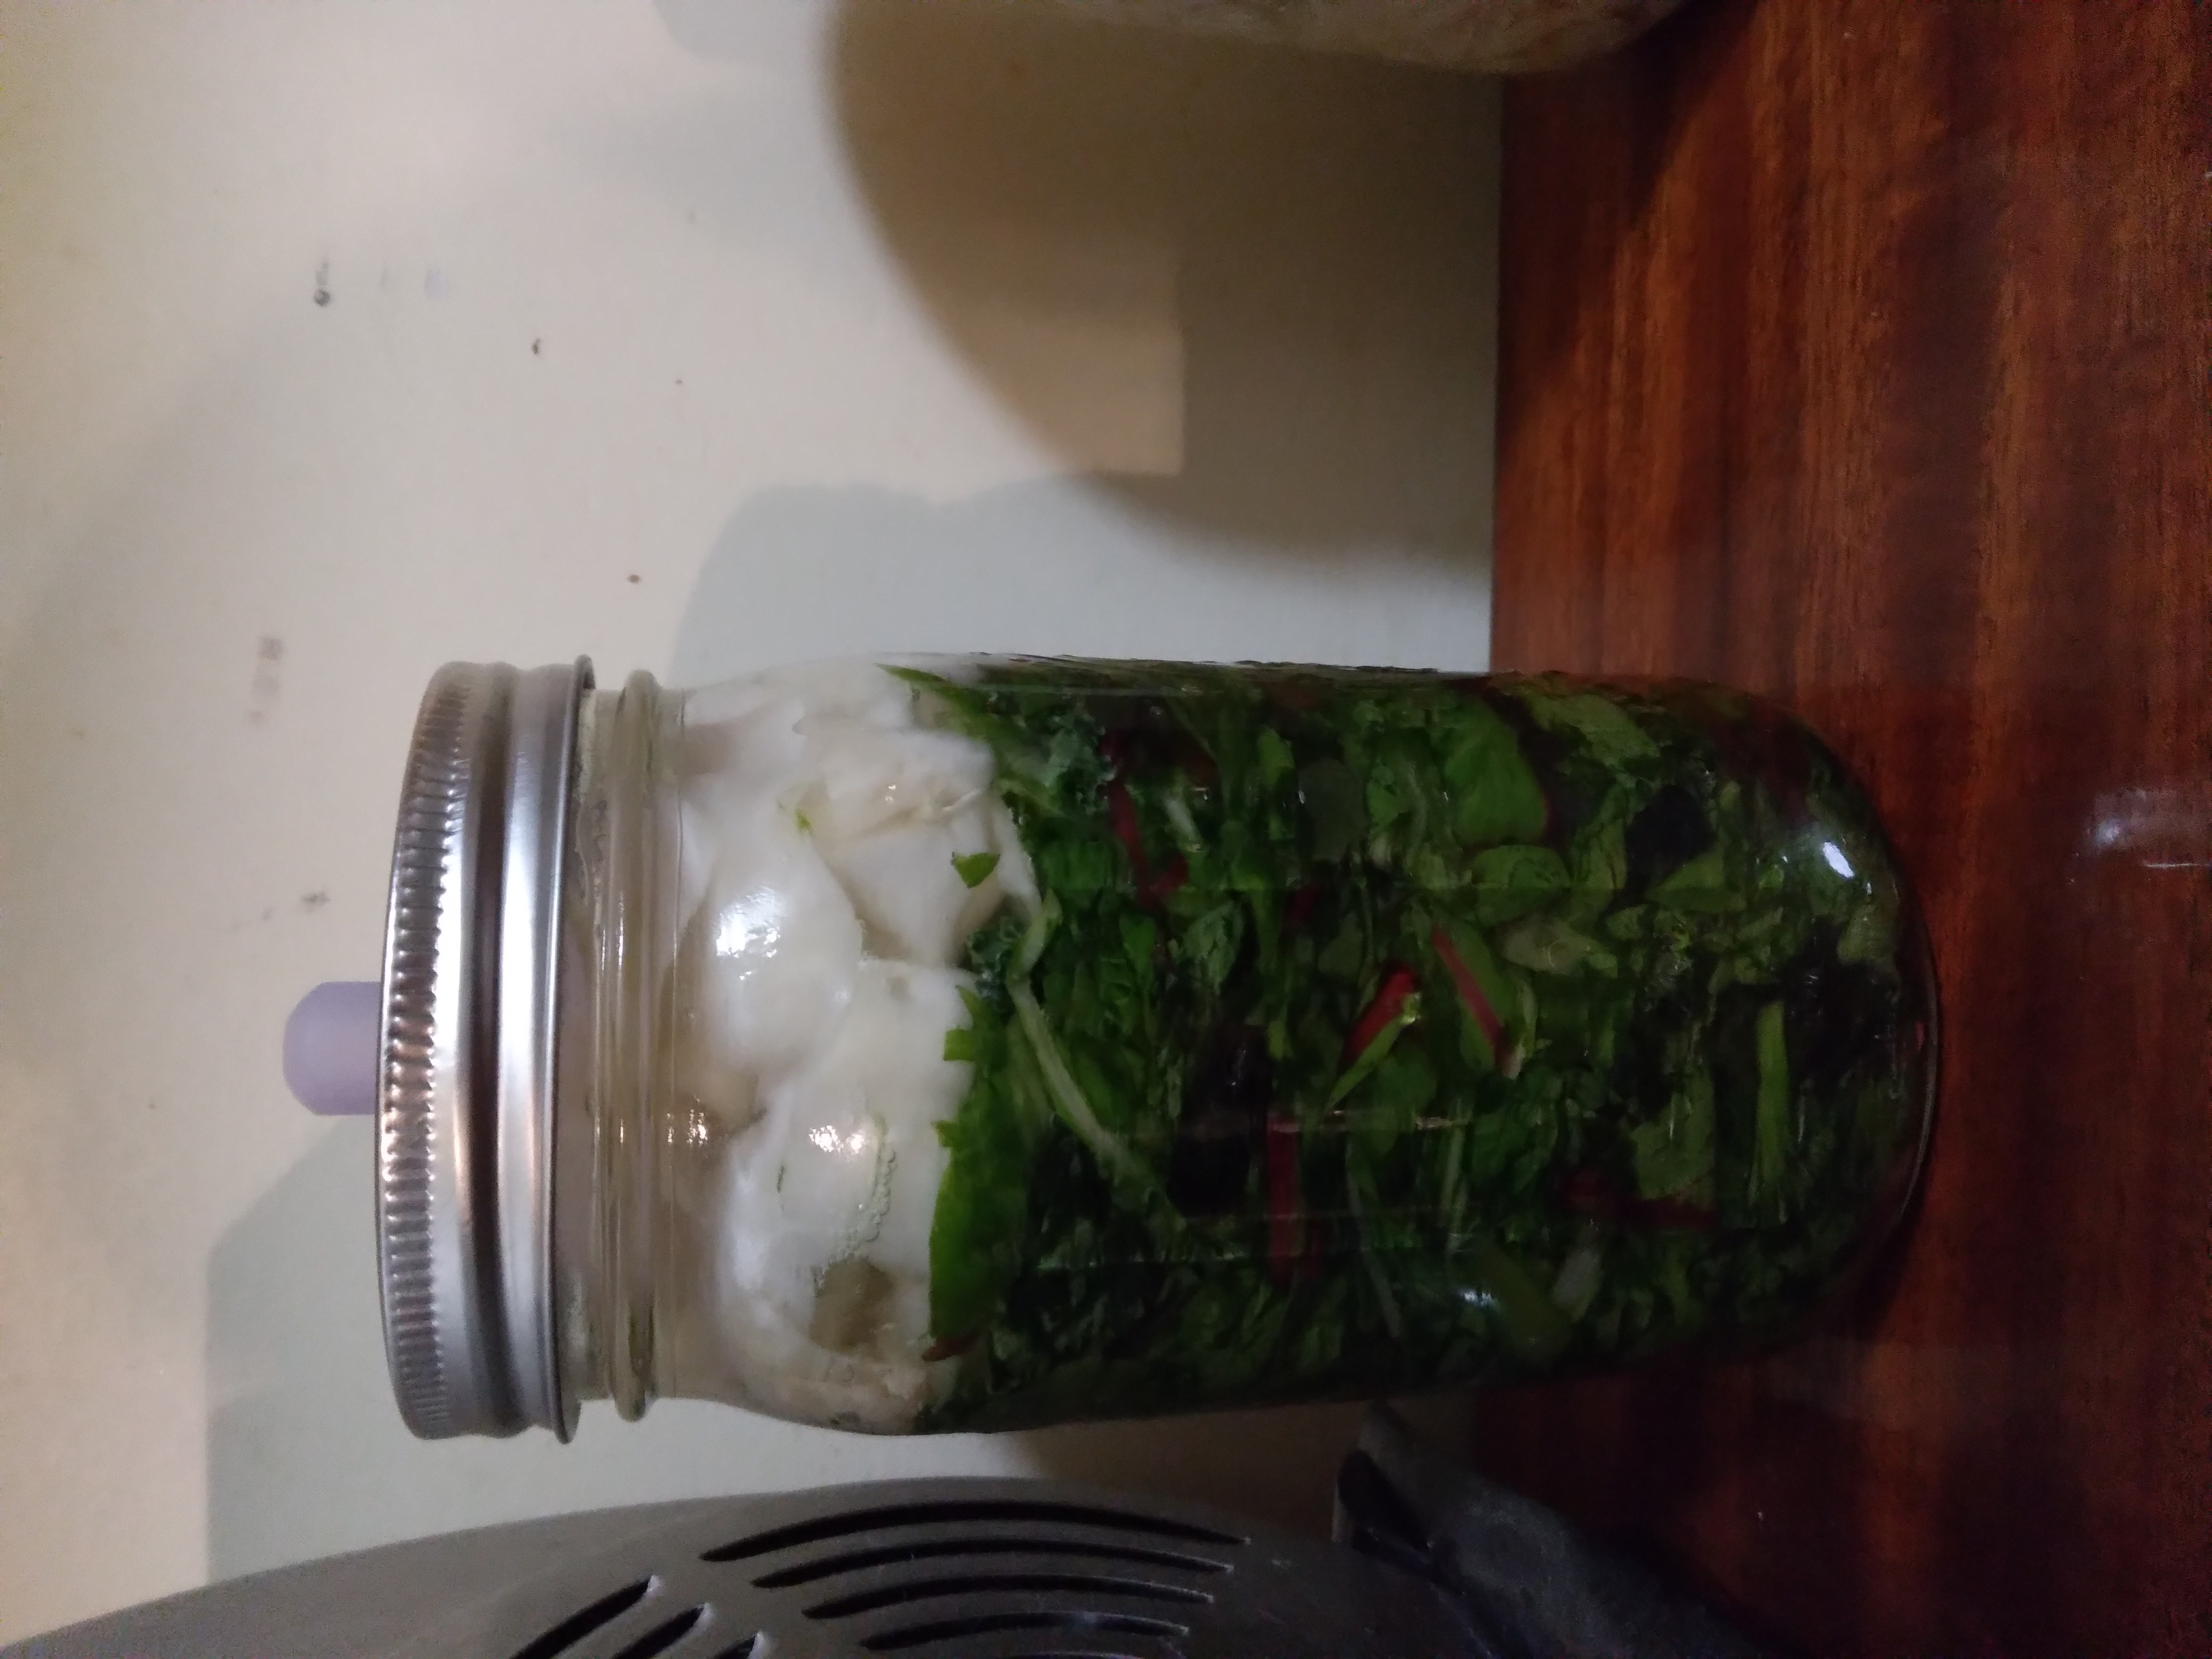
In the fermenting jar above in the photo on the right, you will see something white inside the jar on top of the greens as the weights. That's recycled cabbage weights from the sauerkraut I made weeks earlier.
As we ate the sauerkraut, instead of composting the weights, I stored them in a separate clean jar with only a canning lid disk top in fresh water. They were perfectly preserved and made fabulous weights.
By using recycled vegetable weights, any bits of stems or something not perfect enough to be preserved, could go in the chicken treat dish instead of being salted, which would make them unfit for chicken treats.
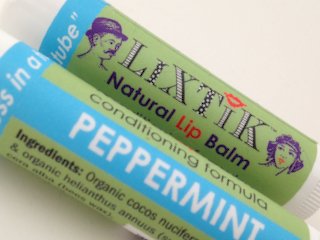 Peppermint bees wax lip balm
Moisturize, hydrate, and nourish your lips with wonderfully luxurious
Leave your lips moist and smooth for many hours. Soothes severely chapped lips.
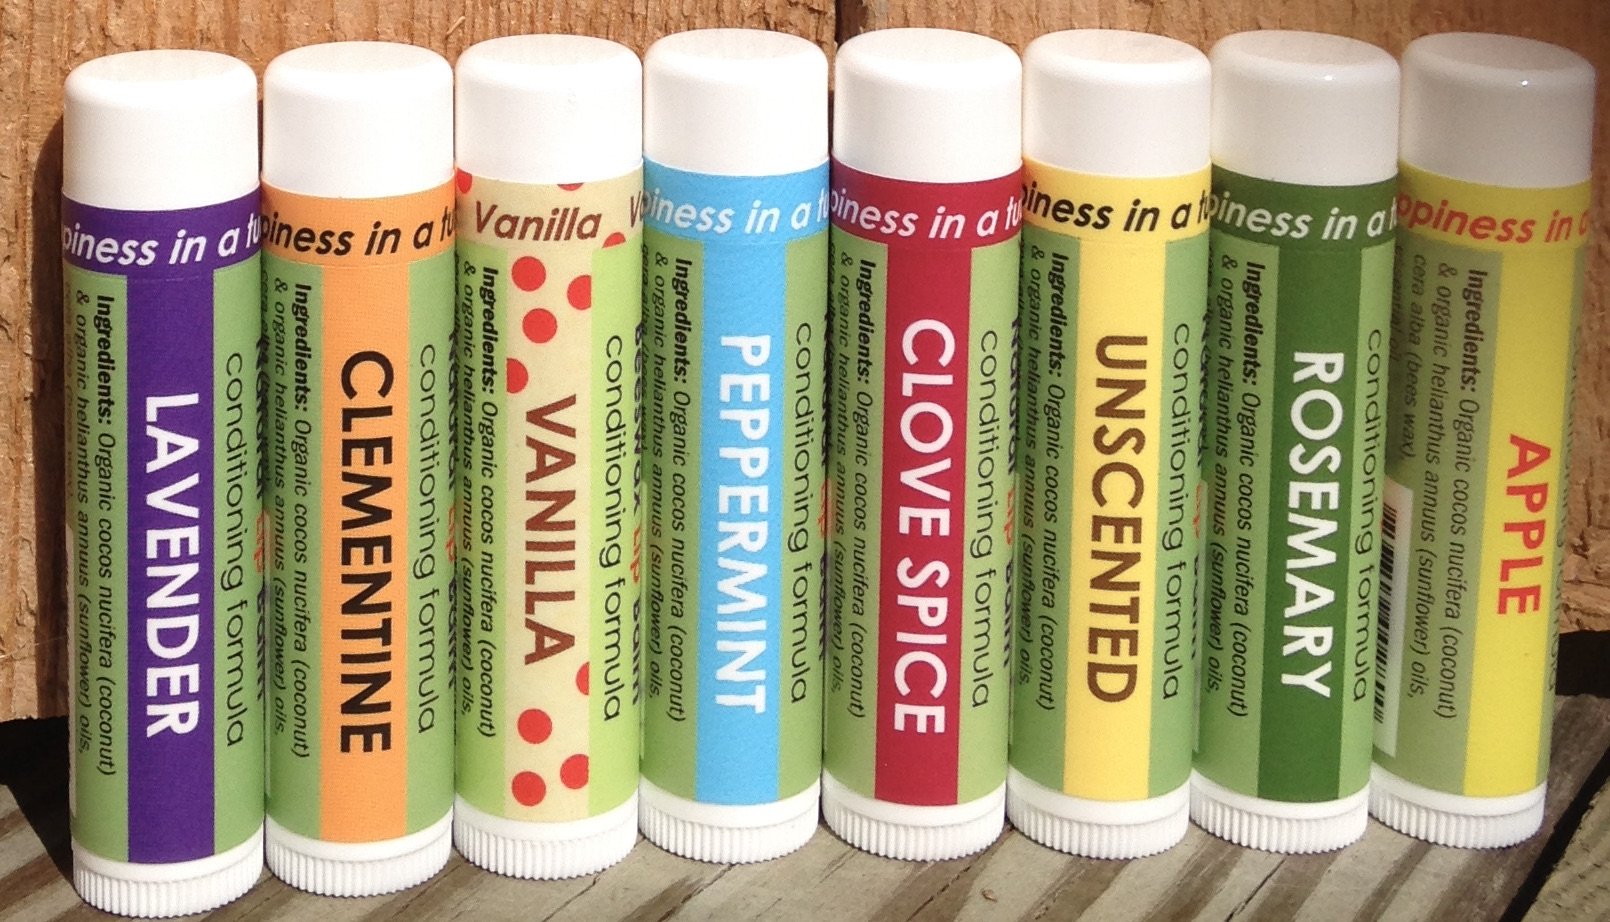 Choose from 8 LiXTiK Beeswax flavors/scents. Ingredients: Organic coconut and sunflower oils, premium beeswax, 100% pure essential oils Choose from 8 LiXTiK Beeswax flavors/scents. Ingredients: Organic coconut and sunflower oils, premium beeswax, 100% pure essential oils |
 Get a 3 pack and save Get a 3 pack and save |
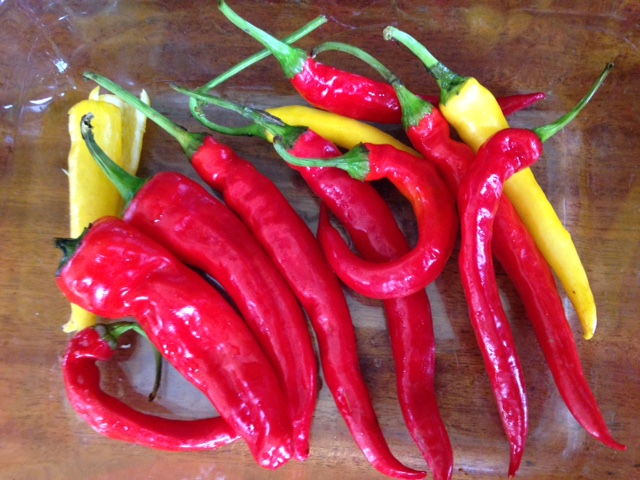
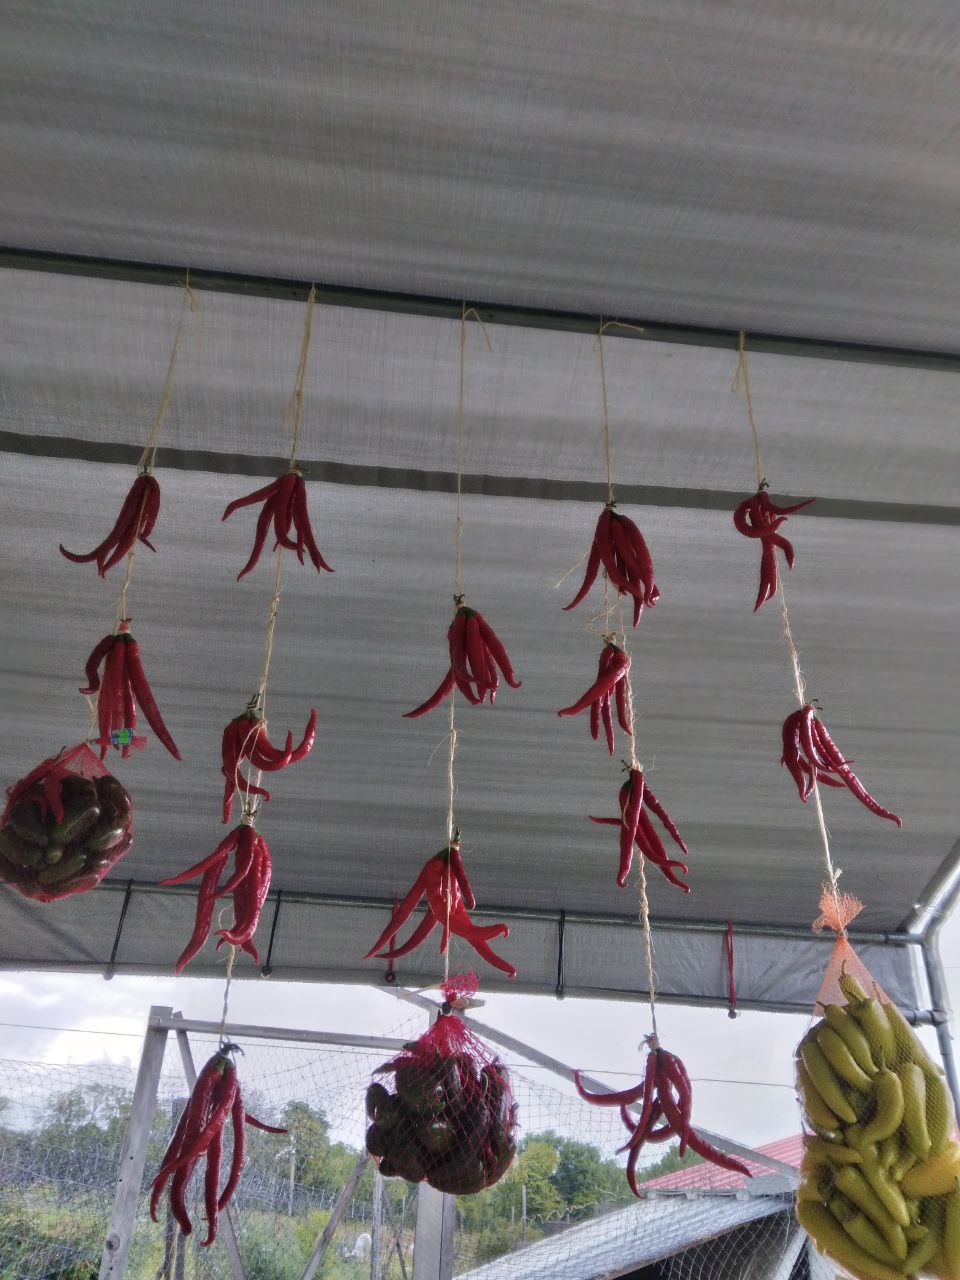
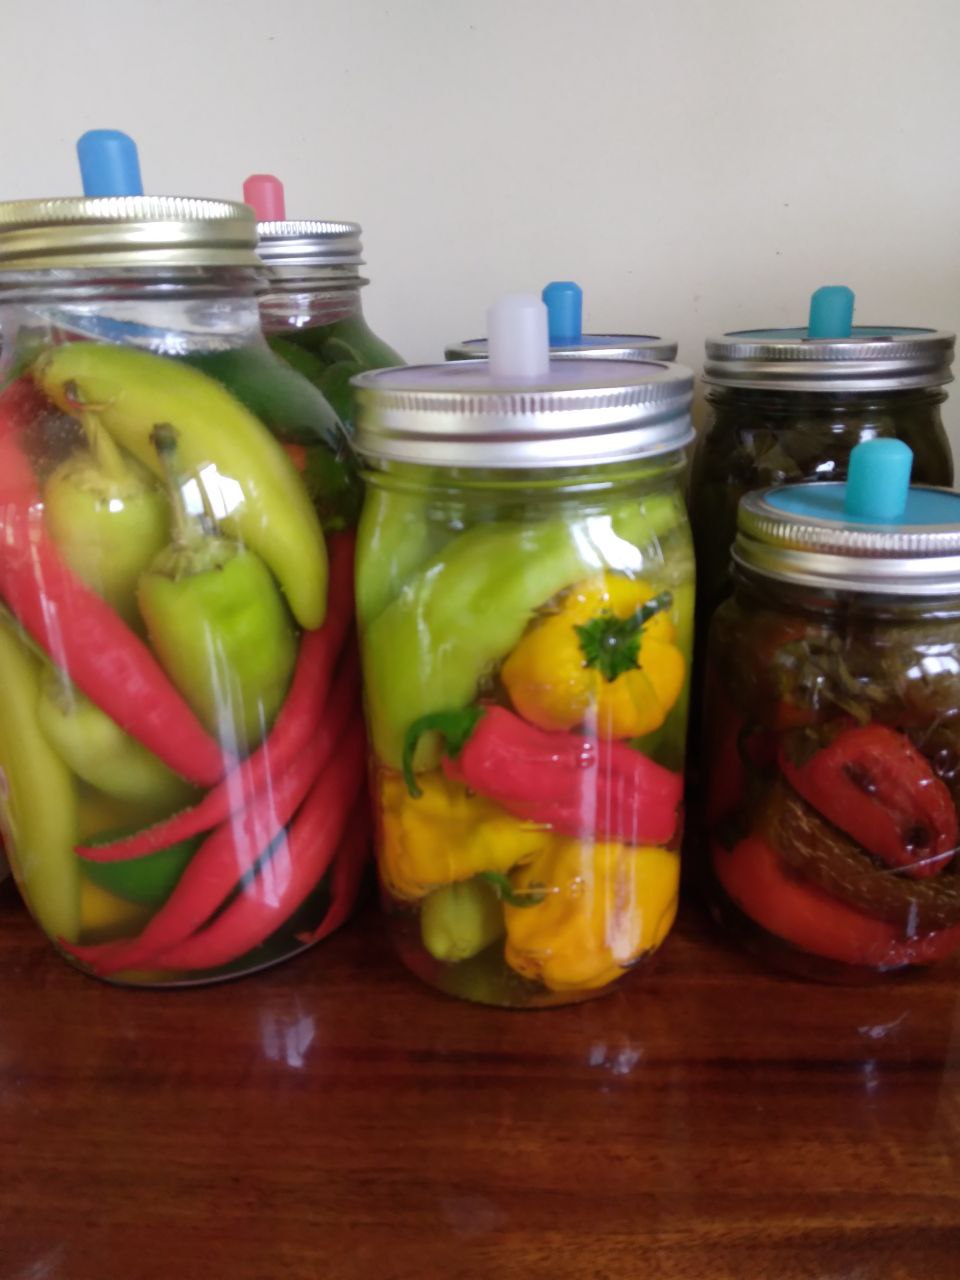
Fermented Hot Peppers
This is very simple. The thing you have to watch out for is getting a hot pepper skin burn.
Simply wash the hot peppers. Gently pack them in the jars and fill with your salt brine. I pack the peppers in such a way that the stems and points hold them under the brine and hopefully will not float and the weights are not necessary.
Cover with your pickle pipe and tighten the jar ring. Let ferment for 6-8 weeks.
- Home
- Kitchen Soap
- Fermented Vegetables
- Home
- Kitchen Soap
- Fermented Vegetables
Share
Recent Articles
-
Soap Sayings and Small Business
Aug 06, 24 11:16 AM
When we started our soap making journey in 1999, I had no idea that only 2 short years later, the Twin Towers would be attacked and knocked down. -
Laundry Sheets
Aug 05, 24 12:18 PM
So many people are talking about laundry sheets. It's a recurring conversation with travelers in our farmers market booth. We see travelers from all over the country and the world, every week, in our… -
Laundry Sheets
Jul 24, 24 10:06 AM
So many people are talking about laundry sheets. It's a recurring conversation with travelers in our farmers market booth. We see travelers from all over the country and the world, every week, in our…